terracotta tiles

Terracotta Brick Paved Patio Renovation Leatherhead

Rescuing a Grout Stained Newly Laid Terracotta Tiled Patio in Leatherhead

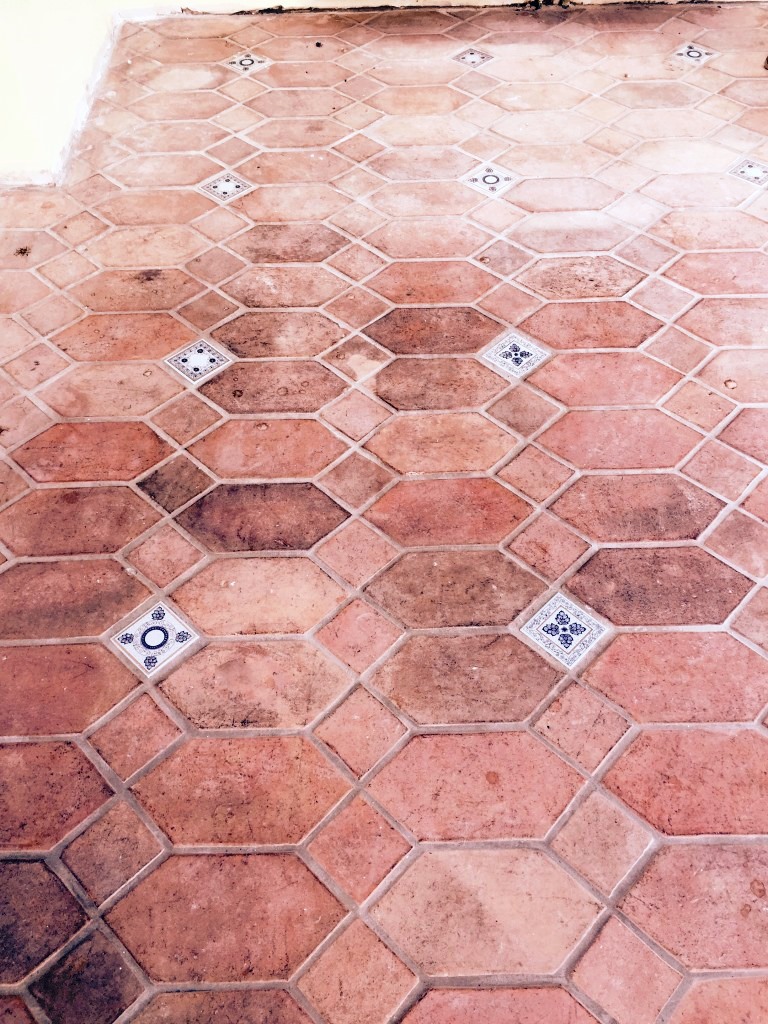
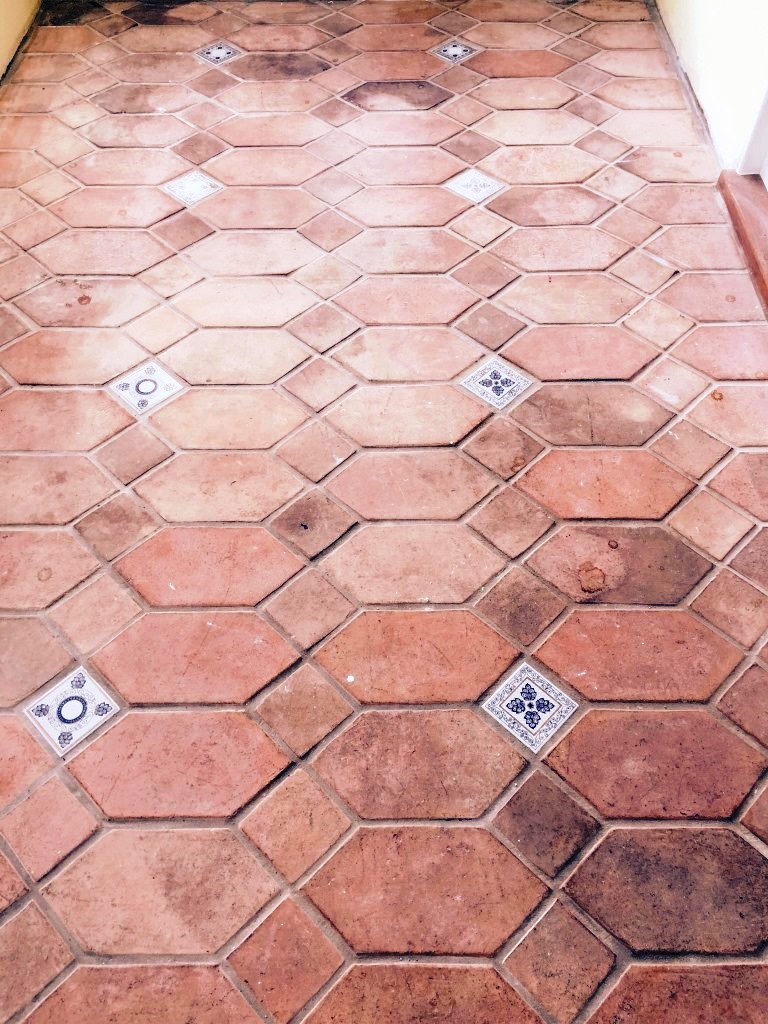
It’s difficult to recognise, but the photo below from a property in Leatherhead, is of a recently tiled Terracotta brick patio laid in a herringbone pattern. While the tiles had been laid well the grout hadn’t been removed from the surface of the tile, in fact I don’t think any of the grout had been polished off which is the usual practice after laying tiles.

Terracotta Brick Paved Herringbone Patio Before Grout Haze Removal Leatherhead

The client was now in dispute with the tiler and had held back half the payment as a result. It was unlikely the tiler would be able to resolve the problem satisfactorily and so I was asked to pop round and take a look.

Terracotta Brick Paved Herringbone Patio Before Grout Haze Removal Leatherhead

I visited, as requested to survey the tiles and propose a solution and was shocked myself at just how bad it was; in fact, this was by far the worst example I’ve ever of a problem we call Grout Haze. My customer was very upset about the whole situation however I was able to provide the assurance that it could be resolved. I worked out a quote for two days’ work to remove the grout staining which was accepted and a date agreed.

h2>Removing Grout Haze from a Terracotta Tiled Brick Patio

Jumping ahead I can confirm I managed to remove the grout haze but I did have to use several methods before it was 100% and looking the way it should of done to start with.

The first method was to attach a coarse 120-grit Carbide Brush to a rotary floor buffer with extra weights fitted. This is essentially a very hard wearing 17-inch wire brush which is very effective at cleaning rough surfaces. I ran this over the patio to work in a strong dilution of Tile Doctor Grout Clean-up which is an acid-based product that is used as its name suggests to remove grout. The brush was run over the floor for the next fours to remove as much of the grout haze as possible and until it became clear it was no longer being effective.

Next, I switched the brush out for a coarser 100-grit diamond pad and used that to work in more Grout Clean-Up. This slowly improved the appearance of the Terracotta but more work would be needed and it was beginning to get dark so I decided to call it a day and finish by rinsing off and extracting the slurry.

Terracotta Brick Paved Herringbone Patio During Grout Haze Removal Leatherhead Terracotta Brick Paved Herringbone Patio During Grout Haze Removal Leatherhead

I returned the following day feeling refreshed and with a new plan on how to tackle and remove the final remnants of grout. It was clear that the previous methods with larger machinery had done all they could so it was now time to try a more detailed approach. For this I used a Fein Oscillator tool to grind away the remaining patches. This is a noisy hand-held tool so you need to wear ear defenders, and working at this level meant slow but effective progress.

Once finished the dust was vacuumed away and then cleaned again with another acid rinse using more Grout Clean-up and rinsed and extracted afterwards.

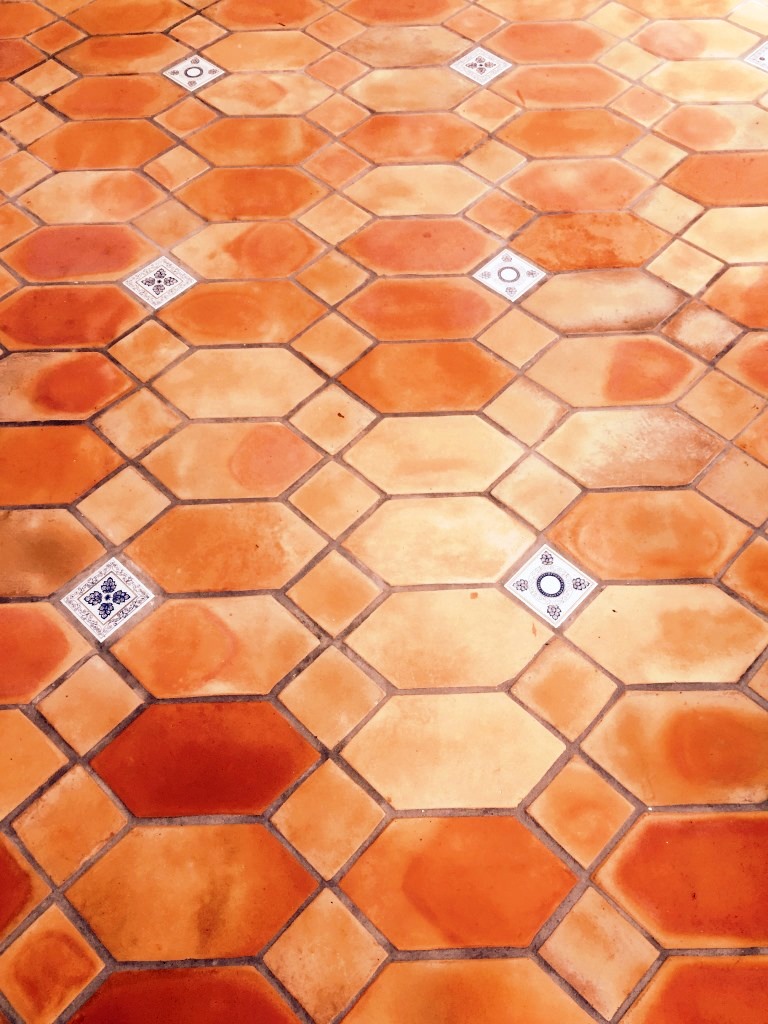
Terracotta Brick Paved Herringbone Patio After Grout Haze Removal Leatherhead

It was two days hard graft but as you can see the patio was completely transformed and as you might expect my customer was very relieved.

Terracotta Brick Paved Herringbone Patio After Grout Haze Removal Leatherhead


Professional Grout Haze Removal Service in West Surrey

Rescuing a Grout Stained Newly Laid Terracotta Tiled Patio in Leatherhead Read More »

Terracotta Tiled Conservatory in Cranleigh Deep Cleaned and Sealed

Terracotta Tiled Conservatory in Cranleigh Deep Cleaned and Sealed

Cranleigh is the self-proclaimed largest village in England, sitting about 8 miles southeast of Guildford in Surrey. One of its villagers contacted me recently to see if there was anything I could do to improve the state of their Terracotta tiled conservatory. They were in the process of completely redecorating the conservatory, having just replaced the wood and glass and I was called in to restore the tiled floor back to looking its best.

Terracotta is made from clay and is quite porous ceramic, and tends to be quite porous when made into commercial or residential tiling. Just like stone it needs to be sealed to ensure the pores don’t become ingrained with dirt, following that sealers do need to be maintained as they do wear off over time.

In this case, my client had moved into the property twenty years ago, and had only ever carried out a routine mop of the floor; as a result the floor was now ingrained with dirt and had lost its colour and would require a deep clean and seal to bring it back to life.

Terracotta Conservatory Cranliegh Before Cleaning Terracotta Conservatory Cranliegh Before Cleaning

Cleaning a Terracotta tiled conservatory

To begin with, I mixed a cleaning solution consisting of one part Tile Doctor Pro Clean to one part water. This was spread evenly across the floor and let to dwell for approximately ten to fifteen minutes. The solution was then agitated with a scrubbing pad fitted to my heavy-weight rotary machine, lifting away the initial layers of muck and any remaining old sealer.

However, I noticed after giving the tiles a rinse that some of the old sealer was still prevalent in some areas. To deal with this, I applied a solvent-based sealer stripper and left it to work its magic on the affected areas. After about an hour, I added a steamer to the mix, and this allowed me to thoroughly scrub away the old seal. This was followed up by another rinse of the floor, and left it to dry.

Terracotta Conservatory Cranliegh During Cleaning

Sealing a Terracotta tiled conservatory

I returned to the house five days later to complete the restoration. My immediate task was to carry out a moisture test to make sure the floor was completely dry and therefore ready to take the new seal, this is an important step as adding a sealer to a damp floor can result in problems.

Once satisfied, I proceeded to seal the floor with five coats of Tile Doctor Colour Grow sealer. This sealer is particularly effective at providing durable surface protection from within, and contains properties which enhanced the natural auburn shades in the Terracotta tiles.

Terracotta Conservatory Cranliegh After Sealing Terracotta Conservatory Cranliegh After Sealing

I’m pleased to say that my client was overjoyed with the quick transformation of their conservatory floor. They never knew quite how vibrant the colours in the stone could be, and better still, the floor now blends in with their newly painted lemon walls.


Terracotta Conservatory Cranliegh Before and After Cleaning
 

Terracotta Tiled Conservatory Floor Refreshed in Surrey

Terracotta Tiled Conservatory in Cranleigh Deep Cleaned and Sealed Read More »

Saltillo Tiles in Shirley

Saltillo Tiles in Shirley

Successful Restoration of Saltillo Tiles

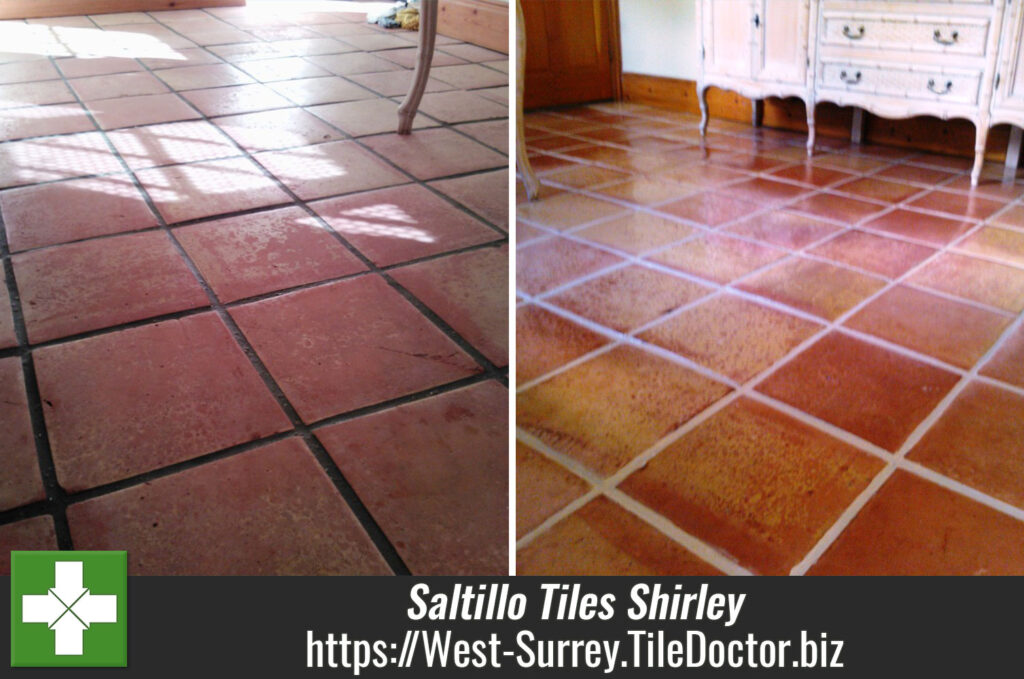
We went and had a look at a floor in a house in Shirley recently to find a dull Saltillo Terracotta tiled floor that was in need of some Tile Doctor TLC. Saltillo tiles are typically made in a region of Mexico; they are very porous and can scuff and stain quite easily if not protected so it’s important to maintain a sealer.

Saltillo Tiles before cleaning Saltillo Tiles before cleaning

Cleaning Saltillo Tiles

We advised the customer that we would probably not be able to get the tile in the traffic lanes back to the same colour due to the excessive wear from foot traffic but we would certainly try our best. We find it best to be honest about what we can achieve and set the customer’s expectations up front. They were happy for us to continue and accepted our very reasonable quote for the amount of work involved so we about cleaning the floor. This we did using a solution of Tile Doctor Pro-Clean tile and grout cleaner. To clean the tougher areas that were heavily stained we mixed the Pro-Clean with a little Tile Doctor NanoTech Ultra-Clean which helps to enhance the cleaning power.

Saltillo Tiled Floor before cleaning

Grout Re-Colouring

We left the floor to dry for 2 days then we went back and re-coloured the customer’s grout which as you can see from the pictures made a huge difference to the look of the floor. Grout Colourant can make a old tired looking floor look totally different and when applied properly forms a barrier that protects the grout from dirt engraining into the grout.

Saltillo Tiled Floor after cleaning Saltillo Tiled Floor after cleaning

Sealing Saltillo Tiles

Terracotta tile are extremely porous and so it came as no surprise that we needed to apply nine coats of Tile Doctor Seal and Go. After the last coat we waited for fourty minutes and then buffed the floor to bring out the shine and harden the sealer, the customer was very pleased with the results and made the following comment:

Thank you very much for doing such a wonderful and professional job my wife and I are very impressed with the results.


Saltillo Tiles Restoration in Shirley

Saltillo Tiles in Shirley Read More »

Scroll to Top