Author name: Rupert Mcloud

Riven Slate Tiled Kitchen Floor Cleaning and Sealing Guildford

Renovating a Riven Slate Tiled Floor in Guildford

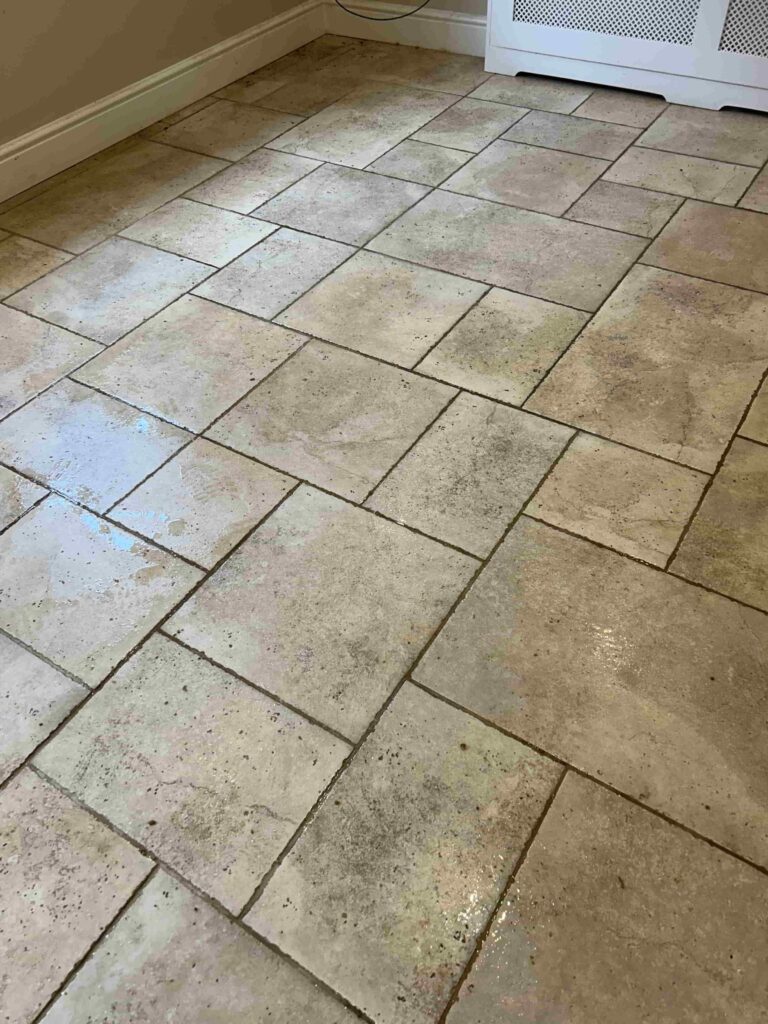
A former client from Guildford asked if we could renovate their Slate kitchen floor tiles which were not looking their best. I’d previously completed some minor works in a bathroom, and we had discussed the floor at the time. So, having already seen the tiles I knew it just needed a deep clean and seal and was able to work out a quote quite quickly without having to schedule a survey.

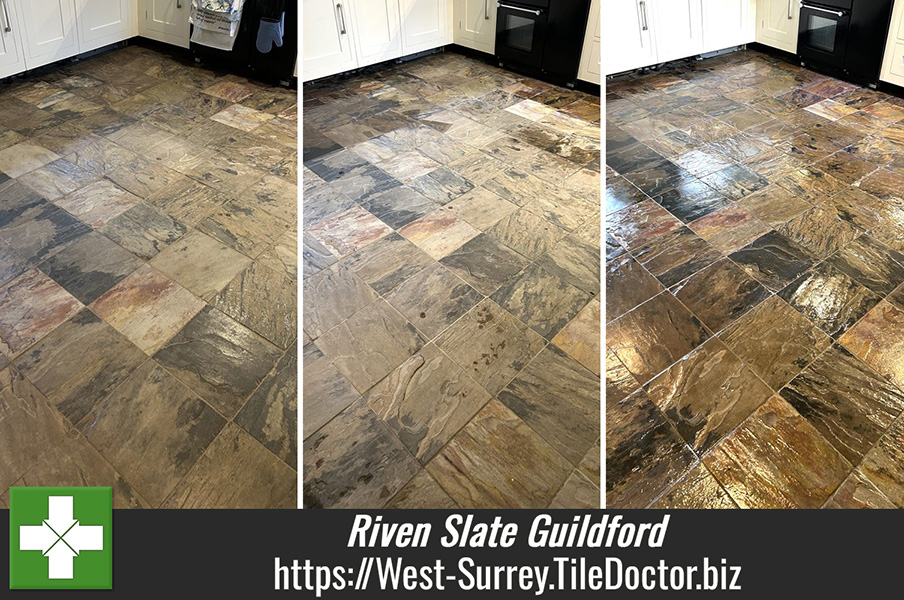
Riven Slate Tiled Kitchen Floor Before Cleaning Guildford

Slate like any natural stone needs to be sealed to prevent dirt from becoming ingrained, the sealer keeps the dirt on the surface where it can be easily cleaned away. Without this barrier in place, it becomes very difficult to clean effectively and absorbs dirt. Once a stone floor starts to become ingrained with dirt it becomes difficult to keep clean.

Happy with the quote, a date was scheduled to carry out the work.

Cleaning a Slate Tiled Kitchen

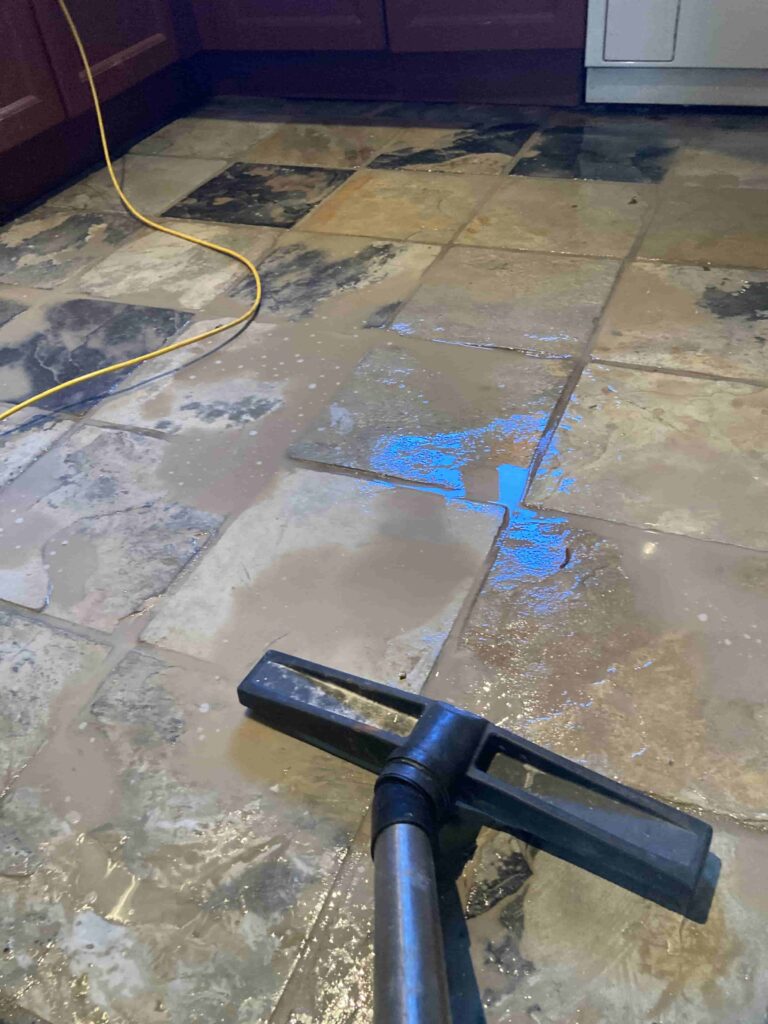
The first job was to add protection to vulnerable surfaces including the hallway carpet as I would be operating a wet vacuum from there. Once done work started in earnest with grout cleaning using a wire brush to scrub in a strong dilution of Tile Doctor Pro-Clean which is an effective alkaline tile and grout cleaner. Water was used to rinse away the soiling and the waste extracted with the wet vacuum.

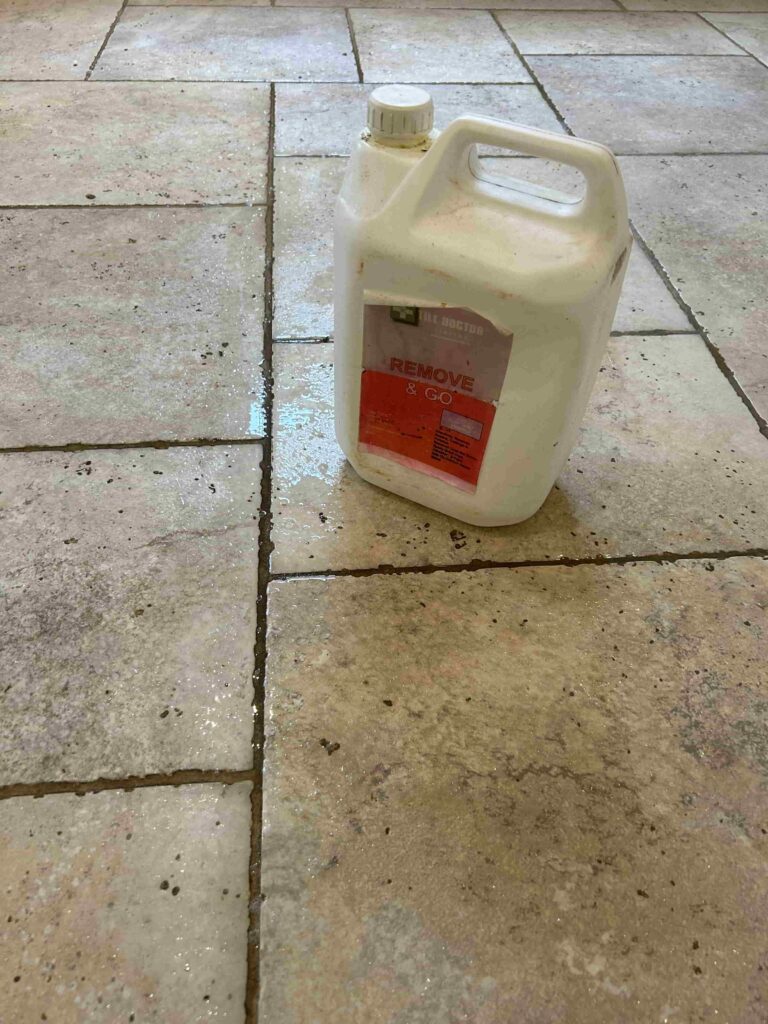
Next up focus turned to removing any remnants of existing sealer. I didn’t expect this to be difficult as the floor hadn’t been sealed in over 15 years; however, the tiles needed to be cleaned of all sealer before re-sealing, otherwise you can end up with an uneven appearance. This was done using another alkaline cleaner called Tile Doctor Remove & Go. This is diluted with water and sprayed onto the floor where it is left to soak in for ten minutes.

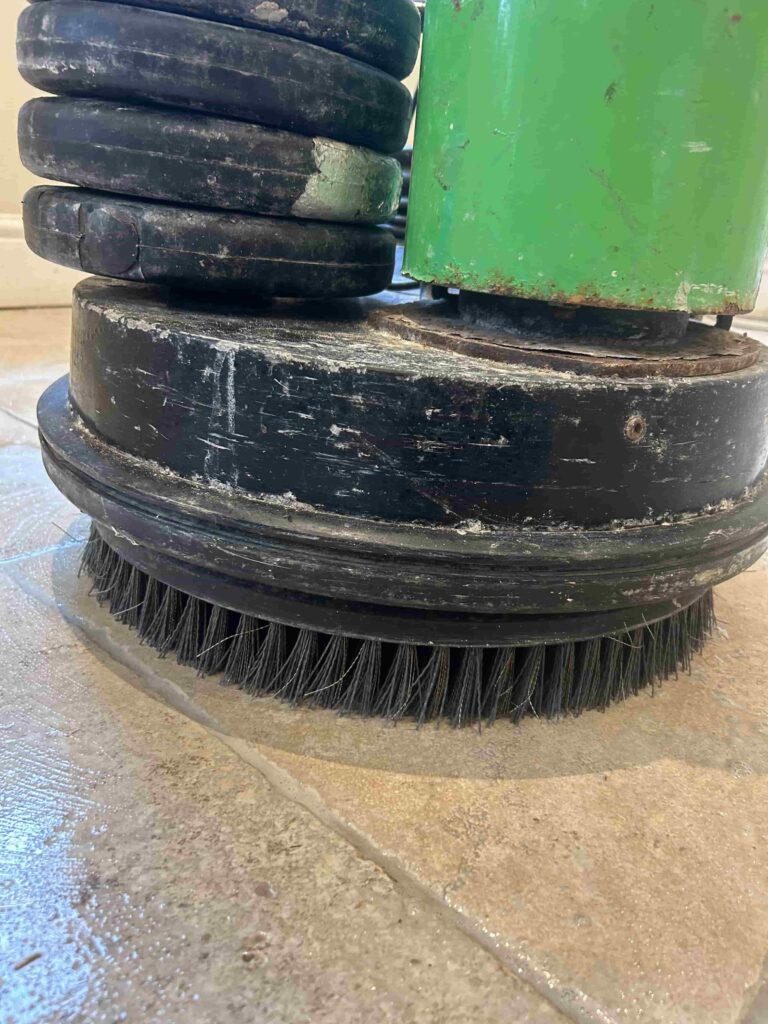
The solution was then worked into the Slate using a 17-inch carbide brush fitted to a rotary machine which really gets into the nooks and crannies of riven Slate, flushing out the dirt and old sealer in the process. All the waste was removed with the wet vacuum as before and then washed down with clean, hot water.

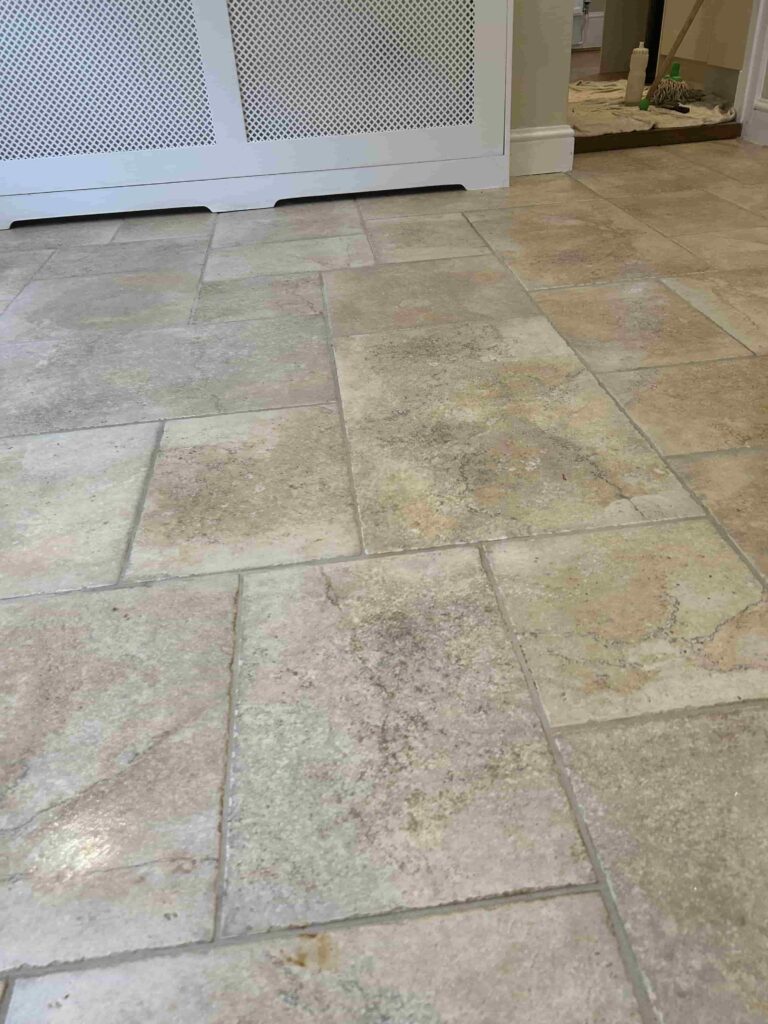
Riven Slate Tiled Kitchen Floor After Cleaning Guildford

Sealing a Slate Tiled Kitchen

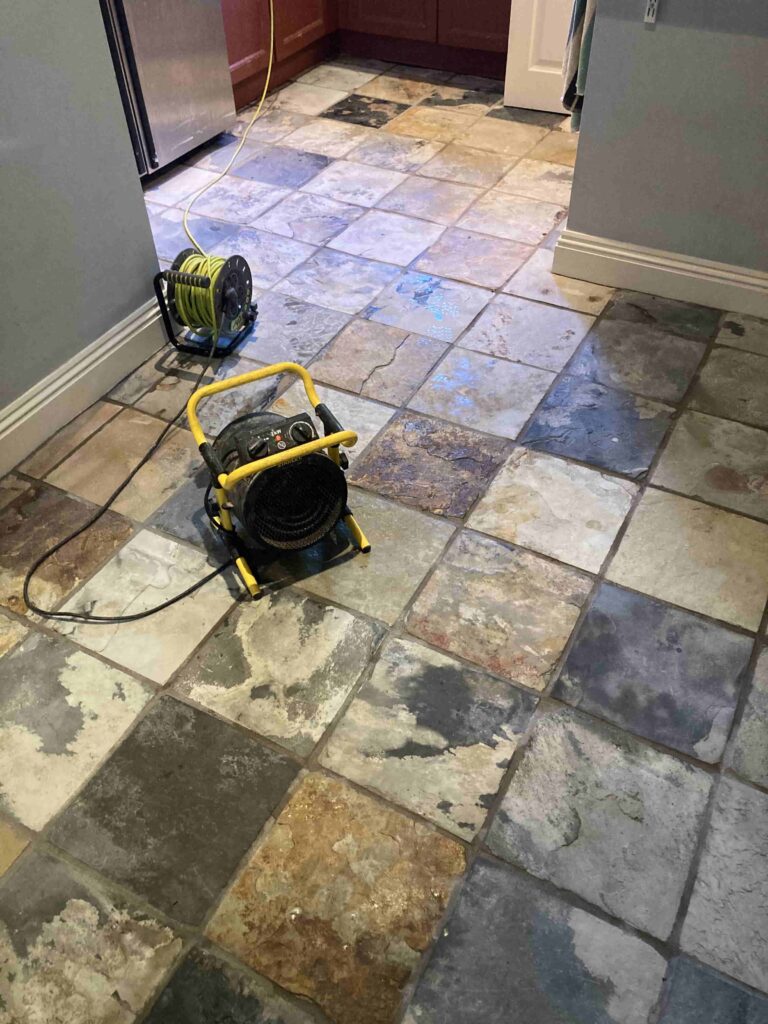
Once complete the floor was speed dried with a combination of the wet vacuum and floor fans. Later that day after checking the slate was dry with a damp meter it was sealed with four coats of Tile Doctor Seal & Go leaving half an hour between each coat. It’s not unusual to have to do the sealing on a second day if it doesn’t dry out in time, however the weather was in my favour.

The new sealer worked exceptionally well on the Slate and added an appealing subtle sheen that really highlighted the features and colours in the stone.

Riven Slate Tiled Kitchen Floor After Cleaning Sealing Guildford

For aftercare we discussed the use of Tile Doctor Neutral Tile Cleaner which being pH neutral won’t impact the sealer like the stronger products you often see available in supermarkets.


Professional Cleaning and Sealing of a Slate Tiled Kitchen Floor in West Surrey

Renovating a Riven Slate Tiled Floor in Guildford Read More »

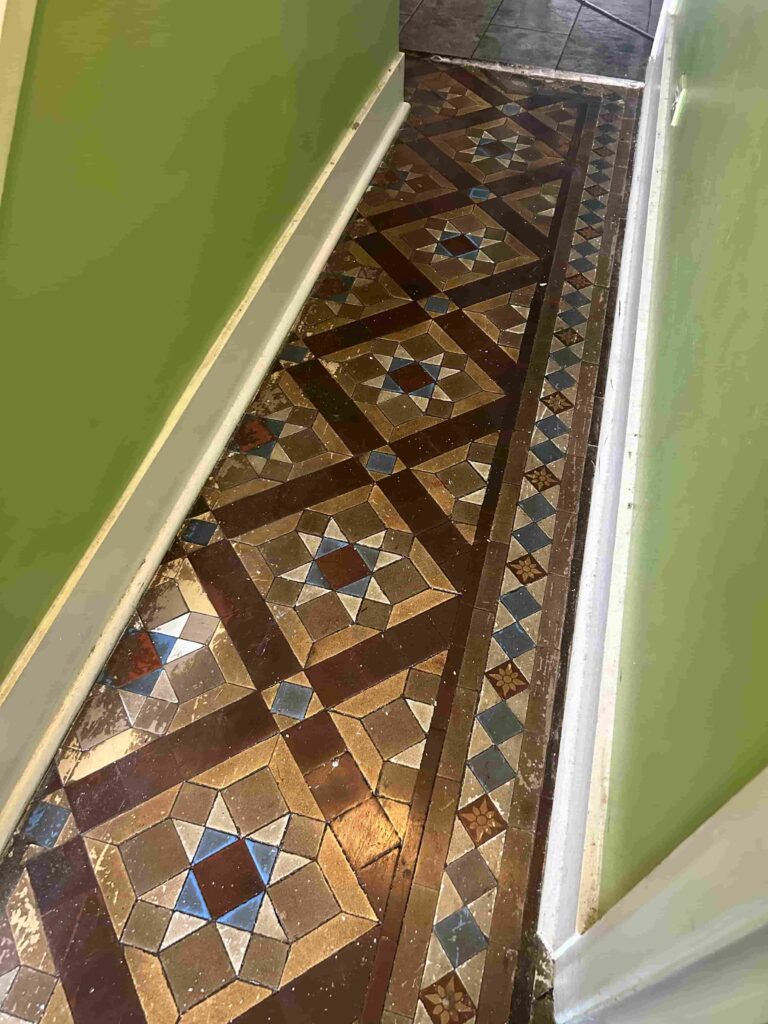
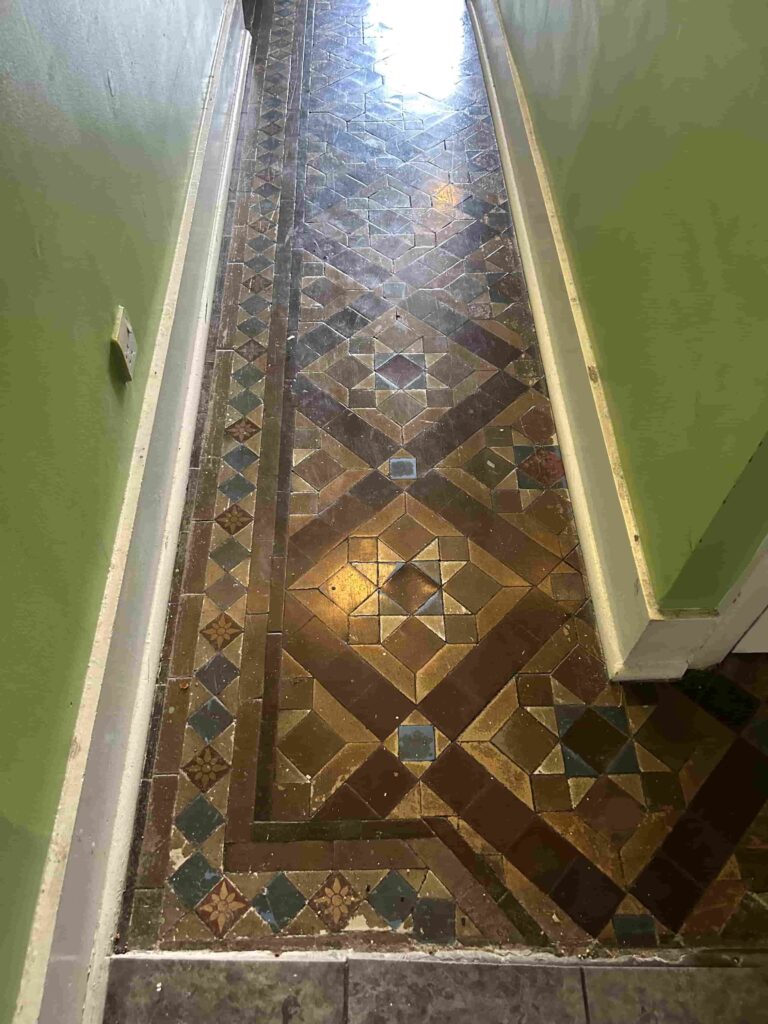
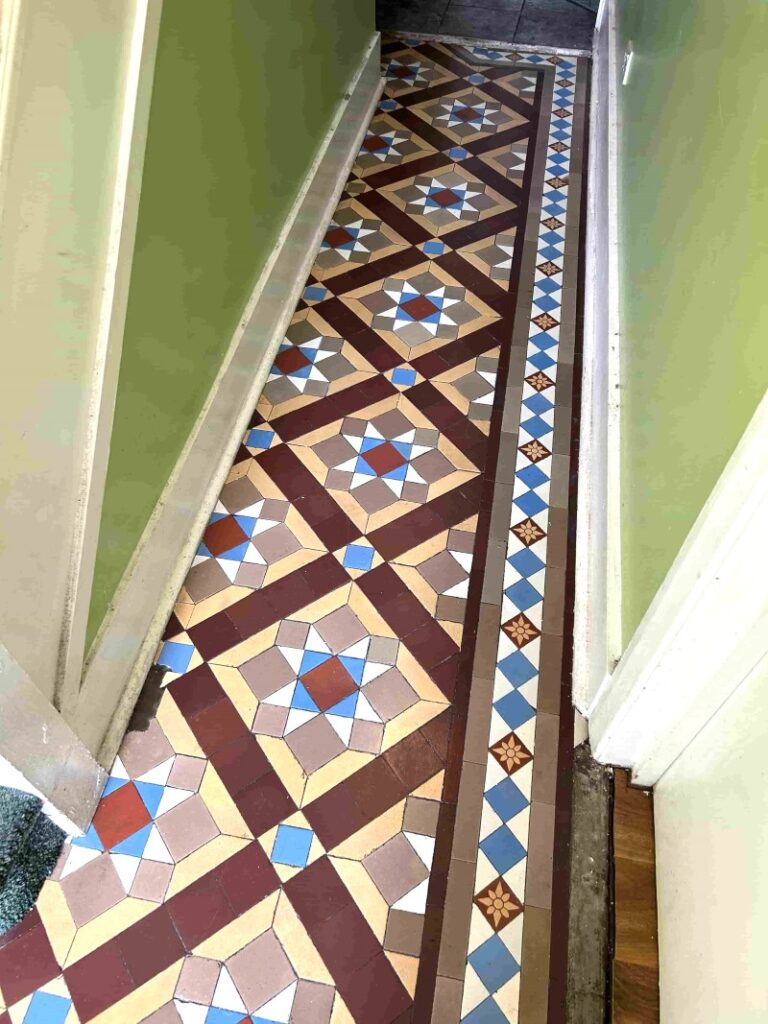
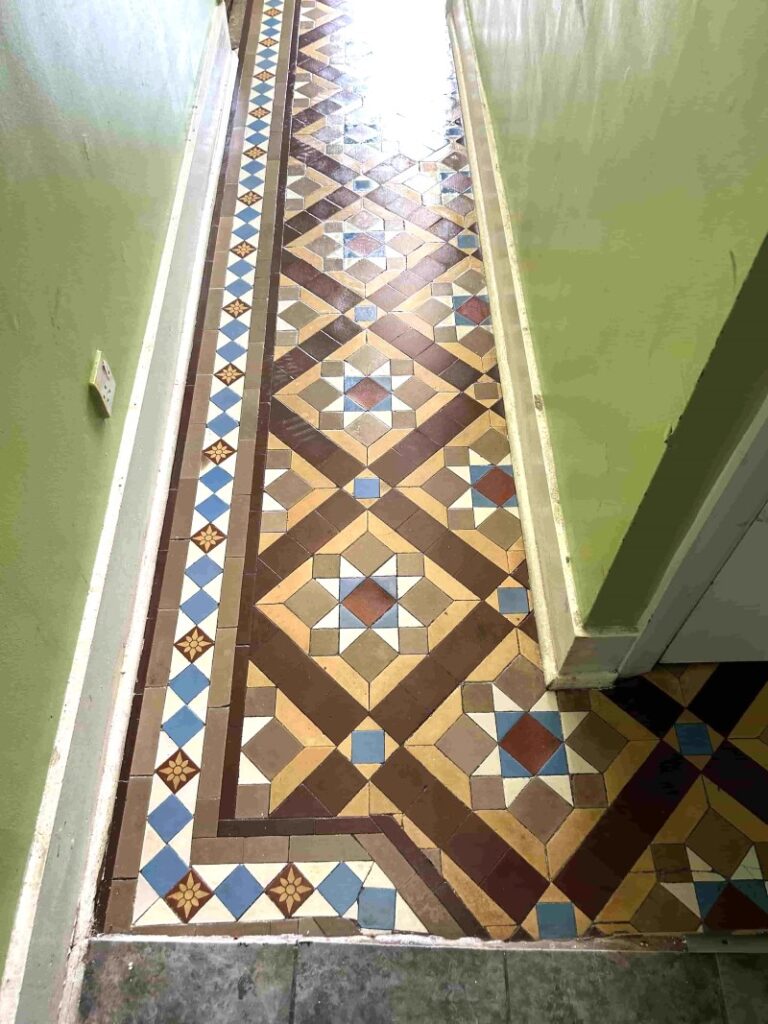
Victorian Tiled School Entrance Floor Resurrected Guildford

Victorian Tiled School Hallway Resurrected in Guildford

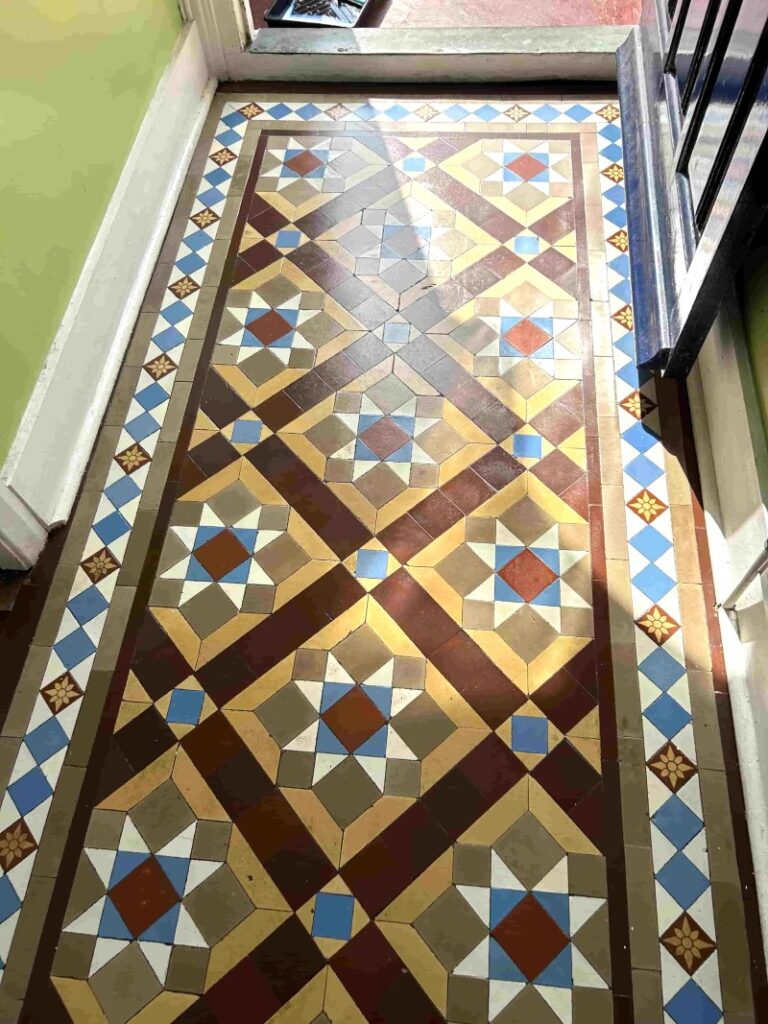
The maintenance staff at school in Guilford uncovered a beautiful Victorian tiled floor under carpet at the entrance. The carpet had been secured with a very thick layer of adhesive and unsure how to proceed they contacted Tile Doctor for advice.

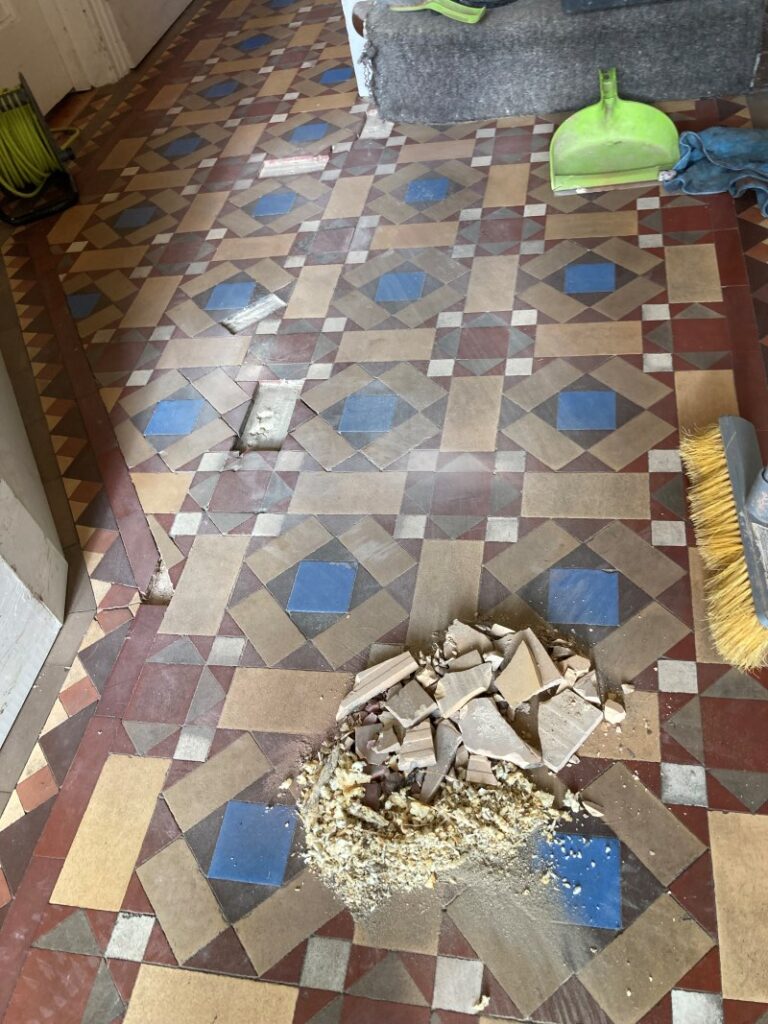
I popped over to take a look and conducted a test clean on part of the floor to see how it might respond to various cleaning options. From this I could see the floor had been covered with a thin layer of self-leveller as well as the adhesive. This would need to be softened and then scrapped off the whole floor a task which would be very labour intensive.

Victorian Tiled School Entrance Floor Before Cleaning Guildford

The school was keen to restore the floor and so I was asked to work out a quote for its restoration. The quote was accepted and date agreed with the maintenance team for the next time the school would be empty. In the meantime, the carpet was rolled back into position so the floor could still be used.

Cleaning a Victorian Tiled Hallway Floor

I returned on the scheduled date and once the maintenance staff had removed the carpet, I was able to start work on removing the glue and cement of the self-levelling compound. To do this I worked in sections starting with coating the floor with a strong dilution of Tile Doctor Remove & Go. This product is an alkaline stripper that soaks int the coatings and starts to break them down.

The Remove & Go was left to soak in for fifteen minutes before work started on carefully scrapping the glue and cement off the surface of the tiles. After hours of scrapping the waste was vacuumed away using a wet vax.

This left some residue over the tiles so they were given a further clean using more Remove and Go and a 17-inch wire brush attached to a rotary floor polisher. Again, all waste was removed as before and then the floor was left to dry off overnight.

Victorian Tiled School Entrance Floor During Restoration Guildford

I returned the next day to review the floor and complete any further cleaning and remove any remaining adhesive including around the edges.

Sealing a Victorian Tiled Hallway Floor

Once I was happy the floor was completely clean and free of adhesive and self-leveller work was progressed onto the final stage of the restoration which involves applying a protective sealer.

For this several coats of Tile Doctor Seal & Go were applied allowing 30-minute drying time between coats. This is a specially formulated water-based blend of acrylic polymers that provides both a stain resistant surface seal and a durable low-sheen finish.

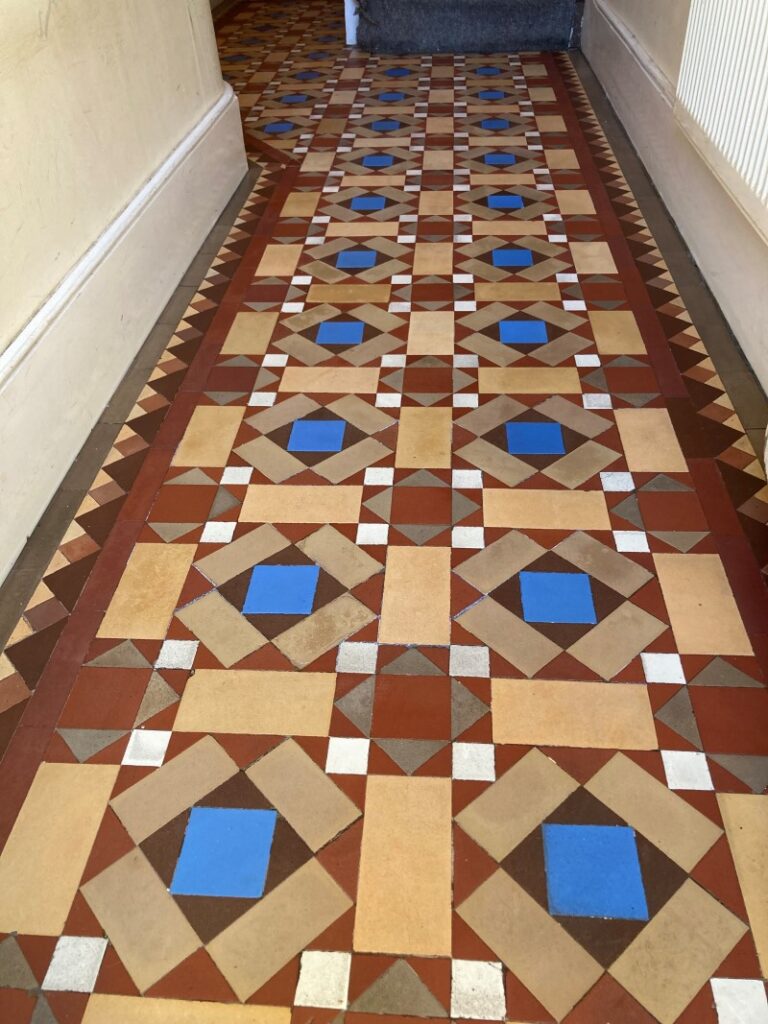
Once complete the beauty of the floor really stood out and made for a very attractive entrance that looks great as you approach the school entrance.

Victorian Tiled School Entrance Floor After Restoration Guildford

For the aftercare of Victorian tiled floors, I recommended the use of Tile Doctor Neutral Tile Cleaner which due to its neutral ph makes it idea for the regular cleaning of sealed tiles. Many of the products you will find in supermarkets are simply too strong and will prematurely erode the sealer on a tile and so best avoided.


Professional Restoration of a Victorian Tiled Hallway in West Surrey

Victorian Tiled School Hallway Resurrected in Guildford Read More »
Terracotta Brick Paved Patio Renovation Leatherhead

Rescuing a Grout Stained Newly Laid Terracotta Tiled Patio in Leatherhead

It’s difficult to recognise, but the photo below from a property in Leatherhead, is of a recently tiled Terracotta brick patio laid in a herringbone pattern. While the tiles had been laid well the grout hadn’t been removed from the surface of the tile, in fact I don’t think any of the grout had been polished off which is the usual practice after laying tiles.

Terracotta Brick Paved Herringbone Patio Before Grout Haze Removal Leatherhead

The client was now in dispute with the tiler and had held back half the payment as a result. It was unlikely the tiler would be able to resolve the problem satisfactorily and so I was asked to pop round and take a look.

Terracotta Brick Paved Herringbone Patio Before Grout Haze Removal Leatherhead

I visited, as requested to survey the tiles and propose a solution and was shocked myself at just how bad it was; in fact, this was by far the worst example I’ve ever of a problem we call Grout Haze. My customer was very upset about the whole situation however I was able to provide the assurance that it could be resolved. I worked out a quote for two days’ work to remove the grout staining which was accepted and a date agreed.

h2>Removing Grout Haze from a Terracotta Tiled Brick Patio

Jumping ahead I can confirm I managed to remove the grout haze but I did have to use several methods before it was 100% and looking the way it should of done to start with.

The first method was to attach a coarse 120-grit Carbide Brush to a rotary floor buffer with extra weights fitted. This is essentially a very hard wearing 17-inch wire brush which is very effective at cleaning rough surfaces. I ran this over the patio to work in a strong dilution of Tile Doctor Grout Clean-up which is an acid-based product that is used as its name suggests to remove grout. The brush was run over the floor for the next fours to remove as much of the grout haze as possible and until it became clear it was no longer being effective.

Next, I switched the brush out for a coarser 100-grit diamond pad and used that to work in more Grout Clean-Up. This slowly improved the appearance of the Terracotta but more work would be needed and it was beginning to get dark so I decided to call it a day and finish by rinsing off and extracting the slurry.

Terracotta Brick Paved Herringbone Patio During Grout Haze Removal Leatherhead Terracotta Brick Paved Herringbone Patio During Grout Haze Removal Leatherhead

I returned the following day feeling refreshed and with a new plan on how to tackle and remove the final remnants of grout. It was clear that the previous methods with larger machinery had done all they could so it was now time to try a more detailed approach. For this I used a Fein Oscillator tool to grind away the remaining patches. This is a noisy hand-held tool so you need to wear ear defenders, and working at this level meant slow but effective progress.

Once finished the dust was vacuumed away and then cleaned again with another acid rinse using more Grout Clean-up and rinsed and extracted afterwards.

Terracotta Brick Paved Herringbone Patio After Grout Haze Removal Leatherhead

It was two days hard graft but as you can see the patio was completely transformed and as you might expect my customer was very relieved.

Terracotta Brick Paved Herringbone Patio After Grout Haze Removal Leatherhead


Professional Grout Haze Removal Service in West Surrey

Rescuing a Grout Stained Newly Laid Terracotta Tiled Patio in Leatherhead Read More »

Ceramic Tiled Shower Transformation Weybridge

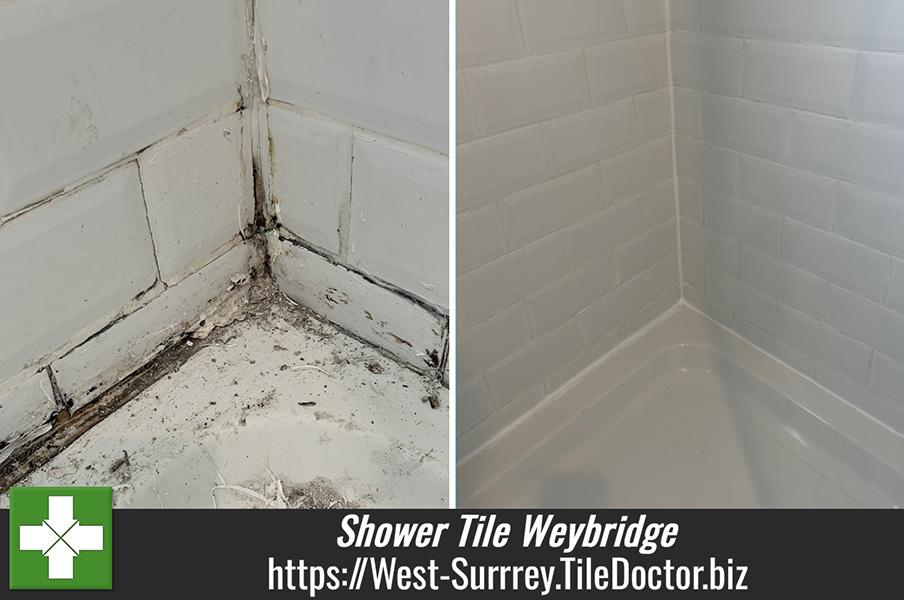
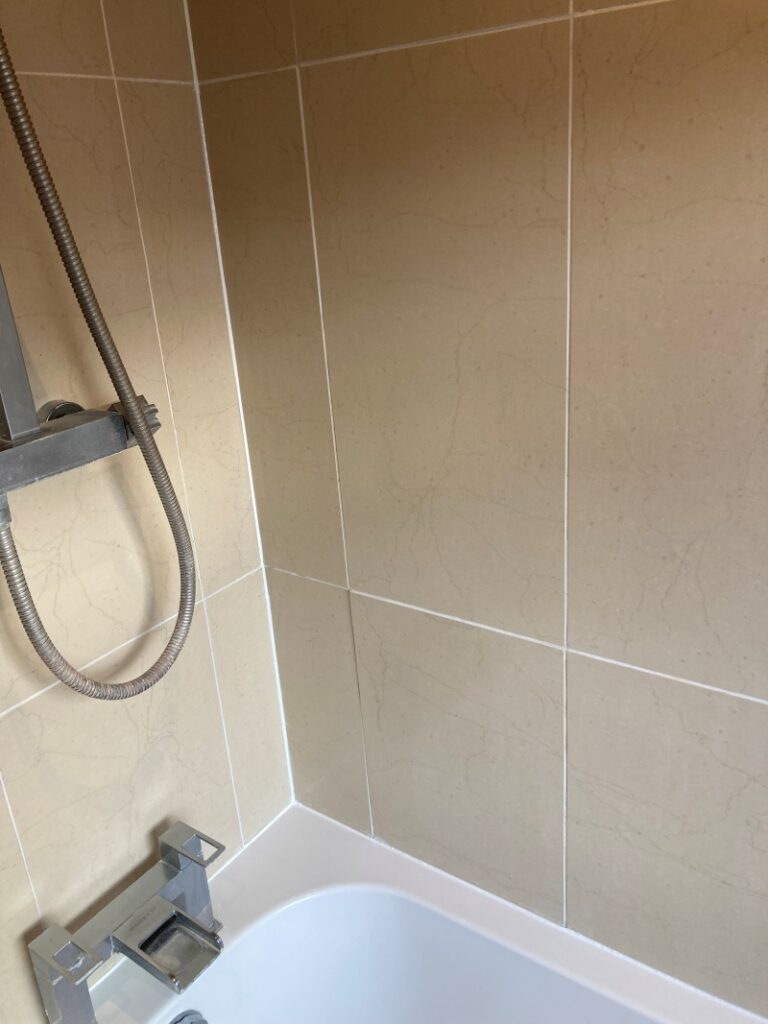
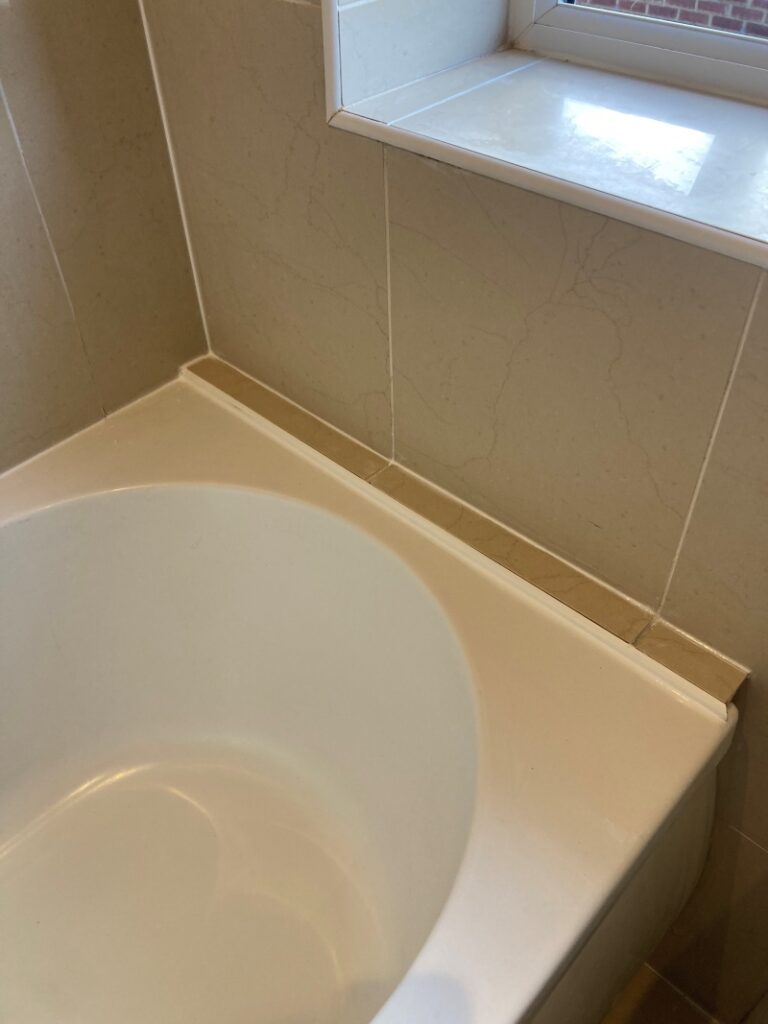
Refreshing a Mouldy Ceramic Tiled Shower Cubicle in Weybridge

Having seen some similar work of Ceramic tiled shower cubicle refresh I had completed I was asked by a homeowner in Weybridge to pop round to their house and do the same for them. A shower cubicle refresh is usually quite straight forward and can be completed in less than a day so I can usually provide a quote based on a few photographs.

Showers are often in daily use and even more frequently in large families, so it’s not surprising that the tile and grout can discolour and if ventilation isn’t adequate mould can form. This can be reduced with the regular use of a squeegee, the liberal squirting of a decent cleaning product and often just leaving a window open can improve ventilation. In this case however and with a very busy household it was a struggle to keep on top of the problem and in this case, external help was needed.

Ceramic Tiled Shower Before Cleaning Weybridge

You can see from the photograph that although the white ceramic tiles were in good condition the appearance of the cubicle was severely let down by discoloured grout and an overuse of mastic which had turned black with mould.

Deep Cleaning a Ceramic Tiled Shower Cubicle

Work started with the removal of the layers of mouldy mastic which were carefully scrapped away using a sharp knife. This would be replaced later, however in my experience even the most expensive anti-mould sealants in a location like this rarely last longer than three to four years before they need replacing.

With the grout fully exposed it was cleaned with the aid of a stiff wire brush and an acid based cleaner call Grout Clean-up. This got the grout clean but not white consistently enough to match the rest of the shower cubicle, this was always a possibility, and I had previously discussed that it might be necessary to apply a grout colourant.

The process was then repeated on the tiles using a scrubbing brush with more Grout Clean-up taking care to keep it away from any chrome as it can cause it to discolour if you’re not careful. The Ceramic tiles have a glazed coating and clean up relatively easily in comparison to the grout.

Following this the shower wall was wiped down with water to provide a general clean and remove any debris left over from cleaning.

Grout Colouring a Ceramic Tiled Shower Cubicle

I had thought that as the grout dried following the cleaning it might be ok against the white tiles however the staining had been left in place too long and it was clear a colourant would be needed. I did this over the course of a few hours, using a White colourant from the Tile Doctor Grout Colourant range. White is just one of eleven colours available in the range and was chosen in this case to give the grout a really fresh look and to blend in with the White Ceramic tiles.

The application of Grout Colourant not only colours the grout joints – it also seals and rejuvenates them. It also dries quickly, so I could apply a second coat quite soon after the first, removing any excess as I went.

Finally, once everything was dry, I applied mastic around the shower tray base and the two verticals. The shower cubicle was completely transformed by the renovation and ready for use again later that afternoon.

Ceramic Tiled Shower After Renovation Weybridge


Ceramic Tiled Shower Cubicle Cleaning and Grout Recolouring in Surrey

Refreshing a Mouldy Ceramic Tiled Shower Cubicle in Weybridge Read More »

Acid Damaged Limestone Patio Renovation Guildford

Black Limestone Patio Damaged with Brick Acid Rescued in Guildford

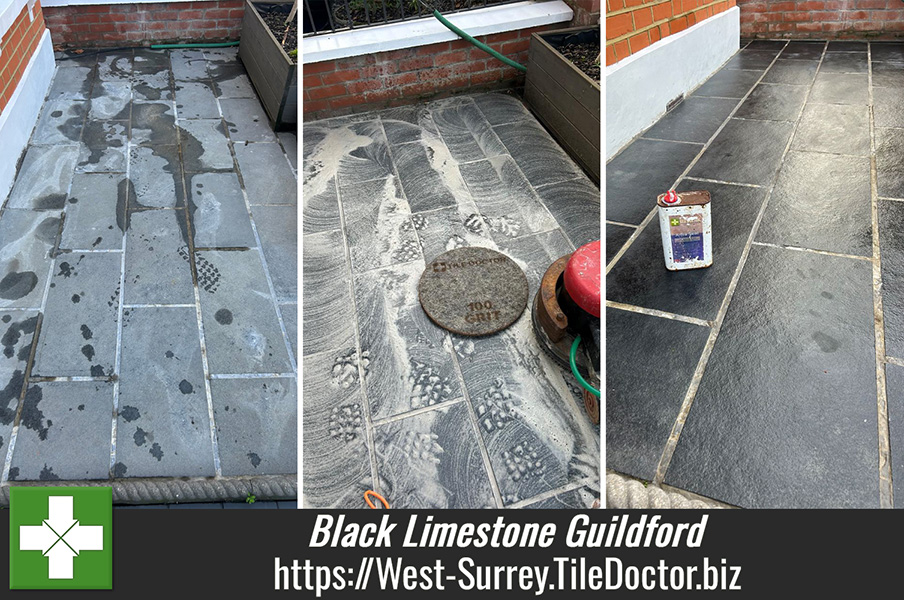
This client from Guildford had the front of her house painted by a contractor who managed to splash paint on their black limestone patio. To remove the staining the contractor decided it would be a good idea to rinse the patio with brick acid. It certainly got the paint off but also bleached the colour out of the limestone and etched the surface in the process completely ruining its appearance. Unfortunately, some types of stone can be cleaned with acid however other calcium-based stones are very sensitive to acid and therefore easily damaged.

Acid Damaged Limestone Patio Before Renovation in Guildford

Horrified by the state of their patio they decided to contact Tile Doctor and I was able to reassure them that there was no need to worry and that I would be able to renovate the limestone and restore the colour. I worked out a detailed quote for the work, the will bill for which no doubt would be passed onto the decorator and arranged a time for the work to be carried out.

Renovating a Black Limestone Tiled Patio

To rectify the surface etching the best solution is to burnish the limestone tiles with coarse 100 and then 200 grit diamond pads. These coarse pads cut slightly into the stone to remove the damage. The pads are fitted to a weighted floor buffer and run over each pad several times. The extra weight added to the buffer improves traction with the stone and gives an even result. The process generates a fine slurry which is rinsed with warm water and then extracted with a wet vacuum.

Acid Damaged Limestone Patio During Renovation in Guildford

Normally I would leave the patio to dry off naturally, but the weather was beginning to change, and I was concerned it could rain so the patio was speed dried using an air mover. After an hour I checked the moisture readings had dropped within the correct tolerance and the tiles were ready to be sealed.

Sealing a Limestone Tiled Patio

I chose Tile Doctor X-Tra Seal to seal this stone, applying two coats. This is an oil-based product that restores the beautiful black colour to the limestone resulting in a nice finish and made my client happy who wanted the tiled darkened. This product is also rated for external as well as internal use so it is ideal for this application.

Acid Damaged Limestone Patio After Renovation in Guildford

Once complete the Black Limestone looked fantastic much to the relief of the owner; the dark colour had returned and the features in the Limestone were visible. Before leaving I recommended the use of Tile Doctor Neutral Tile Cleaner for regular maintenance going forward. It’s always tempting to use something more aggressive on external stone but doing so will risk the problem repeating.


Professional Restoration of a Limestone Tiled Patio in West Surrey

Black Limestone Patio Damaged with Brick Acid Rescued in Guildford Read More »

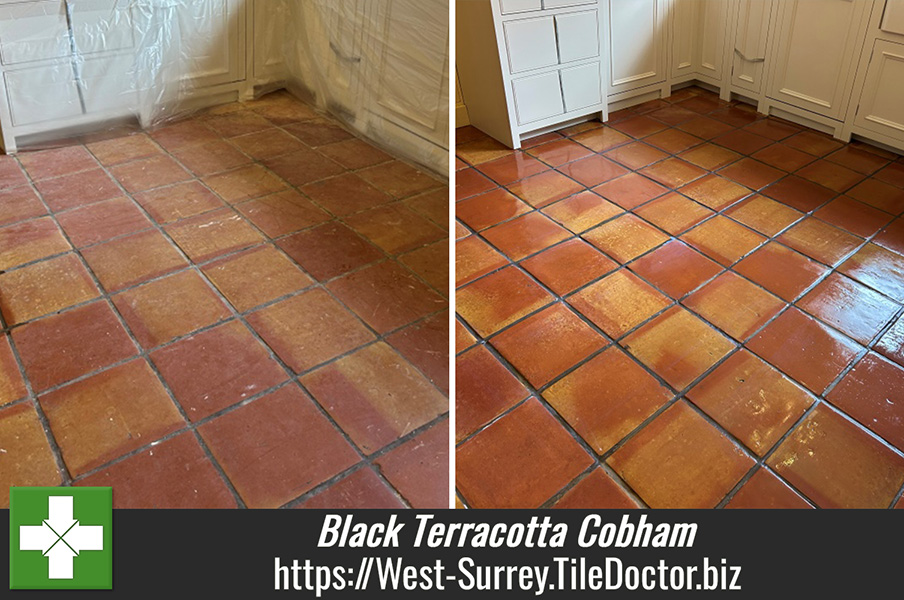
Terracotta Tiled Kitchen Floor Cleaned and Sealed in Cobham

Terracotta Floor Restored at 400-Year-Old Cottage in Cobham

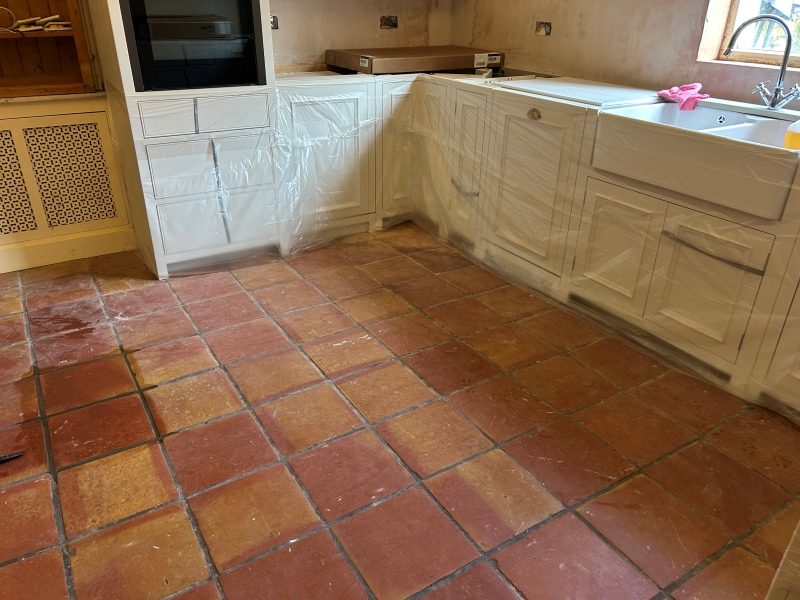
This Terracotta tile cleaning project in Cobham took a while off the ground as a new kitchen was being installed. Ideally its best to deep clean and seal the floor after the old kitchen is removed and before the new one is installed however you risk the installers making a mess on the floor after it’s been renovated.

In this case we agreed to do the work post installation when the workmen had gone and I would have the kitchen to myself. The quote was agreed and a date agreed well into the future to avoid any delays from the kitchen company.

Deep Cleaning a Terracotta Tiled Kitchen Floor

When the date finally arrived work started by removing wooden kickboards and dressing the new cabinets in protective plastic sheets. This would protect the kitchen units from splashing during the cleaning process.

Terracotta Tiled Kitchen Floor Before Cleaning Cobham

Once the units were protected work moved onto cleaning the grout by running a strong dilution of Tile Doctor Pro-Clean along the grout lines and letting it soak in for ten minutes. This gives the product time to soak into the grout and breakdown the dirt and stains that can get caught in the cementitious top layer. The grout was then hand scrubbed using a stiff brush and the soling extracted with a wet vacuum.

Next step was to repeat the process with the Terracotta tiles, again using more Pro-Clean and leaving it to soak for ten minutes before working it in. This time though I used a floor buffer fitted with a 17-inch carbide brush to do the work. These pads are great for cleaning floors and help to lift ingrained dirt out of the pores of the tile up to the surface where if can be easily cleaned away.

The floor was extracted again with the wet vacuum and then rinsed with water and extracted again. Once done the floor was inspected and any stubborn areas re-treated or spot cleaned until I was satisfied the floor was as clean as it possibly could be.

Sealing a Victorian Tiled Hallway Floor

The Terracotta need to be dry before sealing and with it being a very porous material, I made sure to get the floor as dry as possible using the wet vacuum before leaving for the day and left it to dry out fully overnight.

The next day the floor was texted for moisture using a damp meter to confirm it was dry. The readings were acceptable and so the first of what would be several coats of sealer was applied leaving around thirty minutes between coats.

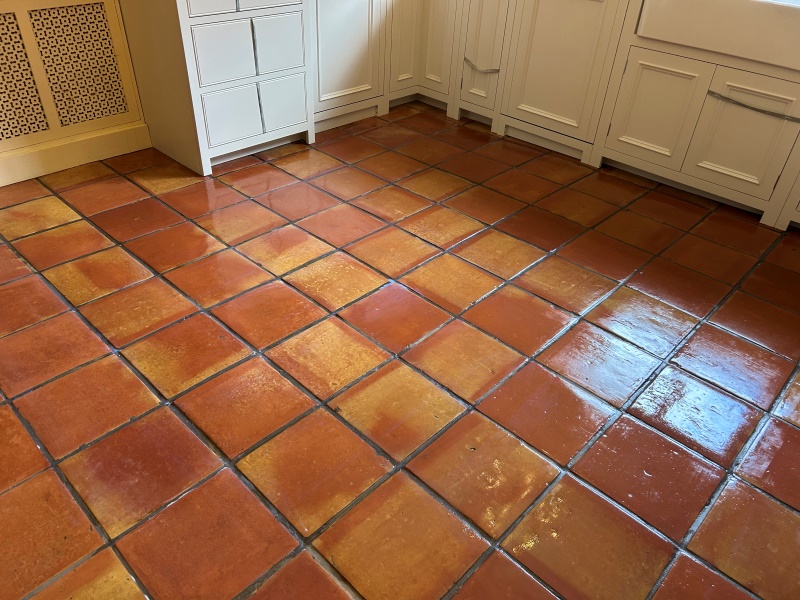
To seal the floor Tile Doctor Seal & Go was used which leaves an appealing satin finish and will work to protect the floor by keeping dirt on the surface where it can be easily cleaned away. The Terracotta tile and grout responded really well to the treatment and finished the transformation of the kitchen.

Terracotta Tiled Kitchen Floor After Cleaning Sealing Cobham

For the aftercare of sealed Terracotta floors, I recommend using Tile Doctor Neutral Tile Cleaner which is mild yet effective tile and grout cleaner that won’t impact the sealer. Many of the products you find in supermarkets are bleach based and are too strong for use on a sealed floor resulting in the sealer being eroded prematurely, they can also bleach the colour out of grout.


Professional Renovation of a Terracotta Tiled Kitchen Floor in Surrey

Terracotta Floor Restored at 400-Year-Old Cottage in Cobham Read More »

Ceramic Tiled Kitchen Floor Cleaning Ewell

Heavily Soiled Ceramic Tile and Grout Deep Cleaned in Ewell Kitchen

I thought I would share with you this tile cleaning example from Ewell that shows what can be achieved when cleaning grubby Textured Ceramic Tiles. Textured Ceramic Tiles are often used in kitchens and wet areas due to the non-slip properties of the tile, however over time the rough surface will trap dirt that becomes increasingly difficult to shift.

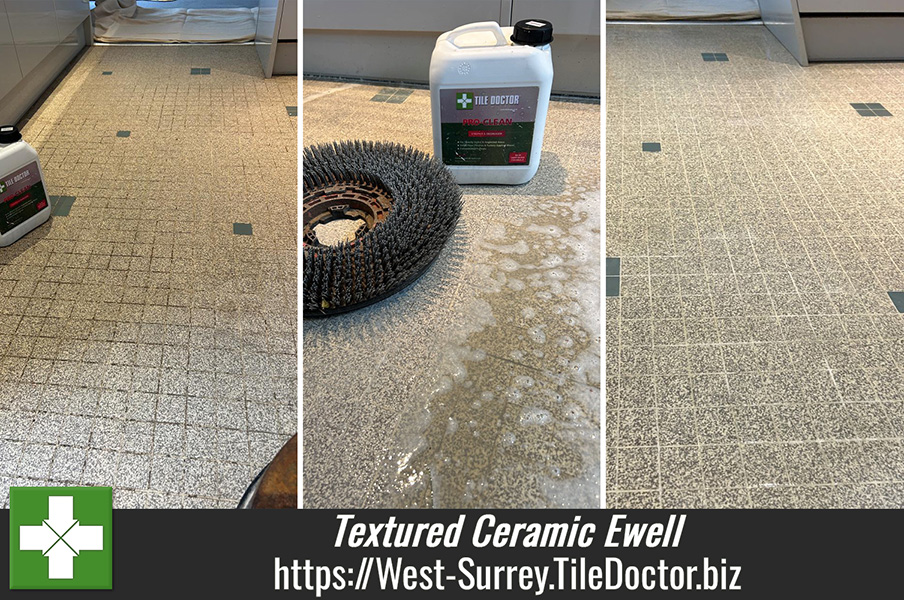
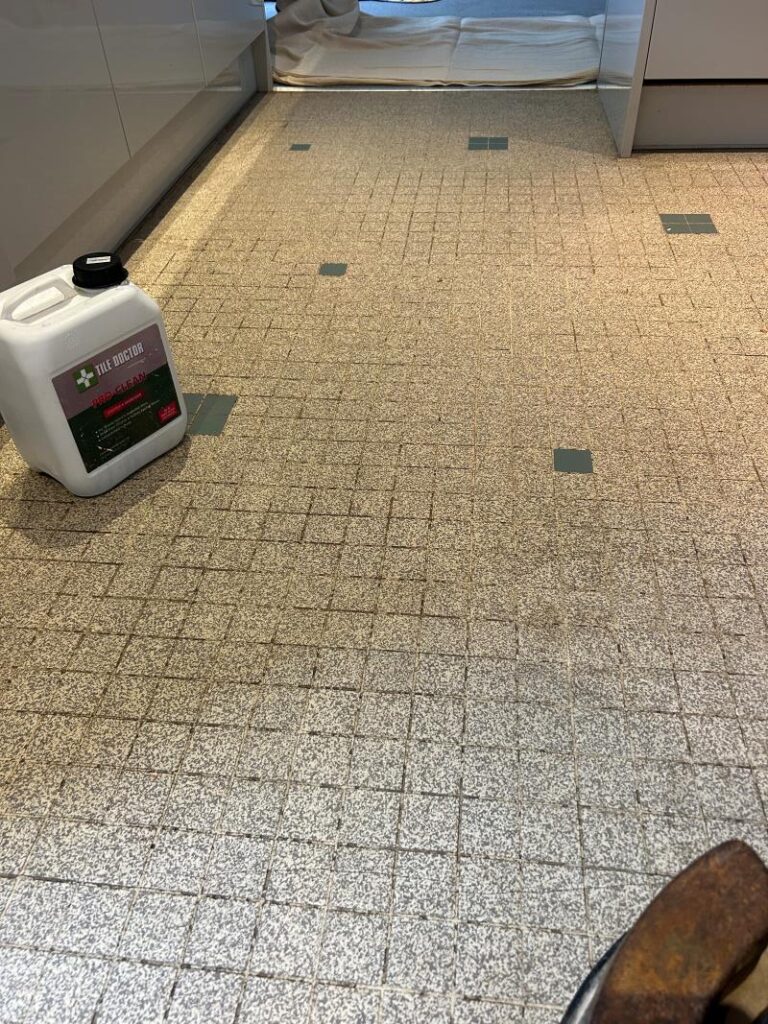
Ceramic Tiled Kitchen Floor Before Cleaning Ewell

In this case the customer had two dogs that often ran in from the garden and so the tile and grout had accumulated a lot of soiling. Unlike stone or clay tiles however ceramic tiles don’t need to be sealed so it’s mainly a question of scrubbing away stubborn surface dirt. The grout was also dirty however this is slightly porous and to clean this is always best to use a strong alkaline cleaning agent.

Cleaning a Ceramic Tiled Kitchen

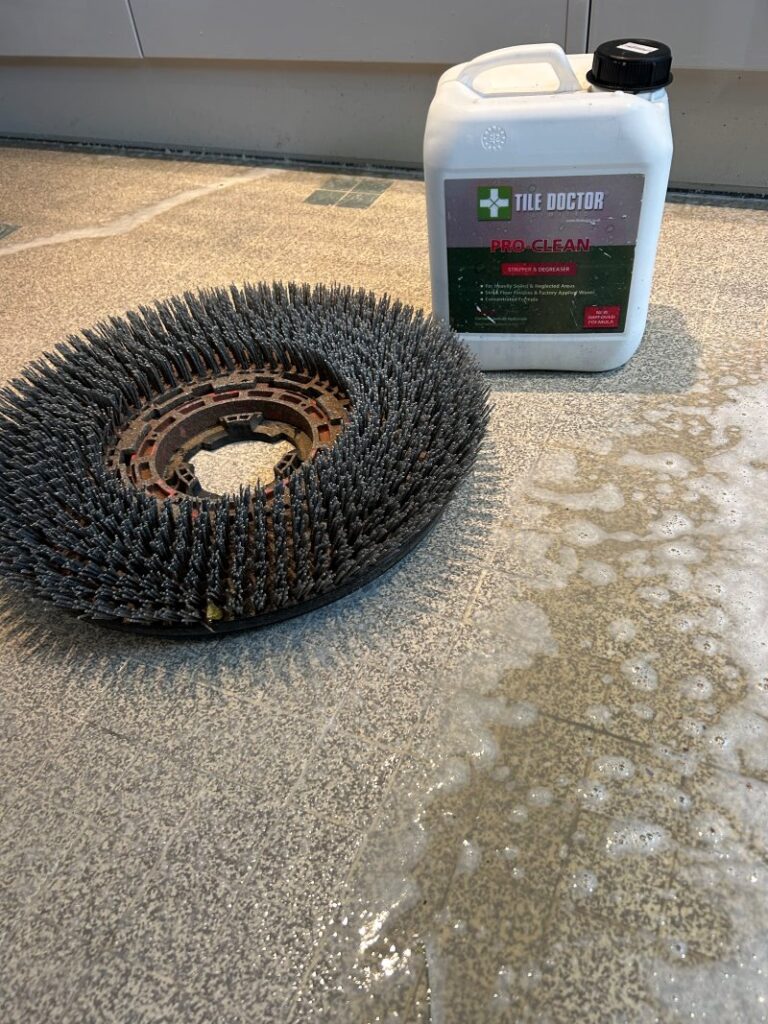
To get the floor clean the tiler and grout was initially brushed with a strong dilution of Tile Doctor Pro-Clean and this was left to soak in. This alkaline cleaner gradually breaks down the ingrained dirt, then after ten minutes it was worked in with a 17-inch carbide brush. This removes the surface dirt and most of the dirt in the grout lines. The stubborn grout was then cleaned further the old-fashioned way using a wire brush and lots of elbow grease.

Ceramic Tiled Kitchen Floor During Cleaning Ewell

The now soiled cleaning solution was removed with a wet vacuum cleaner and the floor inspected to make sure it was as clean as possible. With the cleaning solution removed it became clear a few areas needed a bit more work so they were hand-scrubbed with more Pro-Clean. Once complete the floor dried with the wet vacuum again and then wiped down with warm water.

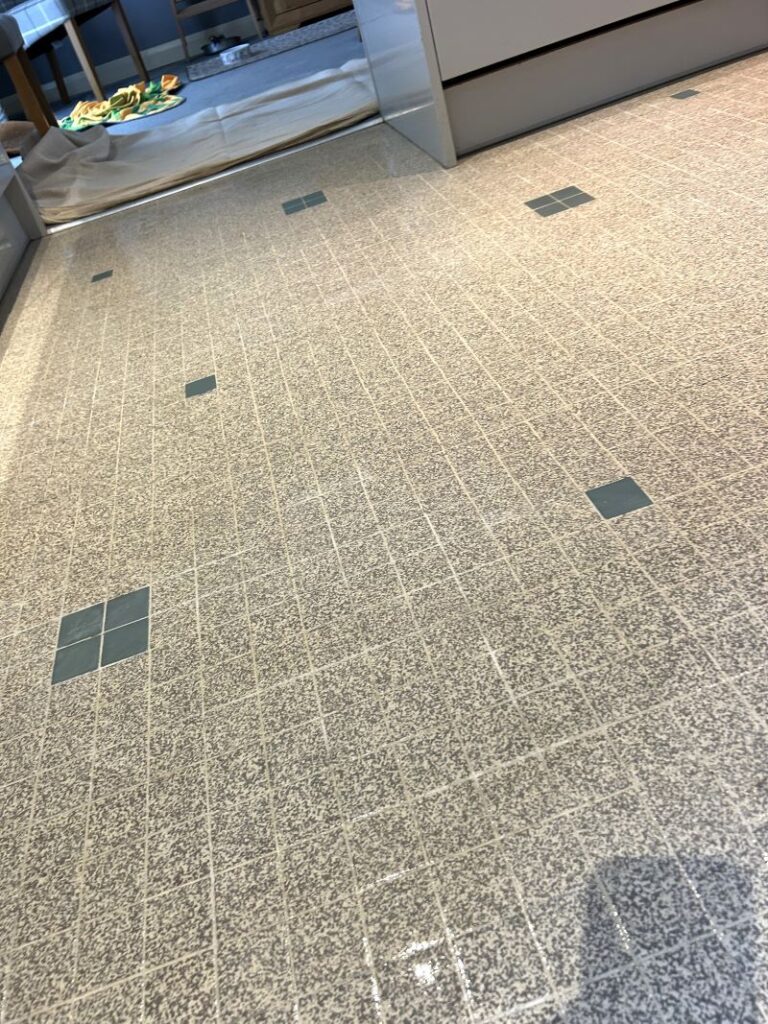
Ceramic Tiled Kitchen Floor After Cleaning Ewell

Once complete the floor looked fresh and clean and was ready for the customer later that afternoon.


Professional Restoration of Textured Ceramic Tile and Grout in West Surrey

Heavily Soiled Ceramic Tile and Grout Deep Cleaned in Ewell Kitchen Read More »

Quarry Tiled Floor Restoration Cranleigh

Cement Screed Covered Quarry Tiled Floor Restoration in Cranleigh

This Quarry tiled floor was discovered in an old cottage in the Surrey village of Cranleigh. The new owners had found the quarry tiled floor under an old carpet and wanted to have it restored as an original feature. Unfortunately, it also had a covering of concrete screed over a large percentage of it. This is a fairly common practice when laying vinyl or carpet over tiles as it ensures a completely flat surface.

Quarry Tiled Floor Before Restoration Cranleigh Quarry Tiled Floor Before Restoration Cranleigh

From experience, I knew returning the tiles to a decent state would be possible but it’s difficult and unpleasant work. None the less I was happy to do the restoration and having visited the property to survey the floor I came up with a restoration plan that I was happy with. This evolved into a quote which the owners were happy to accept, and a date set for the work to commence.

Cleaning a Quarry Tiled Living Room

To remove the screed, I started with a power chisel fitted with a serrated attachment and started to carefully chip away at the screed. This is noisy and messy work, so I shut myself off from the world wearing eye protection goggles and ear defenders. Slowly the cement screed came away and was bagged up for removal.

Once I’d cleared the area of screed, a heavyweight buffing machine was introduced to the floor. Heavy iron bars were attached to the front to increase traction with the tiles and make cleaning and burnishing more effective. With the machine ready the quarry tiles were covered in a strong dilution of Tile Doctor Pro-Clean, and this was left to soak in for ten minutes.

A coarse 200-grit diamond pad was fitted to the machine and then run over the floor to work in the cleaning solution. This abrasive pad cuts into the surface of the tile to remove the years of dirt and grime. This is an aggressive, wet process but the cleaning solution captures the dirt and dust minimising the mess. Once done the floor was rinsed with water and the soiling extracted with a wet vacuum.

Attention was then directed at the grout which had to be hand scrubbed for the best results using more Pro-Clean. The whole floor was then inspected and any stubborn areas of staining were spot treated using the same process. Once I was happy with the condition of the tiles the floor was left to dry out overnight ready for sealing the next day.

Sealing a Quarry Tiled Living Room

Quarry tiles don’t particularly like aggressive cleaning processes and it can cause their colour to fade, however there is little alternative when they are this bad. With this in mind, I had decided to seal them with a colour enhancing sealer called Tile Doctor Colour Grow. This product is an impregnator which works by soaking into the pores of the tile, protecting it from within and ensuring any dirt remains on the surface, it also leaves the matt finish the client had requested.

Quarry Tiled Floor After Restoration Cranleigh Quarry Tiled Floor After Restoration Cranleigh

Other sealers are available that offer a sheen or shiny finish however this client had a couple of dogs whose claws can damage a topical sealer, so an impregnator was the best option.

Quarry Tiled Floor After Restoration Cranleigh

I returned a month later with some reclaimed tiles to fit around the front of the fireplace
For aftercare cleaning I recommended the use of Tile Doctor Neutral Tile Cleaner which is ideal for the regular cleaning of sealed tiles and won’t impact the integrity of the sealer.


Professional Restoration of a Quarry Tiled Floor in Surrey

Cement Screed Covered Quarry Tiled Floor Restoration in Cranleigh Read More »

Wax Covered Victorian Tiled Hallway Floor Renovated in Addlestone

Wax Coated Victorian Tiled Hallway Renovated in Addlestone

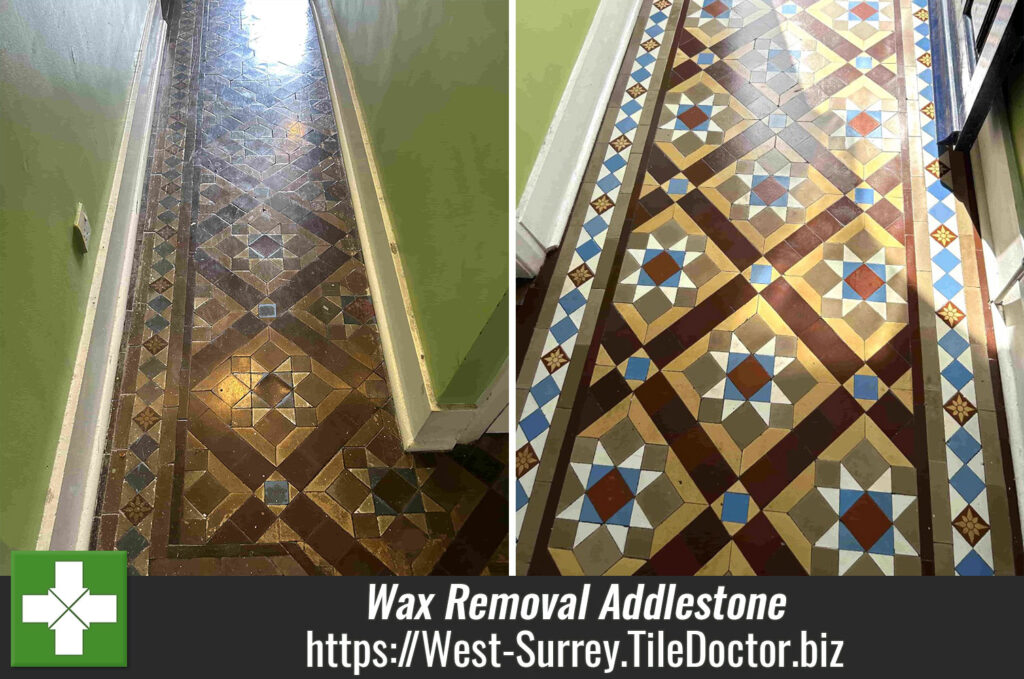
This Victorian tiled hallway floor in Addlestone is a great example of what happens to tiles when you apply wax. I’m sure it looked great for a while but as you can imagine wax is easily scratched and after a few years it darkens and ends up looking like the photos above.

Wax Covered Victorian Tiled Hallway Floor Before Cleaning Addlestone

Having surveyed they hallway I could see the floor was in good physical condition with no tile replacements required. I recommended removing the wax (which would not be an easy job), then deep cleaning the floor and then re-sealing with something more modern and appropriate. I worked out a quote which they were happy with and agreed a date for my return.

Wax Covered Victorian Tiled Hallway Floor Before Cleaning Addlestone Wax Covered Victorian Tiled Hallway Floor Before Cleaning Addlestone

Cleaning a Victorian Tiled Hallway

Working in small section, I applied neat Tile Doctor Remove and Go adding water occasionally so it wouldn’t dry out. This product is a strong alkaline coatings remover that weakens and breaks down the wax so it can be carefully scraped off with a sharp blade. The waste was then removed with a brush and the tiles re-treated with another application. This time applied as a strong dilution and left to soak in for a further ten minutes. Next the product was worked into the tiles using an aggressive carbide brush fitted to a rotary machine to remove what was left of the wax. The waste which was mainly a brown sludge was then extracted with a wet vacuum.

Old Victorian floors don’t have the benefit of a damp proof membrane so there is nothing to prevent moisture coming up through the floor. As a result, nothing should be applied to the tiles that would prevent moisture rising through the tile and evaporating at the surface. If its unable to evaporate it will pool and reach out to the walls potentially leading to rising damp.

Wax is not a breathable covering so I was concerned at this point that moisture had now built up under the floor and with the wax removed it would rise to the surface bringing with it salt deposits. This is called efflorescence and is a common problem with old floors like this one.

To counter this potential issue, I rinsed the floor with fresh water, and I gave it a gentle acid wash with Tile Doctor Grout Clean-up. The acidic formula of this product further cleans up the tiles and neutralises any salts in the process. The solution was then extracted with the wet vacuum and the floor given another rinse to remove any trace of product.

Before leaving, the floor was dried as much as possible with the wet vacuum and left to dry out fully overnight.

Sealing a Victorian Tiled Hallway

The next day I checked the tiles were dry with a moisture meter to ensure they were sufficiently dry to take a sealer. Applying sealer to damp tiles can result in a patchy finish and naturally wanted to avoid that.

Once I was happy the tiles had dried, I applied the first of what would be five coats of Tile Doctor Seal and Go Extra leaving thirty minutes drying time between coats. This product is a water-based sealer so has the advantage of not leaving a smell as it dries. It works really well on Victorian tiles and resulted in a subtle silky finish.

Wax Covered Victorian Tiled Hallway Floor After Renovation Addlestone Wax Covered Victorian Tiled Hallway Floor After Renovation Addlestone

Once complete the floor looked great and my client later texted me the following comment:

“Thank you very much on behalf of myself and the family we appreciate your work that you did today I will get on the link and give a feedback”

Wax Covered Victorian Tiled Hallway Floor After Renovation Addlestone

For the aftercare of Victorian Tiles, I recommend the use of Tile Doctor Neutral Tile Cleaner, it’s a gentle but effective product that being ph neutral won’t damage the sealer which can be the problem with stronger bleach-based products.


Professional Restoration of a Victorian Tiled Hallway in West Surrey

Wax Coated Victorian Tiled Hallway Renovated in Addlestone Read More »

Victorian Tiled Hallway Restoration Camberley Surrey

Express Restoration of a Victorian Tiled Hallway floor in Camberley

A lady from Camberley had been asking me to restore her Victorian tiled hallway for over a year. This was not due to me I should mention, she’s a shift worker so it had been difficult to schedule a time to visit the property and survey the floor, also she didn’t want her husband to be there as the restoration of the floor was to be a surprise.

We did however mange to get that organised and I was able to inspect the floor. It was very dirty and well overdue a deep clean and seal, however, before that could happen it would be necessary to replace several broken tiles. Fortunately, she had a stash in her garden shed that were in reasonable condition which would do the job very nicely.

Happy with my quote the next hurdle was to agree a date for the work, so we had to delay until such time when the husband would be away.

Repairing and Cleaning a Victorian Tiled Hallway in Camberley

When I finally came to do the work, I started by removing all the broken tiles. I used a serrated edge power chisel for this work taking care not to disturb the adjacent tiles. The holes that are left have to be totally cleared out so the new tiles can slot straight in. Annoyingly the replacement tiles were slightly thicker than the existing ones, so I had to dig down a couple of millimetres to ensure a level floor.

Victorian Tiled Hallway During Restoration Camberley Surrey

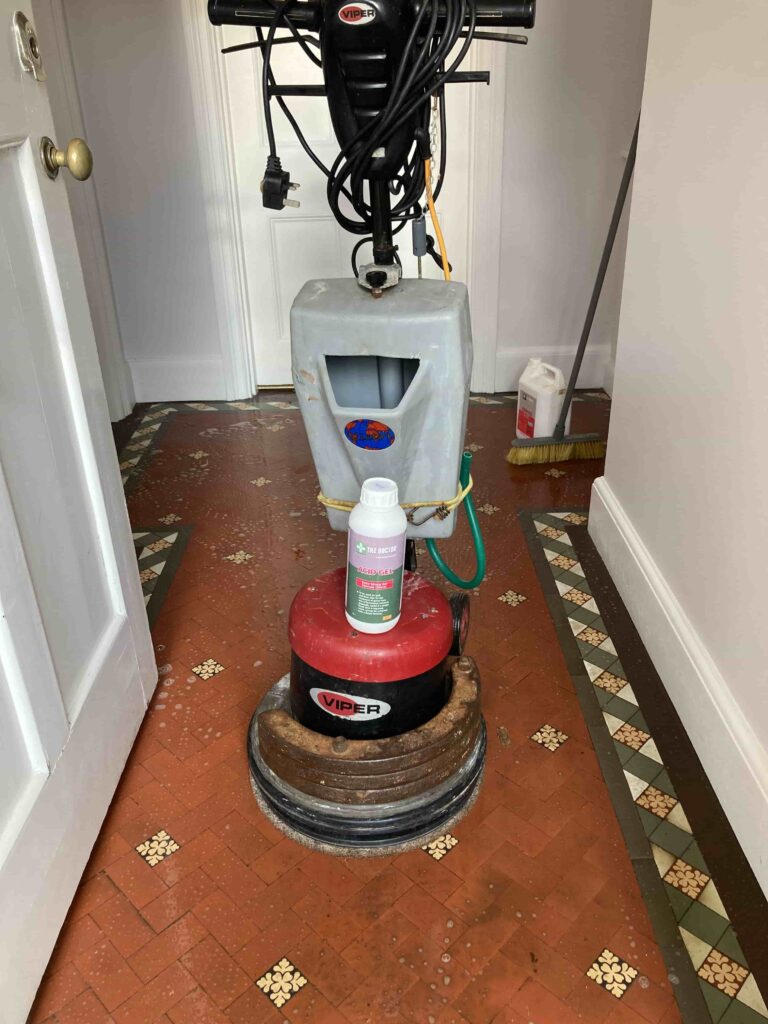
The next step was to clean the floor using Tile Doctor Acid Gel. This is an excellent product that removes ingrained dirt. I brushed it over the floor with a soft brush and left for twenty minutes while I had my lunch in the van. Being a gel it is very easy to control and more importantly you don’t use much water during the process, this means the floor dries quicker and it won’t exacerbate any potential damp issues. This is always a consideration with old Victorian tiled floors as they don’t have a damp proof membrane underneath.

I then sprinkled a covering of water to keep it damp while I introduced a weighted buffer machine to scrub the floor. Attached to the machine was a 100-grit diamond pad. This removes surface dirt leaving a very clean tile. A small amount of water is used to help lubricate the process and all waste was removed with a wet vacuum cleaner.

Sealing a Victorian Tiled Hallway

The work needed to be done in a day, so I used floor fans and a heater to get the floor dry and ready for sealing.

During this time the replacement tiles were slotted into place sticking them down with rapid set adhesive. Another little job that needed doing was to address a gap between the skirting board and the tiles which the client asked my advice over. Always happy to help, I agreed to fill it with transparent mastic.

Once the tiles were dry, I sealed them with Tile Doctor Seal and Go Extra. This gives a sheen finish that enhances colour and last years.

Victorian Tiled Hallway After Restoration Camberley Surrey

Before leaving I took time to discuss aftercare cleaning and recommended the use of Tile Doctor Neutral Tile Cleaner, it is a gentle but effective product that won’t harm the sealer.

I never got to find out what her husband thought of the the floor, but my client was certainly happy with the transformation once I had finished.


Professional Restoration of a Victorian Tiled Hallway in West Surrey

Express Restoration of a Victorian Tiled Hallway floor in Camberley Read More »

Ceramic Bath Tile and Grout Renovation Woking

Leaking Ceramic Tiled Bathroom Renovated in Woking

The tiles in this Ceramic tiled bathroom in Woking are a great example of bad maintenance. I say this as I often get asked to refresh bathrooms and showers regularly and unfortunately this also involves rectifying previous mistakes, bodges and corner cutting.

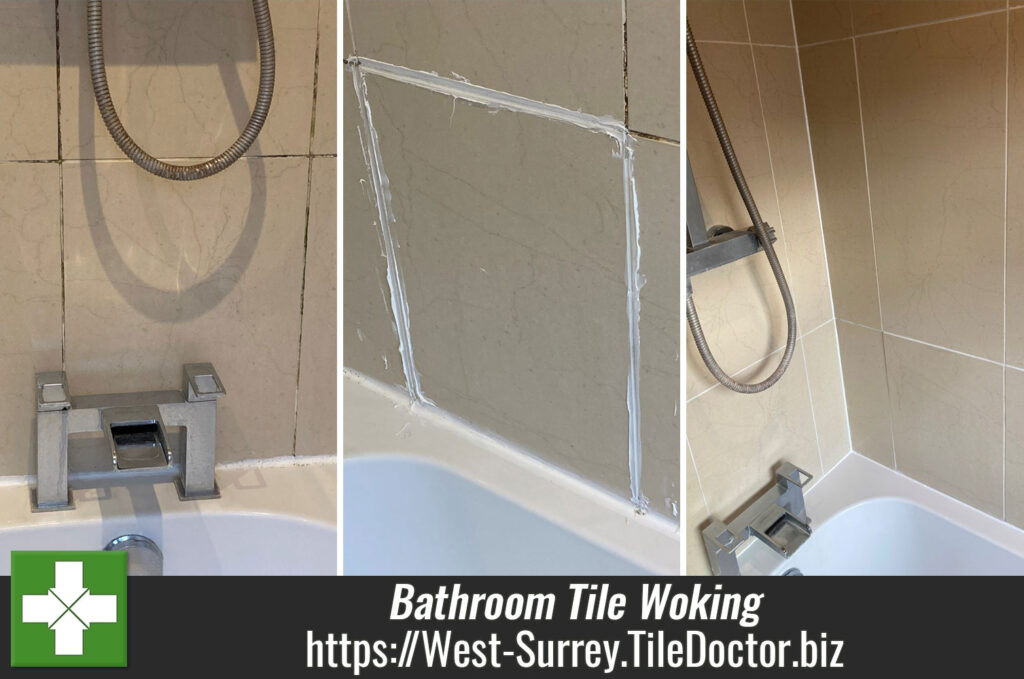
This customer asked me to investigate a water leak in his bathroom that had resulted in a growing brown mark on the kitchen ceiling directly below. While I cannot guarantee 100% with a leak that’s location is not obvious, I can guarantee to resolve cracked grout, holed tiles and missing mastic that may be the cause. Between asking me to quote and deciding to proceed with the work the customer had also asked the opinion of a plumber. He had removed the bath panel and then did something weird with white mastic on a tile. I didn’t ask how much they charged for this utter mess but can only assume he had diagnosed the grouting around this tile as the source of the leak.

Ceramic Bath Tile Before Renovation Woking

I visited the property to review the tile and grout and could see that although the main issue was the poorly installed mastic sealant the grout also needed a deep clean. The best way to deal with the mastic would be to strip it all out and then replace it with new, some of it had attracted mould and turned Black in places anyway. The Ceramic tiles were in good condition and except for a little limescale I was confident they would clean up quite easily.

Ceramic Bath Tile Before Renovation Woking Ceramic Bath Tile Before Renovation Woking

A quote was worked out to renovate the bathroom tiling which included cleaning the Tile and Grout and replacing the mastic sealant. Once complete I was confident this would resolve the leak and leave the bathroom looking like a new installation.

Renovating Ceramic Bathroom Tile and Grout

Arriving at 8:30am I spent the next four hours cutting, picking and scrapping out the abundance of white mastic smeared over the bath, tiles, floor and bath side. It was a fiddley job but all the old mastic had to go to achieve a smooth finish.

I then cleaned the Grout and Tile with Tile Doctor Grout Clean-up. I don’t usually use this product for this type of work but its acid-based and works well on limescale that’s prevalent in the South of England. Some of the grout was falling out so I filled in with some stock I always keep in the van. Once dry I sprayed the grout with an aerosol tile and grout sealer to offer further protection. Once applied the water literally just runs off the tile and grout.

Next, I removed the bath panel to investigate where the leak might be coming from. There was only one obvious location which was in the far corner so I dried it out with a heat gun. Later I would fill the area with mastic to make it watertight.

The plumber had done something odd at the bath end that required a re-build. I suspect they may have used grout as adhesive. This will never work so I took it all apart, cleaned it up and stuck it back together with tile adhesive.

For the next couple of hours, I applied carefully replaced the mastic starting with the two verticals. I used transparent mastic behind the shower door as it’s much more subtle and I think that too much White can often look like go-faster stripes.

Ceramic Bath Tile After Renovation Woking Ceramic Bath Tile After Renovation Woking

As a final courtesy I cleaned the bath and shower glass before presenting the finished bathroom which had been completely transformed by the work. For aftercare cleaning I recommended the use of Tile Doctor Aqua-Pro which is a gentle spray-on shower tile cleaner. Its best to use something like this as more aggressive products can prematurely the erode the sealer I sprayed on earlier.

Ceramic Bath Tile After Renovation Woking


Professional Renovation of a Ceramic Tiled Bathroom in West Surrey

Leaking Ceramic Tiled Bathroom Renovated in Woking Read More »

Victorian Black White Tiled Path Restoration Ewell

Black and White Victorian Tiled Path Restored in Ewell

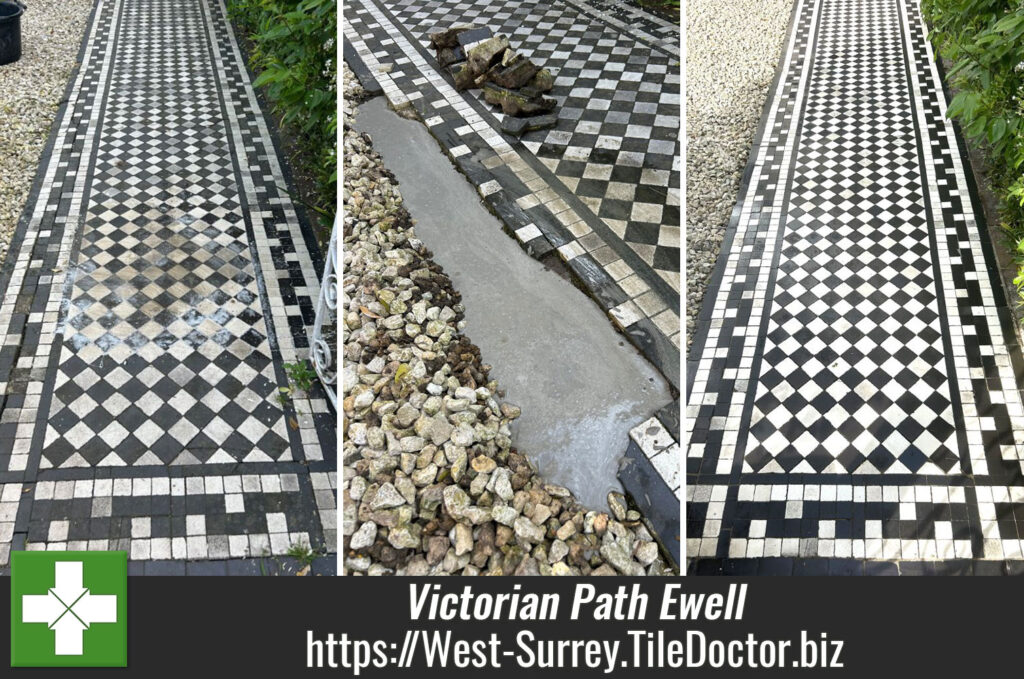
Having seen some of my other work this client contacted me about the restoration of their Victorian tiled path at their property in Ewell . It had various issues that would need resolving and although I was happy to restore it, I advised that it would be best to wait until the weather improved.

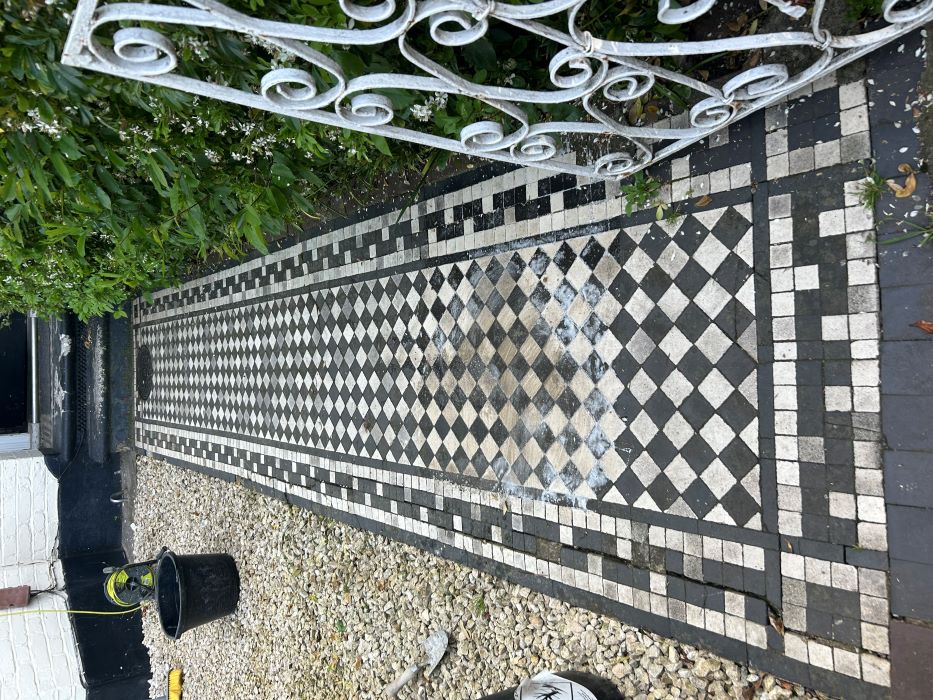
Victorian Black White Tiled Path Before Cleaning Ewell

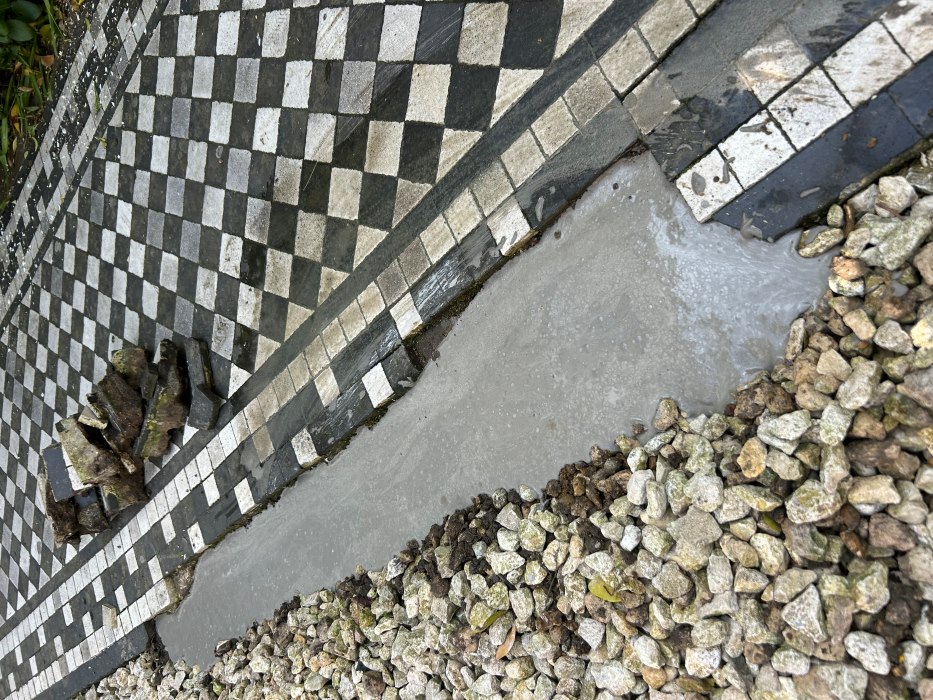
In the meantime, I went over to the property to survey the path, work out a restoration plan and provide a quote for the work. I could see It wasn’t the best of installations, it appeared to be built on mud as some of the edging had become unattached. It was dirty, having never been deep cleaned and about 30 tiles had been broken. All that being said it was definitely restorable so I gave them a price for the work, and they were happy to go ahead.

Cleaning and Repairing a Victorian Tiled Pathway

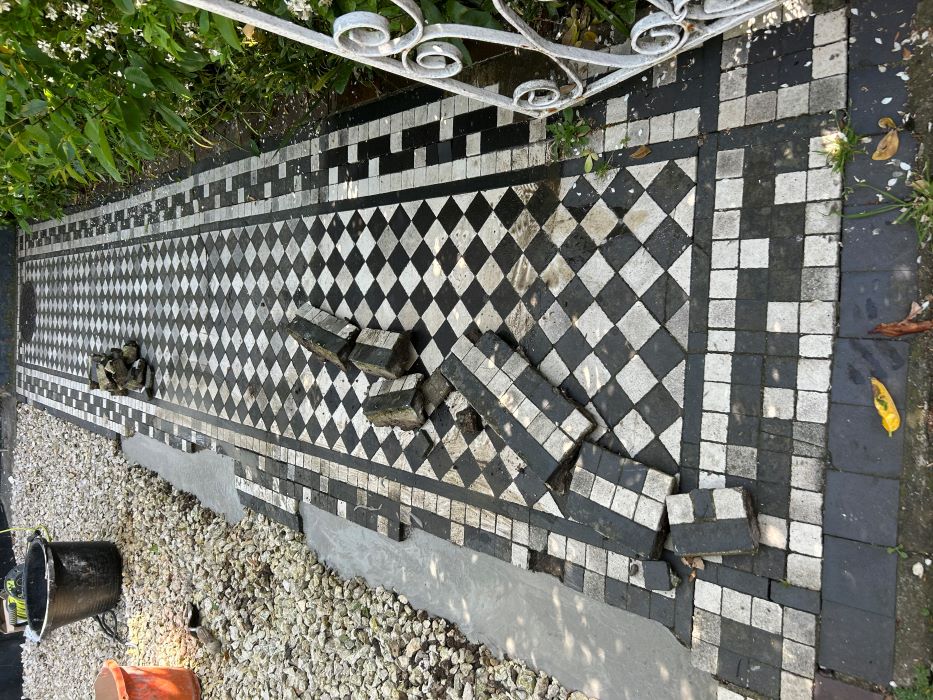
Having found a reasonable weather window, I was able to make a start on the structural issues. First, I needed to fully remove the detached edging which proved more difficult than expected resulting in the need to use a crowbar. With the edging removed the base was cleaned up and backfilled with self-levelling compound which takes three to four hours to set.

It was a warm day and I had plenty of other work to do while I waited, including removing the broken tiles with a power chisel being careful not to chip the surrounding ones. The detached edging had to be cleaned up with a tile cutter. I also prepped the tiles over the remaining pathway by soaking them in Tile Doctor Patio Cleaner. This would gradually seep into the tiles and remove any dirt.

Victorian Black White Tiled Path During Repair Ewell

After lunch the tiling was hand scrubbing with a strong dilution of Tile Doctor Pro-Clean. This took some time as they were small and fiddly. Once done the tiles were rinsed with water.

Victorian Black White Tiled Path During Repair Ewell

Once the self-levelling compound had set, I was able to start rebuilding the path using the original tiles setting them back in place to match the original pattern using a quick setting adhesive.

Sealing a Victorian Tiled Pathway

Time was marching on and eventually the client’s children would start returning home from school, so I was keen to get the path completed before they arrived. Fortunately, it was a warm day and the tiles had dried so I moved onto applying a protective sealer.

For this I used Tile Doctor X-Tra Seal which is an oil-based product rated for external use, the oil also helps to restore colour to the Black tiles. Before leaving I taped up the area, to ensure nobody walked on the tiles whilst the sealer was drying.

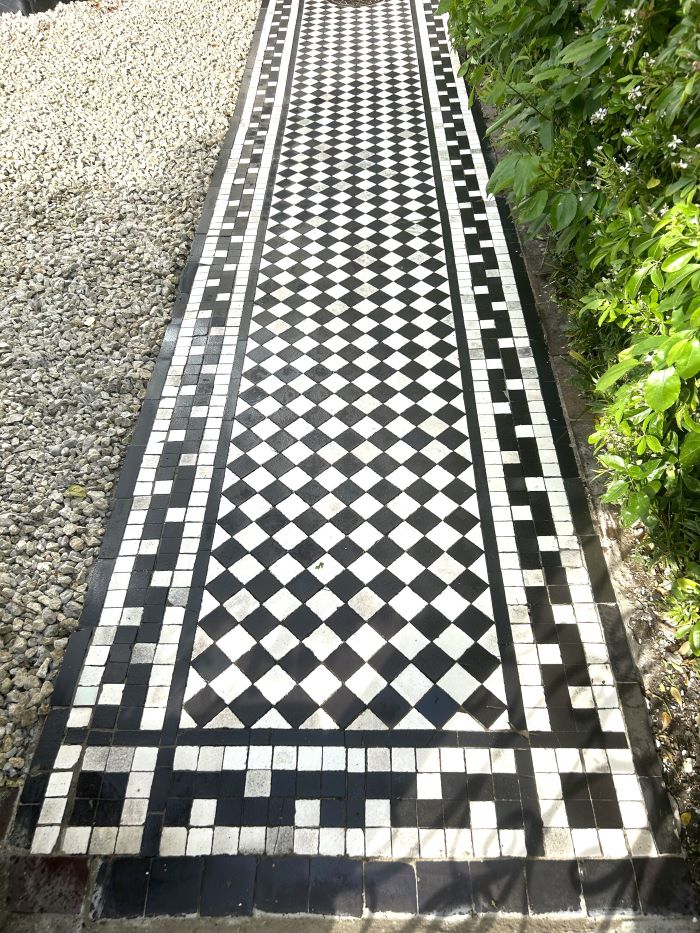
Victorian Black White Tiled Path After Restoration Ewell

My client was very happy with the work I had carried out, the pathway now looked complete and provided a much more inviting entrance to the property. The new sealer would ensure dirt remains on the surface where it can be easily cleaned away for which I recommended using Tile Doctor Neutral Tile Cleaner.


Professional Restoration of a Victorian Tiled Pathway in West Surrey

Black and White Victorian Tiled Path Restored in Ewell Read More »

Textured Ceramic Tiled Floor and Grout Cleaning Epsom

Textured Ceramic Tile and Grout Deep Cleaned in an Epsom Kitchen

I was asked to clean this ceramic tiled kitchen floor at a property in Epsom that was very dirty and needed a deep clean. As usual I called in on the property to survey the floor and provide a quote for its renovation.

Upon initial inspection I thought the tiles were actually limestone, so I did a quick test to establish that they were definitely ceramic. These were a textured ceramic tile which often gets recommended for wet areas such as kitchens due to its non-slip properties, the textured surface of the tile however does cause it to trap dirt.

Ceramic Tiled Kitchen Floor Before Cleaning Epsom

As well as the build-up of dirt on the tiles my client also wanted the grout cleaning, which was filthy, also some of the grout had holes in it and these had filled with dirt.

Ceramic Tiled Kitchen Floor During Cleaning Epsom

Cleaning a Ceramic Tiled Kitchen

To get the grout clean I applied a strong alkaline cleaner called Tile Doctor Remove & Go and worked it into the grout lines using a wire brush. This product is designed to remove all sorts of coatings and grime so just the thing for a dirty grout. The floor was then rinsed with water and the soiling vacuumed away with a wet vacuum.

Then as we were unable to move the furniture out of the kitchen, I had to divide the floor into three areas and scrub the Ceramic tiles with more Remove & Go. This was worked in with a rotary floor machine fitted with an aggressive carbide brush which gets deep into the annoying little holes and textured tile. Extra weights were applied to the machine to improve traction with the tile. After each section was scrubbed, the floor was rinsed and extracted as before.

Ceramic Tiled Kitchen Floor During Cleaning Epsom

Sealing a Ceramic Tiled Kitchen

Finally, I gave the whole kitchen a rinse with warm water to remove any trace of Tile Doctor Remove & Go and dried the floor as much as possible with the wet vacuum.

Ceramic tiles won’t take a sealer as they are already sealed within the manufacturing process. Therefore, once I was happy the floor was as clean as it could be the work was done.

The work was completed in less than a day and my clients were very happy with the transformation. I think you will agree from the photographs the Ceramic tile and Grout look so much cleaner.

Ceramic Tiled Kitchen Floor After Cleaning Epsom


Professional Restoration of Textured Ceramic Tile and Grout in West Surrey

Textured Ceramic Tile and Grout Deep Cleaned in an Epsom Kitchen Read More »

Victorian Tiled 3D Geometric Patterned Floor Renovation Guildford

3D Patterned Geometric Victorian Tiled Hallway Floor Renovated in Guildford

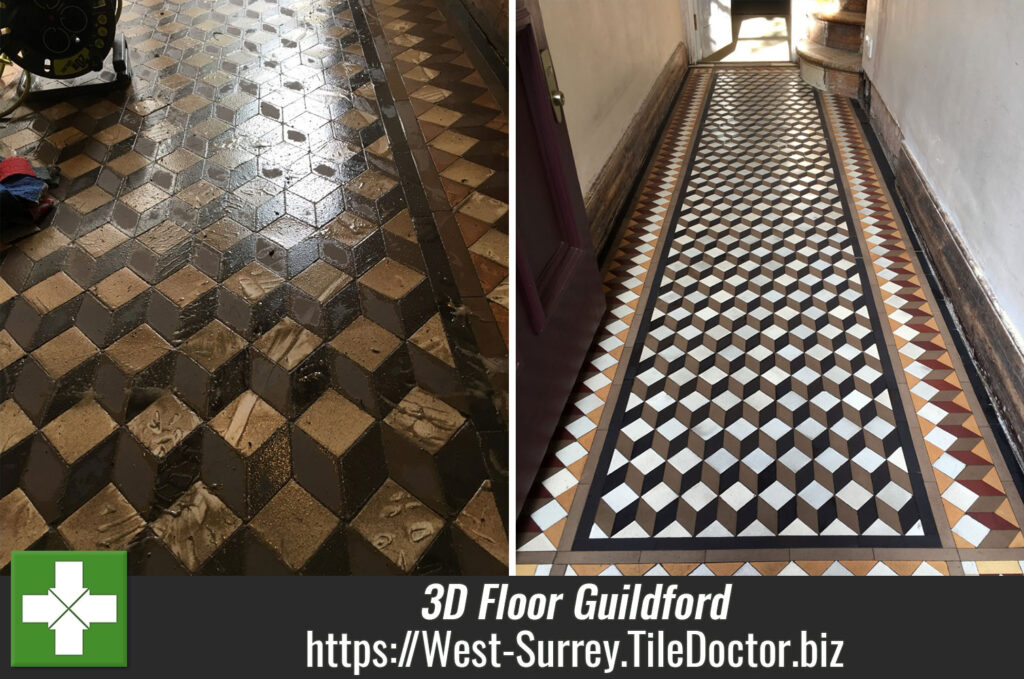
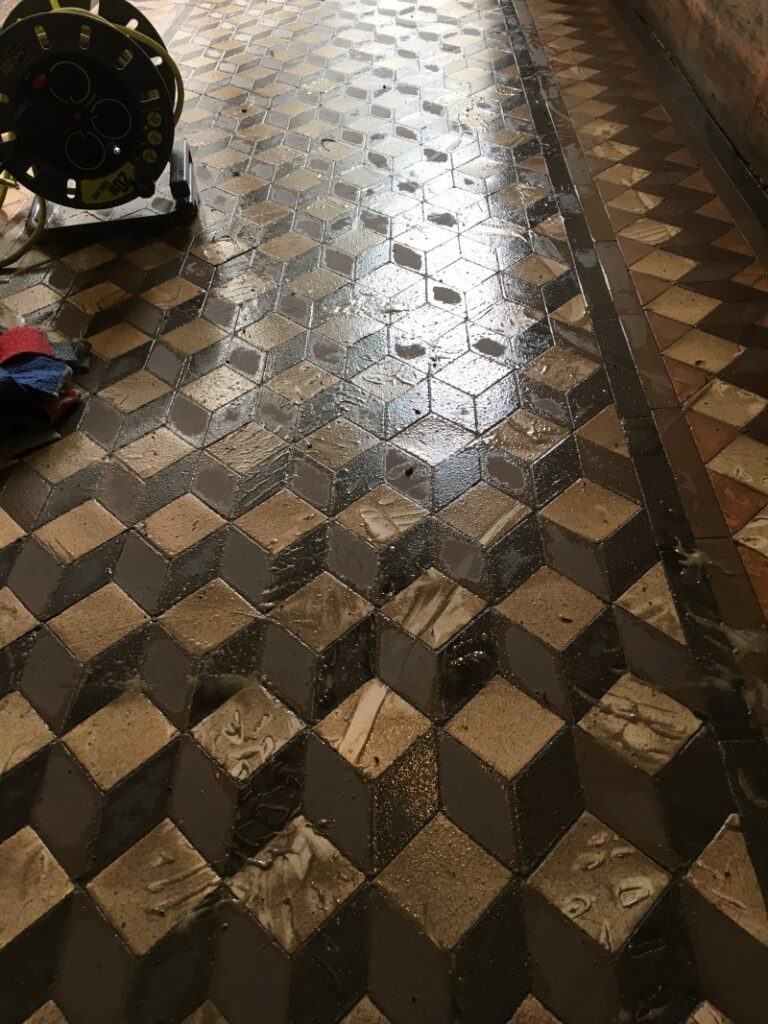
I’ve cleaned many interesting geometric Victorian tiled floors in my career but none so eye catching as this example at a property in Guildford which featured a beautiful 3D pattern. My client had got in touch to see if I could restore the floor back to its original, it was currently looking quite grubby but thankfully appeared to be physically intact with no loose or broken tiles.

I was confident the floor would look great with a bit of love and care and all it needed was a deep clean to extract all the ingrained dirt and then sealing. I provided a quote for the work and arranged a convenient time to complete the work for them.

Cleaning a Victorian Tiled Mosaic Hallway Floor

It was quite soiled to start with, so I gently sprayed Tile Doctor Pro-Clean over all the tiles, leaving the product to dwell for twenty minutes whilst keeping the tiles moist. Whilst this has happening I setup a weighted buffing machine fitted with a coarse 100-grit diamond pad. I’m able to attach three heavy iron bars to the front of this machine to add more heft to the machine; increasing the weight improves downward pressure and traction to equal a better result.

Victorian Tiled 3D Geometric Patterned Floor During Cleaning Guildford

Applied with water for lubrication the pad is run over each of the tiles in turn. This is quite an aggressive process that cuts a thin layer from the tile which is absorbed into the water turning it into a slurry and ensuring no dust is generated. Marching up and down, slowly from front to rear I slowly deep cleaned the tiles. Once I was satisfied, they were as clean as they could possible be all the waste with a wet vacuum.

The floor was then washed with hot water and then extracted with the wet vacuum again, this was done a couple of times to remove any remaining soiling. Hot water is preferable for this as it evaporates quickly.

The buffing machine doesn’t reach into the corners, so to make sure they were not missed I used handheld diamond blocks; again, rinsing the soil created away with water and extracting with the wet vacuum afterwards.

The floor was then left to dry out overnight and I asked the owners to try and avoid walking on it.

Sealing a Victorian Tiled Hallway Floor

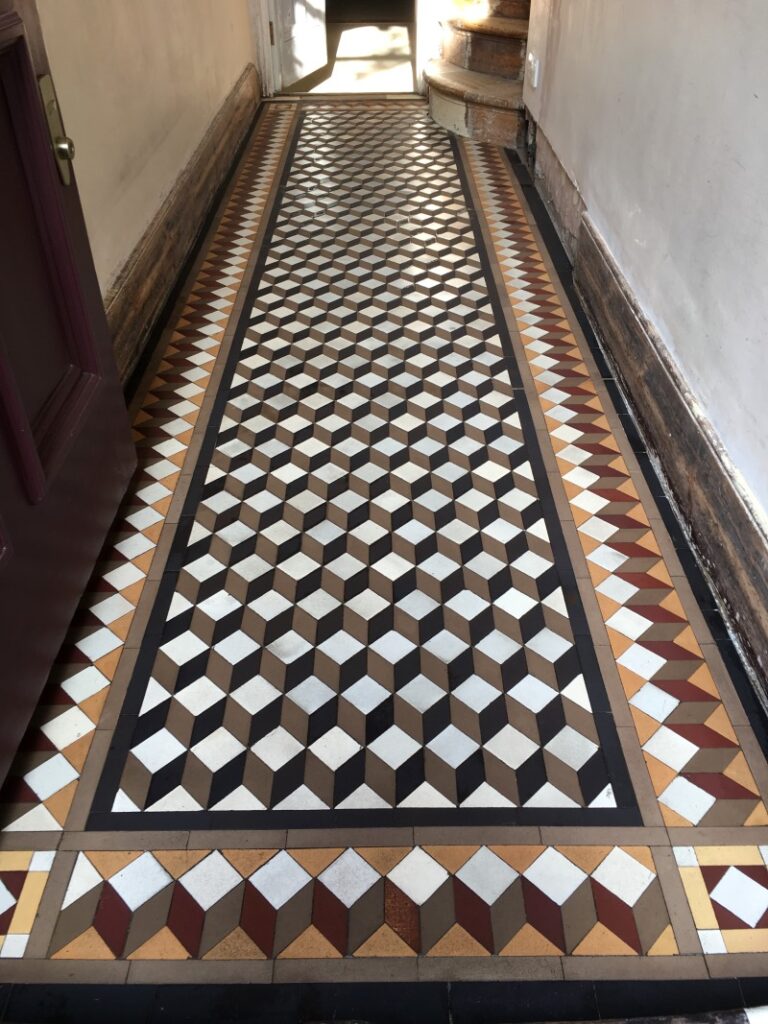
Having discussed the clients’ needs and expectations of the final finish earlier it was clear they wanted the floor to have a subtle shine to it. They had said that a matte finish was a little boring but they thought a shiny finish was a little too much, so we opted for a sheen finish. To provide this effect I had recommended Tile Doctor Seal and Go Extra which is a fine compromise that offers a subtle shine and is tough wearing. It’s actually my personal favourite that I use on many types of tiled floor.

So, the following day I applied several coats until I was satisfied the finish was as hoped. The floor looked great and created a stunning entrance to the property. This was now more in keeping with the rest of the original features in the period property.

Victorian Tiled 3D Geometric Patterned Floor After Cleaning Sealing Guildford

My client was over the moon with the work and before leaving I took time to discuss aftercare. I recommended the use of Tile Doctor Neutral Tile Cleaner for regular cleaning; this product won’t impact the newly applied sealer. It’s also mild enough to use every day which is always a possibility in high traffic areas such as a hallway.


Professional Restoration of a Victorian Tiled Hallway in West Surrey

3D Patterned Geometric Victorian Tiled Hallway Floor Renovated in Guildford Read More »

Slate Floor Tile and Grout Renovation Farnham Utility

Neglected Slate Tiled Utility Room Floor Cleaned and Sealed in Farnham

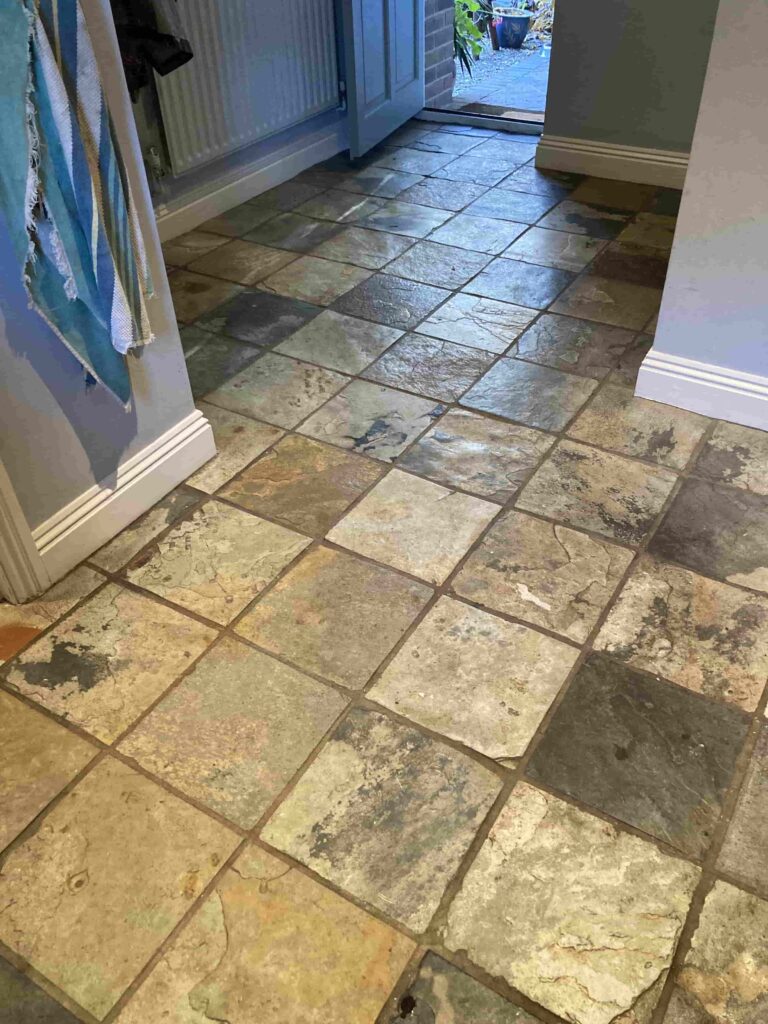
The Slate floor in this room at a property in Farnham was in quite a state. “Heavily soiled” is a polite description. The floor was situated in the utility room and hadn’t been cleaned properly since the house was constructed ten years ago.

The room was mainly used as a dumping ground for walking boots and was also where the dog slept. Being out of sight it was therefore out of mind but eventually they decided it was time to do something about it and reached out to Tile Doctor for help.

Slate Floor Before Cleaning Farnham Kitchen Slate Floor Before Cleaning Farnham Kitchen

I visited the property, surveyed the tiles and was confident the floor could be restored! From my survey I was also able to provide a quote for a deep clean and seal of the Slate tiles which was accepted and a date set for my return.

Cleaning a Slate Tiled Utility Room Floor

I cleaned the grout first with Tile Doctor Pro-Clean, this was done using the usual method of applying it directly to the grout and leaving it to soak in for ten minutes before using an abrasive wire brush to scrub the grout clean. The floor was then rinsed then the waste extracted with a wet vacuum. This was repeated until I was happy the grout was as clean as possible.

Slate Floor During Cleaning Farnham Kitchen Slate Floor During Cleaning Farnham Kitchen

Next up, I sprayed a strong dilution of more Tile Doctor Pro Clean over the tiles and left it to dwell this time for twenty minutes. The surface gradually turned yellow indicating that the product was working. Then using a tough carbide brush attached to a handheld polisher I slowly cleaned the tiles. Slate has a riven surface with lots of nooks and crannies that the brush can get into. All the waste soil was removed again with a wet vacuum and I then neutralised the floor rinsing it twice with hot water.

Slate Floor During Cleaning Farnham Kitchen Slate Floor During Cleaning Farnham Kitchen

Sealing a Slate Tiled Utility Room Floor

For the next hour or so I dried the floor with a heater and while waiting I cleaned the small brick patio by the front door which made the entrance look a lot more inviting!

Once the floor looked dry, I tested with the damp meter to make sure it was ready to seal. Satisfied the levels were good, I applied three coats of Tile Doctor Seal and Go Extra. This is a moder tough sealer that’s ideal for busy floors that leaves an attractive sheen finish.

Once dry the floor looked so much clear and appealing, much to the relief of my client who was very happy with the work we carried out- and so was the dog!

Slate Floor During Sealing Farnham Kitchen Slate Floor During Sealing Farnham Kitchen

For aftercare I recommended using Tile Doctor Neutral Cleaner which is a Neutral pH tile and grout cleaner and will help ensure the floor stays in great condition for many years to come. It always worth readying the label of a Tile Cleaning product to check its suitable for use on a sealed floor as most household products are usually acidic and can trip a sealant off a floor with repeated use.


Professional Restoration of a Slate Tiled Utility Room in West Surrey

Neglected Slate Tiled Utility Room Floor Cleaned and Sealed in Farnham Read More »

Limestone Kitchen Floor Cleaning and Polishing Weybridge

Large Limestone Tiled Floor Stripped and Resealed in Weybridge

The photographs below were taken at a property in Weybridge where the owner had Limestone tiles installed throughout the Kitchen and adjacent dining room. Like any stone floor the sealer and appearance will degrade with use and in this case the tiles and especially the grout had become darker with ingrained dirt. The owners had decided it was time to the floor professionally cleaned and asked me to quote for the work.

Limestone is a beautiful stone that cleans up really well but to get the best out of it needs to be polished with burnishing pads using heavy equipment, something the tile shop salesman usually forgets to mention.

Limestone Kitchen Floor Before Cleaning Weybridge

Having surveyed the floor I worked out a renovation plan which included tile and grout cleaning, stone polishing and finally sealing to protect it going forward. Happy with my quote we set a date for the work to begin.

Resealing a Polished Limestone Floor

My first job was to protect the kitchen cabinets from splashing with a sheet of decorator’s plastic about a foot from the ground upwards. I also like to apply a thin line of transparent mastic at the base of the cabinets where they meet the tile as this is usually a place where unwanted water can find its way in.

Once the kitchen woodwork was protected, I set about deep cleaning the grout. To do this I run a dilution of Tile Doctor Pro-Clean along the grout lines then leave it to dwell for five minutes and then scrubbed by hand using a wire brush until clean. All the waste is then rinsed off and extracted with a wet vacuum.

With the grout now clean and the soil removed I set up my rotary floor cleaning machine ready to burnish the stone tile and restore the finish with a set of diamond encrusted burnishing pads.

The first pad in the set to be applied is a coarse 400 grit pad that is designed to open the pores of the stone allowing dirt to be flushed out and removes existing sealers in the process. Water is used for lubrication and the during the following hours the process was repeated with the medium 800 grit and fine 1500 grit pads which gradually close the pores, buildup the polish and return the shine. This is a wet process which generates a slurry which is removed with after each pad with the wet vacuum.

Once the whole floor had been burnished it was given a final rinse and dried as much as possible with the wet vacuum. It was then left to fully dry off fully overnight.

Sealing Limestone Tiles

Returning the next day, I tested the floor was dry with a damp meter which confirmed the floor ready for sealing. The customer wanted a natural look to the floor so we chose to apply Tile Doctor Ultra-Seal which adds almost invisible protection. This sealer is an impregnator which soaks into the pores of the stone preventing dirt from becoming ingrained and keeping it on the surface where it can be easily removed. Two coats were applied and this should keep the floor protected for many years to come.

Limestone Kitchen Floor After Cleaning and Polishing Weybridge

Once complete I advised the owner to stay off the floor for an hour or so and then they can return the furniture. For aftercare cleaning I recommend Tile Doctor Stone Soap which is a gentle but effective cleaner that will keep the floor clean whilst maintaining the patina and without harming the sealer.


Stripping and Resealing a Polished Limestone Floor in West Surrey

Large Limestone Tiled Floor Stripped and Resealed in Weybridge Read More »

Adhesive Stained Ceramic Tiled Kitchen Floor Renovated Ripley

Renovating a Classic Ceramic Tiled Kitchen Stained with Adhesive in Ripley

This 1940’s Black and White Ceramic tiled floor at a property in the Surrey village of Ripley was covered in adhesive and the owner needed our help in cleaning them up. Originally, they had been covered in hideous blue tiles which the customer decided to remove to see what was underneath.

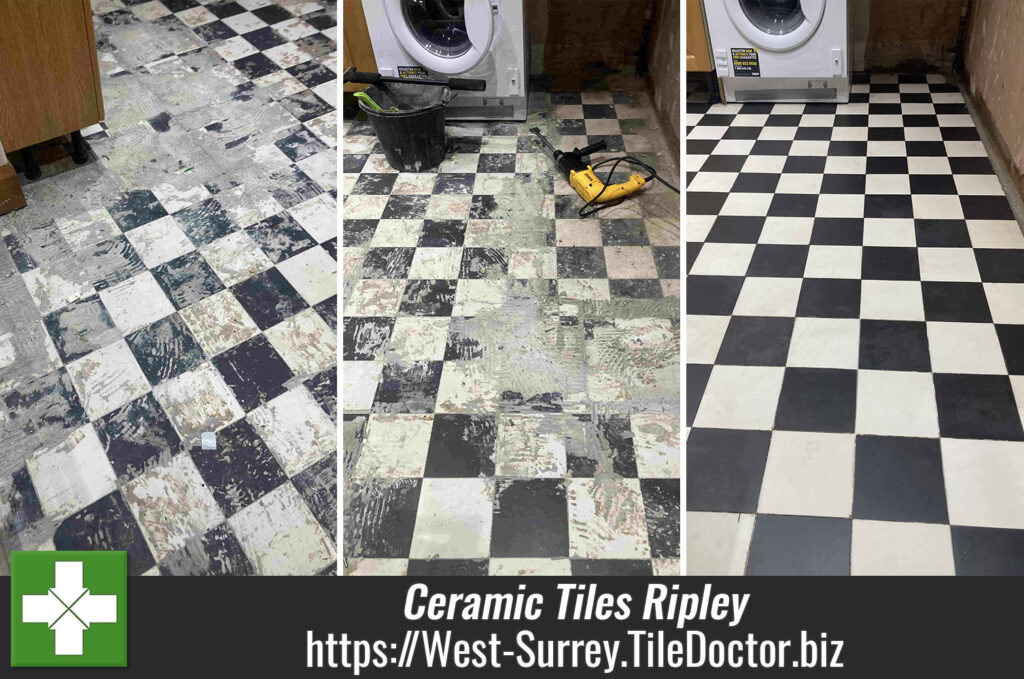
Adhesive Stained Ceramic Tiled Kitchen Floor Before Cleaning Ripley

They started pulling them up only to uncover a classic chessboard pattern ceramic tiled floor underneath. The blue tiles came up quite easily however the tile adhesive that was left underneath had heavily stained them and proved much too difficult to remove. Overwhelmed with the size of the task now faced and unsure how to renovate the ceramic tiles a decision was made to ask for professional help. They contacted Tile Doctor to get a quote.

I popped over to the house to have a look at the job and estimated it would only take around a day to complete the work, which would be a bit of a manual task to remove the remnants of the adhesive. They were happy to accept my quote and pleased that I was confident the floor could be restored.

Removing Adhesive from a Ceramic Tiled Kitchen Floor

Donning safety glasses and ear defenders my approach was to carefully remove the bulk of the adhesive with a power chisel. It took several hours to remove most of it and the rest I scraped off with sharp blades leaving some residue and dirt.

Adhesive Stained Ceramic Tiled Kitchen Floor During Cleaning Ripley

To deal with the remaining adhesive I covered the tiles with a strong dilution of Tile Doctor Remove and Go and left it to soak in. I then brought in a weighted buffer fitted with a coarse diamond pad and ran it over the tiles. This removed all the remaining adhesive and lifted out the dirt.

The resultant slurry was then rinsed off and extracted with a wet vacuum. The floor was then thoroughly rinsed with warm water then dried. Before finishing I cleaned up around the edges with a handheld diamond block.

Generally ceramic tiles don’t need sealing as they are sealed within the factory process. So, once all the adhesive was gone, the job was finished.

Adhesive Stained Ceramic Tiled Kitchen Floor After Cleaning Ripley

The floor was transformed by the work, and my customer was very happy with the finish. They were pleased to see the nasty blue tiles gone and very happy to see the classic original floor restored.

Little maintenance is required for a floor like this, normal regular mopping will suffice. They can use Tile Doctor Neutral Tile Cleaner for this, it has a minty fresh fragrance and is mild enough to be used daily, keeping the floor in great condition.

Adhesive Stained Ceramic Tiled Kitchen Floor After Cleaning Ripley


Professional Restoration of a Ceramic Tiled Kitchen Floor in Surrey

Renovating a Classic Ceramic Tiled Kitchen Stained with Adhesive in Ripley Read More »

Travertine Kitchen Tile Renovation Cobham

Travertine Floor Tiles Cleaned and Sealed in a Cobham Kitchen

The property in Cobham had a large Travertine tiled floor in the kitchen, which was not looking its best, and was now in need of a deep clean and re-seal to bring it back to life.

Travertine Kitchen Tile Before Cleaning Cobham

Travertine is a beautiful, natural stone that needs some regular attention to keep it looking at its best. Like any natural stone its vulnerable to dirt becoming ingrained in the pores and to prevent this it needs to be sealed. A sealer keeps the dirt on the surface where it can be easily removed through regular cleaning, however a sealer will usually only last for three to four years depending on how the floor is used and maintained.

Another issue specific to Travertine is its acid sensitivity which comes from the calcium carbonate that it’s formed from. You need to be careful not to use acidic products on the stone as this can cause it to dissolve over time leading to pitts and potentially holes forming in the surface. If the pitts are not filled they will attract dirt easily making the floor hard to keep clean.

Travertine Kitchen Tile Before Cleaning Cobham Travertine Kitchen Tile Before Cleaning Cobham

I visited the property to survey the floor and gave the client a price for its renovation which would take two days. Whilst there I also carried out a small cleaning test to ascertain the best cleaning method and to demonstrate what could be achieved. They were happy to go ahead with the quote so we agreed a suitable date for the work to start.

Cleaning a Travertine Tiled Kitchen Floor

On day one I started by wrapping the kitchen cabinets in decorator’s plastic to protected them and applied a thin line of mastic where the tiles meet the floor. This is done to keep unwanted water out during the cleaning process.

The travertine floor had been laid using different sizes of tile in an irregular pattern which resulted in a lot of grout lines that needed cleaning. I find the best way to do this is with Tile Doctor Pro-Clean, scrubbing it in by hand with a wire brush, its hard work but its effective although it did take up most of the morning. Afterwards the grout was rinsed with water and the waste removed with a wet vacuum.

After lunch, I turned my attention to the tiles which needed to be burnished using a series of diamond pads fitted to a buffing machine fitted with extra weight to increase traction. Work started with the application of a coarse 400-grit pad which is run over each tile three to four times using only water for lubrication. The floor was then rinsed and the soiling extracted before moving onto the next pad in the series which is 800-grit and then onto 1500-grit.

This wet process pores in the stone allowing the dirt to be flushed out and then slowly closes them again leaving the floor clean and ready for sealing. By the end of day one all the Stone and Grout was clean and was left to dry out overnight.

Sealing a Travertine Tiled Kitchen Floor

The following day I checked the moisture levels of the floor with a damp meter to make sure it was dry and ready to accept a sealer. The results were good, so I set about applying the first of what would be two coats of Tile Doctor Ultra-Seal. This sealer is an impregnator that soaks into the pores of the stone preventing dirt from becoming ingrained there, it doesn’t contain a colour enhancer so leaves a very natural finish.

Travertine Kitchen Tile After Cleaning Sealing Cobham

The floor was then once polished with the final burnishing pad in the set which is a very fine 3000-grit, this last pad removes any excess sealer and leaves a nice subtle appealing shine on the floor. The client was very happy with the finish we had achieved, the floor now has a lovely sheen and should stay looking good for some time.

Travertine Kitchen Tile After Cleaning Sealing Cobham

For aftercare cleaning I recommended the use of Tile Doctor Stone Soap which is ideal for sealed stone floors. Not only is it pH neutral so its safe to use on sealed travertine but it also includes a patina enhancer that will help maintain the shine.


Professional Renovation of a Travertine Tiled Kitchen Floor in West Surrey

Travertine Floor Tiles Cleaned and Sealed in a Cobham Kitchen Read More »

Victorian Tiled Hallway Floor Cleaning Sealing Farnham

Victorian Tiled Hallway Deep Cleaned and Sealed in Farnham

This client from Farnham had been in touch regarding their Victorian tiled hallway which needed deep cleaning and re-sealing. As usual I paid them a visit, surveyed the floor, and provided a quote for renovating it which they were happy to accept, there were no broken tiles to remove and replace so it was a straightforward clean and seal. It was a lovely floor which had been laid in a herringbone pattern with lovely black and gold floral inserts and a beautiful green border.

Whilst discussing dates it became apparent that they were planning on having some decorating done in the same area, so I recommended they book me in for a date after the decorators had left. It’s always good practice to get the floor cleaned after your last tradesperson has left, decorators especially have a habit of not covering floors properly.

Cleaning a Victorian Tiled Hallway Floor

I turned up on the agreed date and was pleasantly surprised to see there were only a few paint splashes on the floor so I wondered if my comments to the owner must have been passed onto the decorators. The hallway led onto several rooms many of which had new carpets, so with my own advice in mind I made sure to cover them with a plastic sheet before starting work.

Victorian Tiled Hallway Floor During Cleaning Farnham Victorian Tiled Hallway Floor During Cleaning Farnham

The first job was to remove any existing sealer from the tiles using Tile Doctor Remove and Go, this is brushed onto the tiles, left for ten to fifteen minutes, and then scrubbed in with a black pad fitted to a rotary floor machine running at slow speed. The resultant slurry was then rinsed off and extracted with a wet vacuum. It was a small floor so I planned to seal the floor later that day and so I only used a minimal amount of water and used the wet vacuum to remove as much moisture as possible.

Victorian Tiled Hallway Floor During Cleaning Farnham Victorian Tiled Hallway Floor During Cleaning Farnham

Next, I gave the floor an acid rinse by carefully smearing Tile Doctor Acid Gel over the tiled surface. Leaving it to dwell for half an hour yet keeping it moist with water. I then introduced my weighted burnishing machine. Circling the floor, it slightly cuts the tile creating a slurry of tile and dirt. The pads can struggle to get right into the corners so once that was done, I scooted around the edges hand cleaning them with a scrubbing brush and ensuring any paint splashes the decorators had left were removed.

All the waste was extracted, and the floor given a rinse with hot water. I left a small heater on them while I had my lunch. As the gel doesn’t penetrate the tiles like fluid it didn’t take long for the floor to dry sufficiently enough for sealing.

Sealing a Victorian Tiled Hallway Floor

Finally, I applied three coats of Tile Doctor Seal and Go Extra. This is a hard-wearing colour enhancing sealer. Each coat takes twenty to thirty minutes to dry. After the final coat I ask that it’s not walked on for a good hour.

Victorian Tiled Hallway Floor After Cleaning Sealing Farnham

Once done to the floor looked really clean and the new sealer should keep it that way for many years to come. Before leaving I took time to discuss maintenance cleaning and of course get their feedback which they gladly gave and is copied below:

“Great service. Rupert was professional, informative, friendly clean worker who made a great job of cleaning our original Victorian tiled floor. Tile Doctor were recommended to me by a friend, and I would definitely recommend them and Rupert for tile cleaning.”

For the aftercare of Victorian tiled floors, I recommended the use of Tile Doctor Neutral Tile Cleaner which due to its neutral ph makes it idea for the regular cleaning of sealed tiles. Many of the products you will find in supermarkets are simply too strong and will prematurely erode the sealer on a tile and so best avoided.


Professional Restoration of a Victorian Tiled Hallway in West Surrey

Victorian Tiled Hallway Deep Cleaned and Sealed in Farnham Read More »
Ceramic Tile and Grout Cleaned in Woking

Ceramic Tile and Grout Cleaning in a Woking Kitchen

I took the photographs below of a Ceramic Tiled kitchen floor at a property in Woking. Two adults, two children and a dog so a lot of foot fall coming in and out of the patio doors that opened to the garden. Ceramic tiles are an ideal choice for a busy floor like this however we all know that children and animals don’t tend to wipe their feet and so they were struggling to keep the tile and grout clean.

Ceramic Tiled Kitchen Floor Before Cleaning Woking Ceramic Tiled Kitchen Floor Before Cleaning Woking

Ceramic tiles are usually very easy to keep clean however grout has a rough cementitious surface and so easily attracts dirt turning it black. Also, we find that dirt is washed into the grout line during cleaning which doesn’t help.

Happy to assist I quoted for deep cleaning the tile and grout with a weighted mechanical floor buffer which would scrub the floor clean again, the work would also involve manually cleaning the grout as the pads can struggle to reach into the recesses of the grout line.

Deep Cleaning Kitchen Ceramic Tile and Grout

On arrival I ran a thin line of transparent mastic along the kickboards where they meet the tiles. Unwanted water can be destructive and cause the boards to warp. I leave the mastic in place once I’ve finished as it looks subtle and offers added protection.

With that done I sprayed the tiles with and 1:5 dilution of Tile Doctor Pro-Clean and left this to soak into the floor for twenty minutes. The Pro-Clean breaks down the dirt turning it a shade of yellow. While this was happening, I retrieved a weighted floor polisher from the van. The iron bars I use as weights improves traction to make the clean more.

Once the Pro-Clean had soaked in I went around the grout lines giving them a good scrub with more Pro-Clean and a wire brush. I’m yet to find a machine that does this as effectively as hand brushing so for best results I get on my hands and knees and give it a good scrub. You can see from the pictures the dirt being released.

Ceramic Tiled Kitchen Floor During Grout Cleaning Woking

Once the grout was done the buffing machine was brought in fitted with a black scrubbing pad that won’t scratch the tiles but does a job of releasing the dirt. All the dirt is vacuumed up with a wet vax. Then just to be sure I neutralise with fresh, warm water. This is also removed leaving the tiles to dry.

Ceramic Tiled Kitchen Floor During Cleaning Woking

Once dry the floor was inspected and any stubborn areas spot treated until both I and the customer were satisfied the tile and grout was as clean as it could be.

Normally after cleaning the final step would be to seal the tiles, however Ceramic tiles won’t take a sealer so once the cleaning was done the job was completed, and in less than a day.

Ceramic Tiled Kitchen Floor After Cleaning Woking Ceramic Tiled Kitchen Floor After Cleaning Woking


Professional Clean of a Ceramic Tiled Kitchen in West Surrey

Ceramic Tile and Grout Cleaning in a Woking Kitchen Read More »

Scroll to Top