Renovating a Riven Slate Tiled Floor in Guildford
A former client from Guildford asked if we could renovate their Slate kitchen floor tiles which were not looking their best. I’d previously completed some minor works in a bathroom, and we had discussed the floor at the time. So, having already seen the tiles I knew it just needed a deep clean and seal and was able to work out a quote quite quickly without having to schedule a survey.

Slate like any natural stone needs to be sealed to prevent dirt from becoming ingrained, the sealer keeps the dirt on the surface where it can be easily cleaned away. Without this barrier in place, it becomes very difficult to clean effectively and absorbs dirt. Once a stone floor starts to become ingrained with dirt it becomes difficult to keep clean.
Happy with the quote, a date was scheduled to carry out the work.
Cleaning a Slate Tiled Kitchen
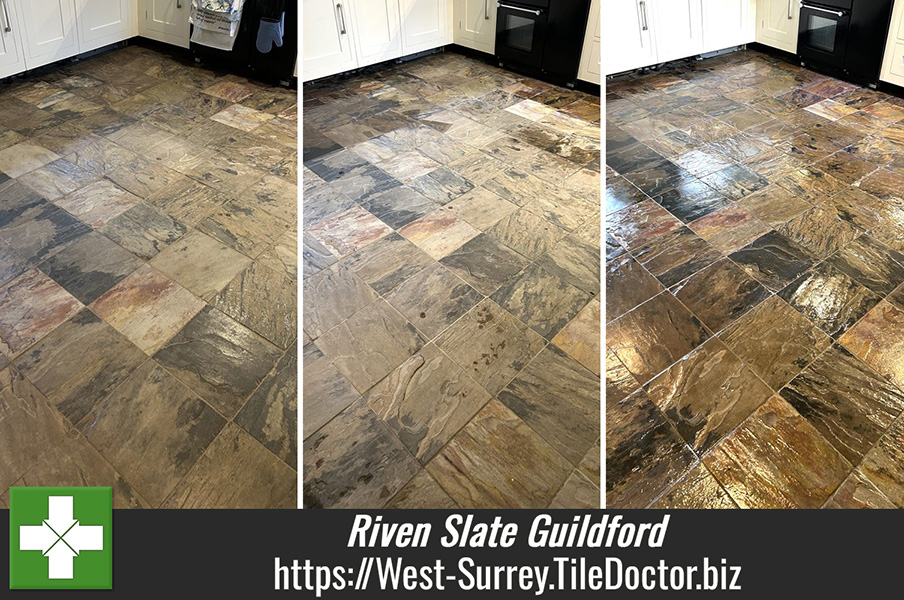
The first job was to add protection to vulnerable surfaces including the hallway carpet as I would be operating a wet vacuum from there. Once done work started in earnest with grout cleaning using a wire brush to scrub in a strong dilution of Tile Doctor Pro-Clean which is an effective alkaline tile and grout cleaner. Water was used to rinse away the soiling and the waste extracted with the wet vacuum.
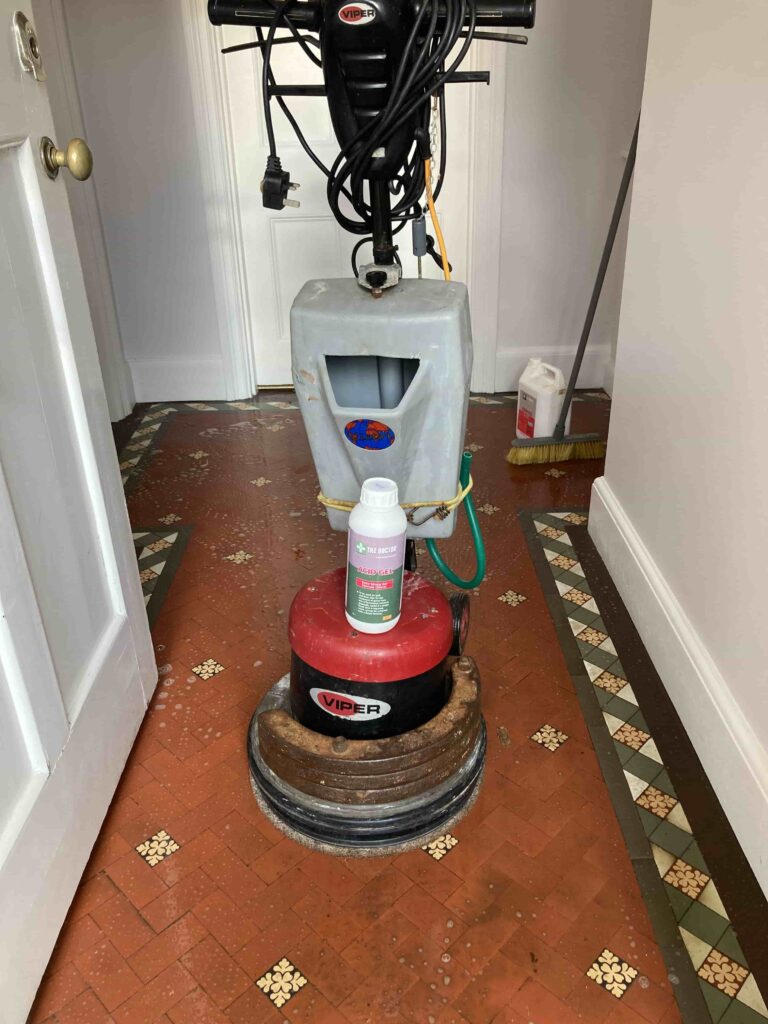
Next up focus turned to removing any remnants of existing sealer. I didn’t expect this to be difficult as the floor hadn’t been sealed in over 15 years; however, the tiles needed to be cleaned of all sealer before re-sealing, otherwise you can end up with an uneven appearance. This was done using another alkaline cleaner called Tile Doctor Remove & Go. This is diluted with water and sprayed onto the floor where it is left to soak in for ten minutes.
The solution was then worked into the Slate using a 17-inch carbide brush fitted to a rotary machine which really gets into the nooks and crannies of riven Slate, flushing out the dirt and old sealer in the process. All the waste was removed with the wet vacuum as before and then washed down with clean, hot water.

Sealing a Slate Tiled Kitchen
Once complete the floor was speed dried with a combination of the wet vacuum and floor fans. Later that day after checking the slate was dry with a damp meter it was sealed with four coats of Tile Doctor Seal & Go leaving half an hour between each coat. It’s not unusual to have to do the sealing on a second day if it doesn’t dry out in time, however the weather was in my favour.
The new sealer worked exceptionally well on the Slate and added an appealing subtle sheen that really highlighted the features and colours in the stone.

For aftercare we discussed the use of Tile Doctor Neutral Tile Cleaner which being pH neutral won’t impact the sealer like the stronger products you often see available in supermarkets.
Professional Cleaning and Sealing of a Slate Tiled Kitchen Floor in West Surrey
Renovating a Riven Slate Tiled Floor in Guildford Read More »