Victorian Tile Cleaning

Welcome to my Work History archive where you will find detailed examples of the cleaning and renovation of Victorian tiles carried out in West Surrey

Cleaning and Renovating Victorian Tiles

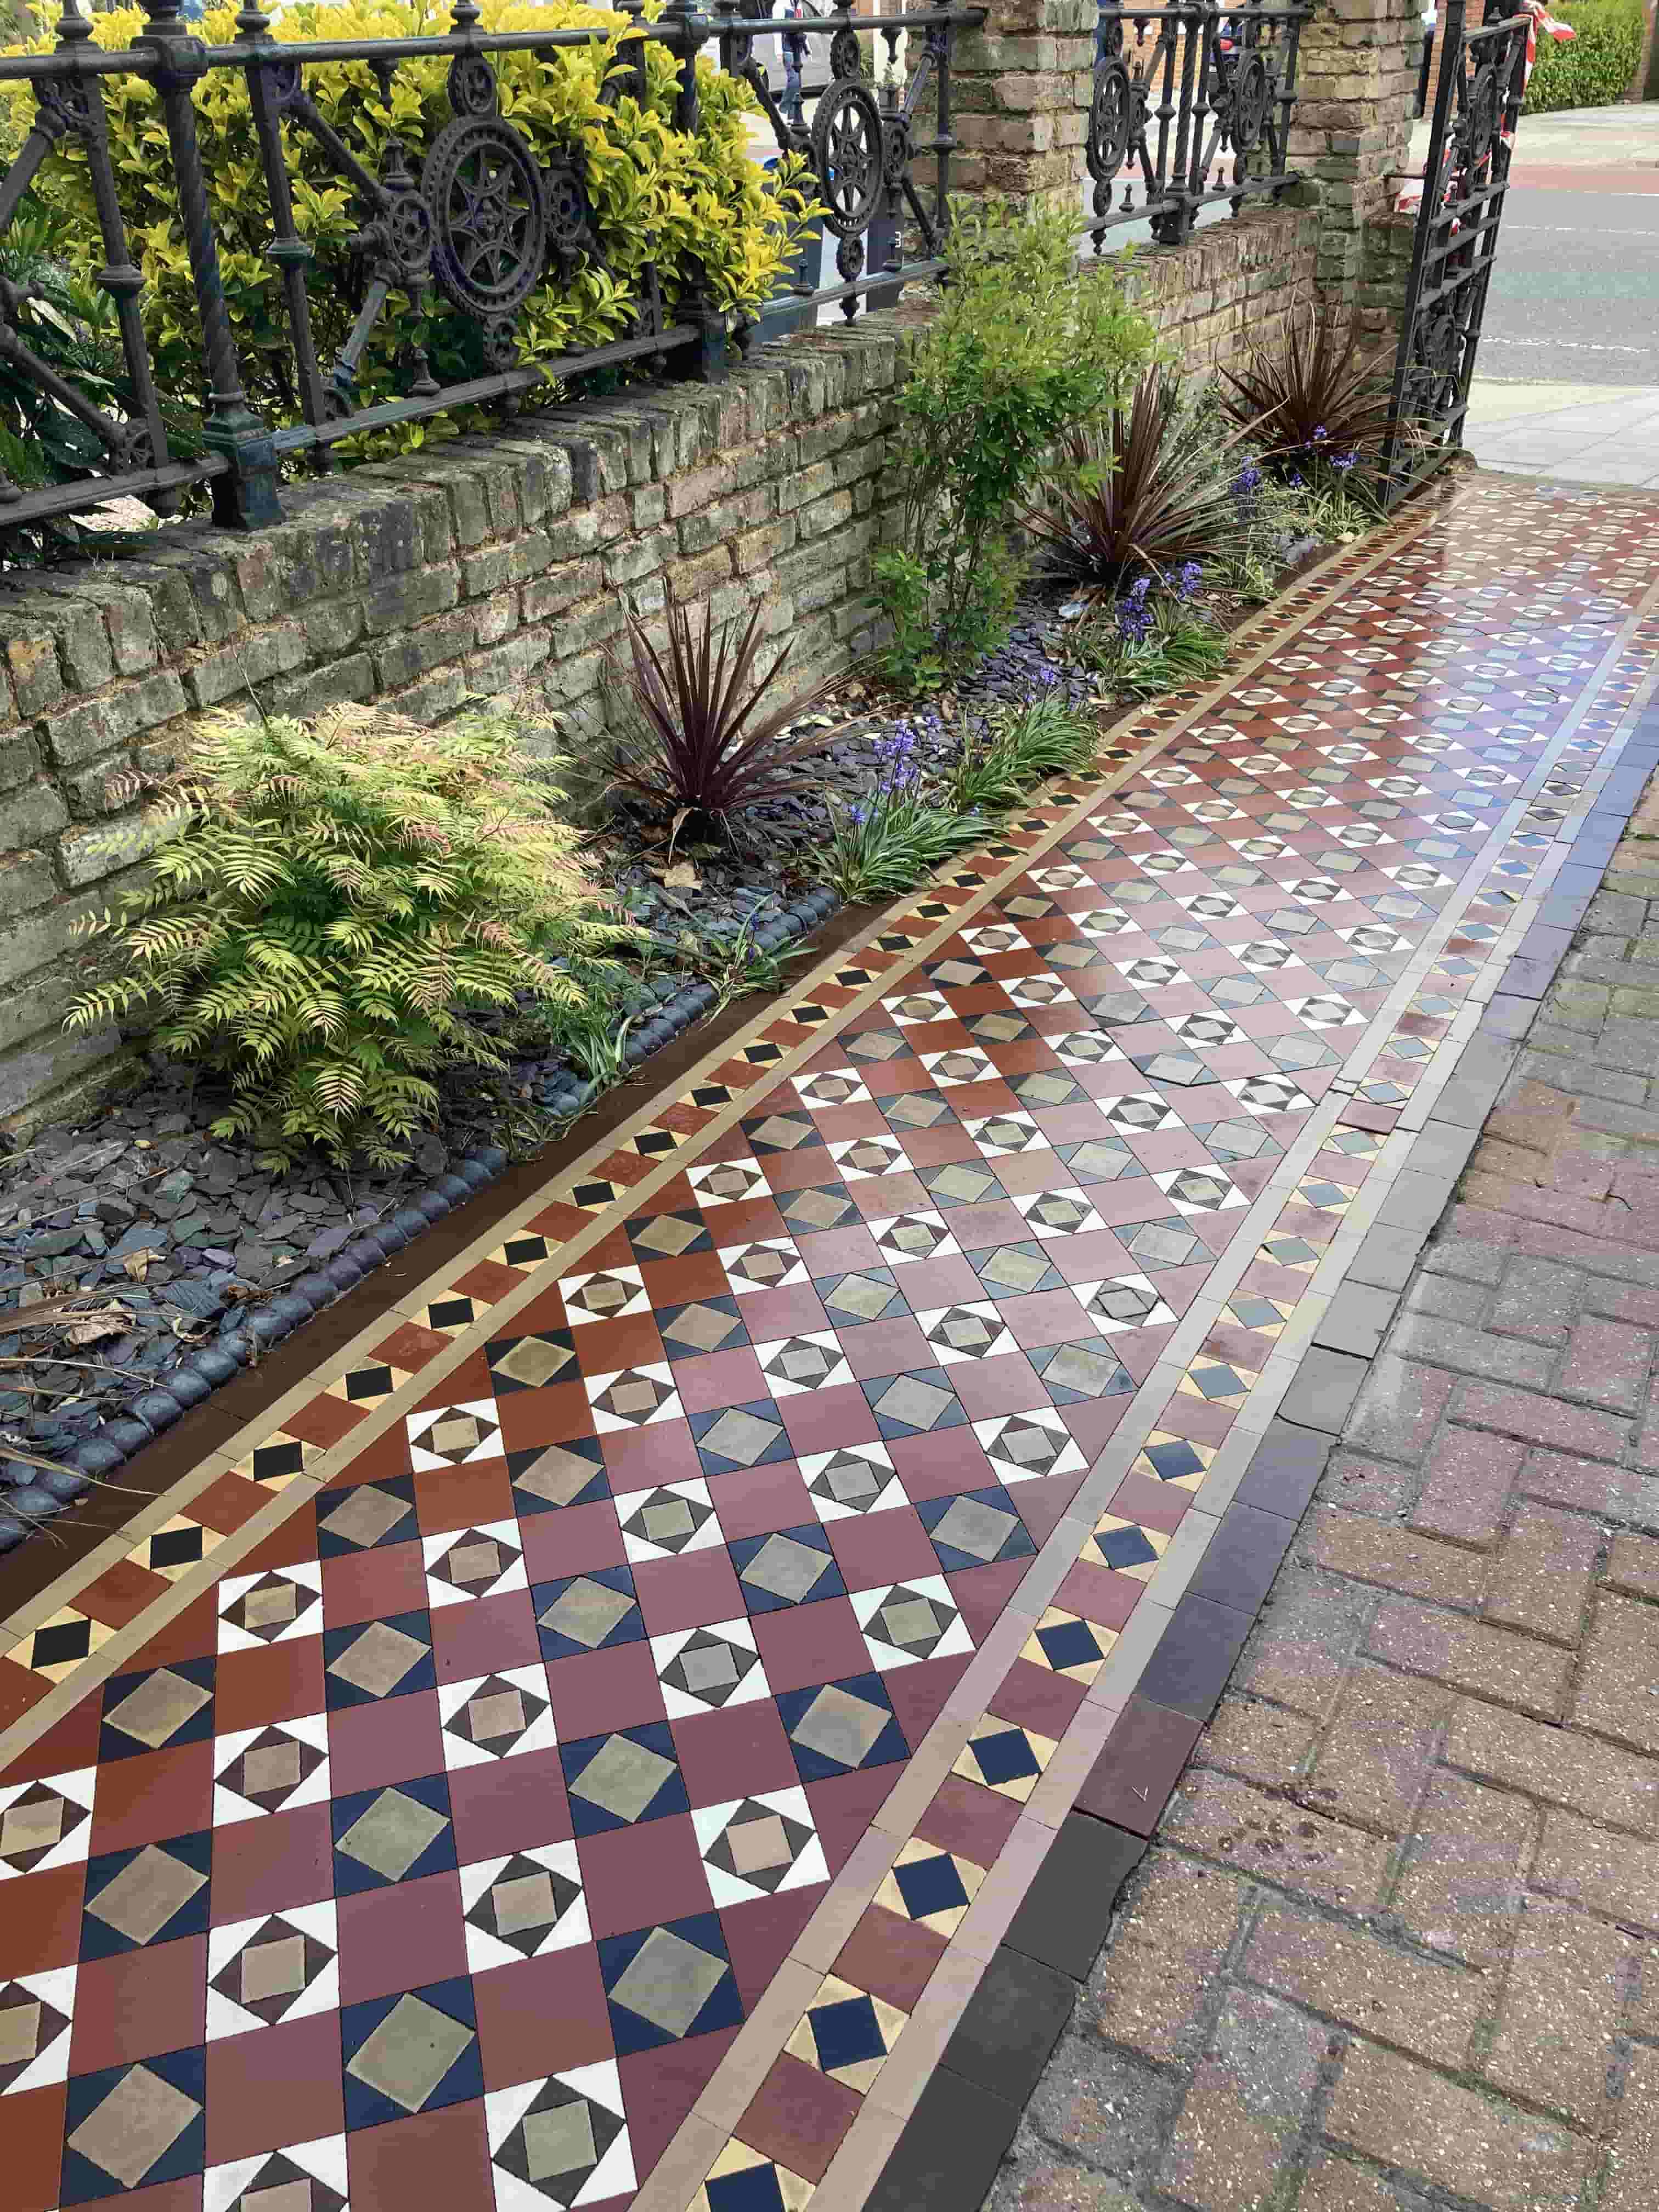
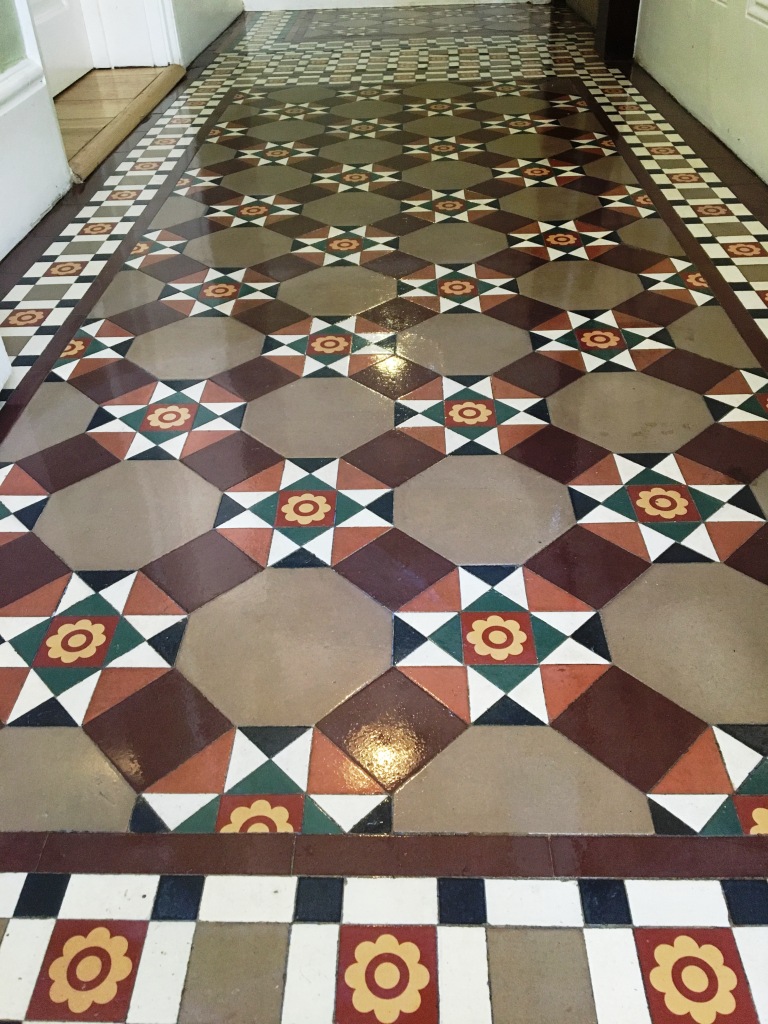
Commonly found in the hallways of oldder UK properties Victorian tiles are very hard wearing and can provide a classic look to any space. We often find that the beauty of these tiles are hidden under years of grime and neglect and are often covered up with carpets etc as tastes have changed over the years. If this sounds familiar then all is not lost as they can be restored.

The standard bearer for quality Victorian tiles was a firm called Minton Hollins, an English manufacturer who made a very good product which lasted the test of time. Victorian building practices however did not include the use of damp proof membranes and we often find damp can be a major issue with these old floors leading to salt problems known as efflorescence.

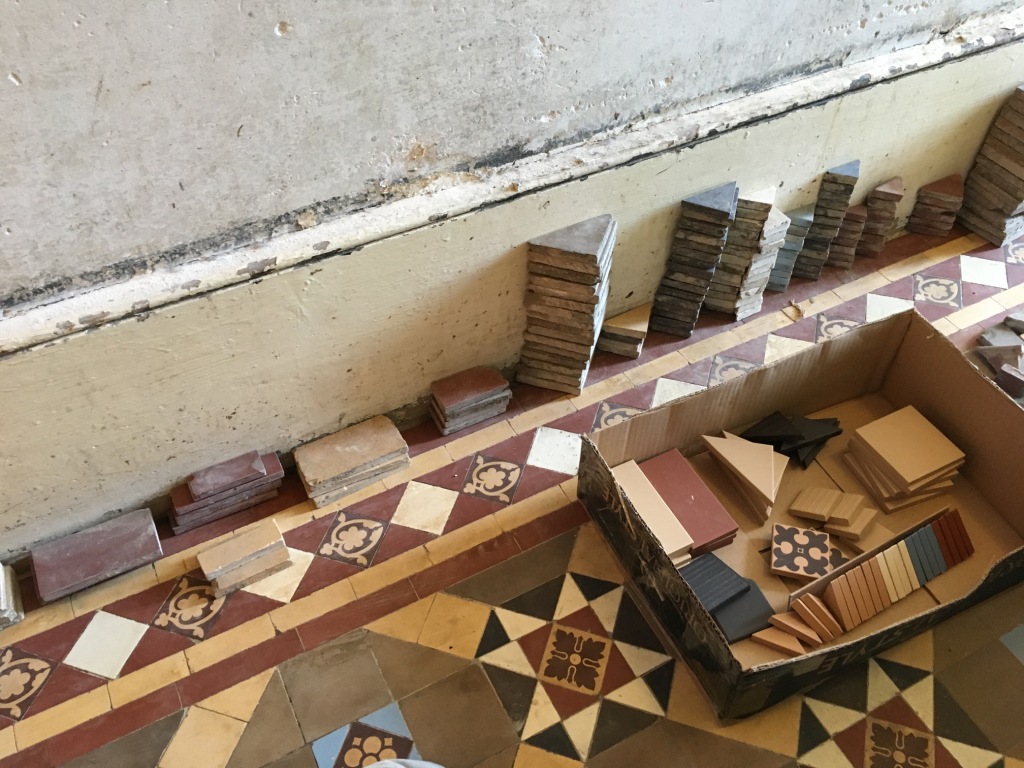
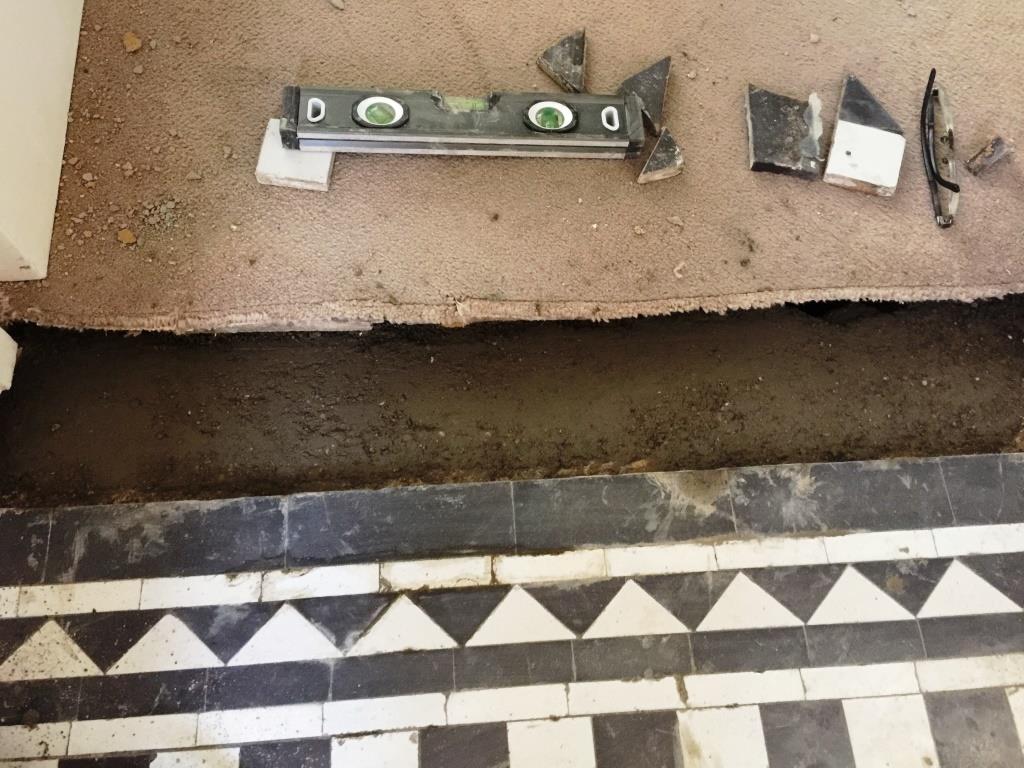
Common problems we face when restoring Victorian tiles are the removal of carpet glue, paint splashes and cement. Loose and cracked tiles can also be a problem however due to their popularity we usually find finding replacement tiles isn’t a problem.

Below you will find detailed examples of work we have carried out in the past, it should give you some idea of what’s involved and what can be achieved with the right techniques and products.


Victorian Tiled Hallway Floor Cleaning Sealing Farnham

Victorian Tiled Hallway Deep Cleaned and Sealed in Farnham

This client from Farnham had been in touch regarding their Victorian tiled hallway which needed deep cleaning and re-sealing. As usual I paid them a visit, surveyed the floor, and provided a quote for renovating it which they were happy to accept, there were no broken tiles to remove and replace so it was a straightforward clean and seal. It was a lovely floor which had been laid in a herringbone pattern with lovely black and gold floral inserts and a beautiful green border.

Whilst discussing dates it became apparent that they were planning on having some decorating done in the same area, so I recommended they book me in for a date after the decorators had left. It’s always good practice to get the floor cleaned after your last tradesperson has left, decorators especially have a habit of not covering floors properly.

Cleaning a Victorian Tiled Hallway Floor

I turned up on the agreed date and was pleasantly surprised to see there were only a few paint splashes on the floor so I wondered if my comments to the owner must have been passed onto the decorators. The hallway led onto several rooms many of which had new carpets, so with my own advice in mind I made sure to cover them with a plastic sheet before starting work.

Victorian Tiled Hallway Floor During Cleaning Farnham Victorian Tiled Hallway Floor During Cleaning Farnham

The first job was to remove any existing sealer from the tiles using Tile Doctor Remove and Go, this is brushed onto the tiles, left for ten to fifteen minutes, and then scrubbed in with a black pad fitted to a rotary floor machine running at slow speed. The resultant slurry was then rinsed off and extracted with a wet vacuum. It was a small floor so I planned to seal the floor later that day and so I only used a minimal amount of water and used the wet vacuum to remove as much moisture as possible.
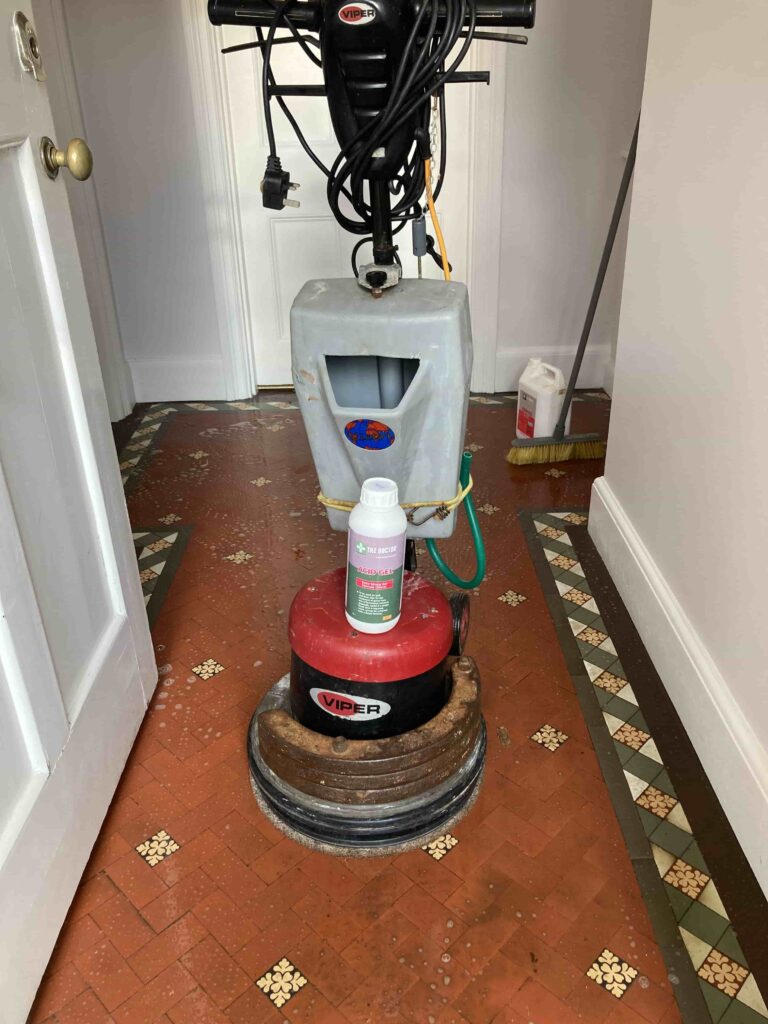
Victorian Tiled Hallway Floor During Cleaning Farnham Victorian Tiled Hallway Floor During Cleaning Farnham

Next, I gave the floor an acid rinse by carefully smearing Tile Doctor Acid Gel over the tiled surface. Leaving it to dwell for half an hour yet keeping it moist with water. I then introduced my weighted burnishing machine. Circling the floor, it slightly cuts the tile creating a slurry of tile and dirt. The pads can struggle to get right into the corners so once that was done, I scooted around the edges hand cleaning them with a scrubbing brush and ensuring any paint splashes the decorators had left were removed.

All the waste was extracted, and the floor given a rinse with hot water. I left a small heater on them while I had my lunch. As the gel doesn’t penetrate the tiles like fluid it didn’t take long for the floor to dry sufficiently enough for sealing.

Sealing a Victorian Tiled Hallway Floor

Finally, I applied three coats of Tile Doctor Seal and Go Extra. This is a hard-wearing colour enhancing sealer. Each coat takes twenty to thirty minutes to dry. After the final coat I ask that it’s not walked on for a good hour.

Victorian Tiled Hallway Floor After Cleaning Sealing Farnham

Once done to the floor looked really clean and the new sealer should keep it that way for many years to come. Before leaving I took time to discuss maintenance cleaning and of course get their feedback which they gladly gave and is copied below:

“Great service. Rupert was professional, informative, friendly clean worker who made a great job of cleaning our original Victorian tiled floor. Tile Doctor were recommended to me by a friend, and I would definitely recommend them and Rupert for tile cleaning.”

For the aftercare of Victorian tiled floors, I recommended the use of Tile Doctor Neutral Tile Cleaner which due to its neutral ph makes it idea for the regular cleaning of sealed tiles. Many of the products you will find in supermarkets are simply too strong and will prematurely erode the sealer on a tile and so best avoided.


Professional Restoration of a Victorian Tiled Hallway in West Surrey

Victorian Tiled Hallway Deep Cleaned and Sealed in Farnham Read More »

Victorian Black White Pathway Repair Restoration Surbiton

Neglected Black & White Victorian Tiled Pathway Restored in Surbiton

Over the past ten years I’ve restored many tiled pathways, however none were in such a poor state as this example in Surbiton. Unfortunately, it had been badly installed and then further “repairs” by the customers ex father In-law hadn’t helped. I certainly had my work cut out and working outside of course has its own challenges.

Victorian Black White Pathway Before Restoration Surbiton Victorian Black White Pathway Before Restoration Surbiton

Repairing a Neglected Victorian Tiled Pathway

The first task was to clear the area of plant life and other detritus, all the existing holes had to be totally cleaned out so I could see exactly what I was dealing with. I discovered the foundation of the path was not very deep and this had allowed it to be disturbed by adjacent rose bushes so these had to be chopped back and the roots removed. I also had to rope-off the area as anyone treading on the path would dislodge further tiles resulting in Amazon and the postwoman having to take a more cumbersome route.

The next step was to remove the existing concrete edging, now normally I wouldn’t do this as I’m not a building contractor however given the problems with the path foundations it made sense. Additionally new steel edging would form an excellent base and straight line from which I could re-build the path. I had to break the concrete edging out with a power chisel and left the pieces in building sacks for the customer to dispose of. The customer supplied the replacement metal edging which is joined together, worked into the ground with a sledgehammer and then secured with foot long metal stakes.

Victorian Black White Pathway During Restoration Surbiton Victorian Black White Pathway During Restoration Surbiton

The next day were spent cleaning up three buckets of loose tiles in the rear garden. These had been reclaimed over the years. I knew we would be short of replacements so I also ordered matching Victorian tiles from the Vintage Tile Company in Margate. The only way to clean them up effectively is with a wet tile cutting machine whizzing down the edges. It’s a wet, messy, noisy business made harder by the incoming rain. It took all day to make 100’s of tiles acceptable. It was tedious work but made more enjoyable by the numerous cups of tea that were made available.

Victorian Black White Pathway During Restoration Surbiton Victorian Black White Pathway During Restoration Surbiton

The next day was spent removing and cleaning up the existing broken base. Once removed I filled the holes and gaps with self-levelling compound. Thankfully the new metal straight edges allowed the compound to level out nicely. It was then left to set over night.

Victorian Black White Pathway During Restoration Surbiton Victorian Black White Pathway During Restoration Surbiton

The next two days were spent tiling. I had three buckets and two boxes of tiles to use. It’s a slow process that sometimes you need to step away from to make sure you’d used the correct colour and pattern. The customers ex father in-law hadn’t done this so rogue tiles were removed.

Deep Cleaning a Neglected Victorian Tiled Pathway

Once I had finished repairing the tiles on the pathway, I was able to move onto what I know best, i.e., cleaning and sealing the whole area. This work began by coating the path in a strong dilution of Tile Doctor Remove and Go which as the name suggests is a coatings remover that breaks down dirt, old sealers and other contaminates. As usual it was left to dwell for ten to fifteen minutes to give it time to break down the soils.

Then I introduced a heavily weighted buffing machine fitted with a 100-grit diamond pad to scrub the product into the tile. The industrial diamonds in the pad slightly cut the tiles resulting in a Black and White slurry. This is then rinsed with water then extracted with a wet vacuum cleaner.

Sealing a Victorian Tiled Pathway

Once the tiles had dried from the warm Sun, I was able to start applying the sealer which for these tiles I applied Tile Doctor X-Tra Seal. This is a modern oil-based sealer that is rated for external use and contains UV protection thereby providing excellent protection and making the tiles very easy to maintain.

Victorian Black White Pathway After Restoration Surbiton Victorian Black White Pathway After Restoration Surbiton

This was a long job that due to being outside I had to come back to due to the weather, so it took longer expected but I think the transformation speaks for itself. Lastly for aftercare cleaning I recommended the use of Tile Doctor Neutral Tile Cleaner. Most tile cleaning products you find in supermarkets are simply too strong for the sealer and can degrade them prematurely.


Professional Victorian Tiled Pathway Repaired and Restored in Surrey

Neglected Black & White Victorian Tiled Pathway Restored in Surbiton Read More »

Victorian Tiled Path Restoration Surbiton

Damaged Victorian Tiled Pathway Fully Restored in Surbiton

I was contacted in February last year by a homeowner in Surbiton regarding the Victorian Path at the front of their property which was in a really bad state. I’ve restored a number of these pathways in the past so I was more than happy to pop over and provide a quote for doing the work. I did mention though that February was not a good time to do the work due to the poor weather and that the work would be done in the spring at the earliest.

Victorian Pathway Before Restoration Surbiton

The path was indeed in a bad state as described so after survey the path and making detailed notes it took me some time to put the quote together. There was extensive damage in two areas and a large crack close to the house. Original vintage tiles are generally available though sometimes stock can run low. I took notes of size, colour, and number needed while the customer made me a cup of tea. Happy with the quote we agreed I would return in May for three days to do the work.

Victorian Pathway Before Restoration Surbiton Victorian Pathway Before Restoration Surbiton

Restoring a Damaged Victorian Tiled Path

This type of job takes lot of preparation, the two areas had to be totally cleaned out, broken tiles removed, mud and foliage disposed of. Once that was done, I set about cleaning up the path and removing old tile adhesive with a power chisel where needed.

Next up was cleaning the remaining existing tiles. Using a yard broom, I spread five litres of Tile Doctor Acid Gel over the whole length from door to pavement. This was left to soak in for thirty minutes so it could really get to work breaking down the ingrained dirt. While this was working, I introduced in my weighted buffing machine, attached a coarse 200-grit diamond burnishing pad, and added some iron bars to weigh the machine down. More weight means improved contact and therefore a better result. Working my way from road to the front door the machine was run over each tile slowly removing the grime and ingrained dirt in the process.

Once complete, all residue and dirt was rinsed off the path and removed with a wet vacuum cleaner. After a quick wipe over with warm water the tiles were left to dry in the sun.

Repairing a Victorian Tiled Pathway

The following day I returned to carry out the tiling of the two gaps. Since quoting for the work in February I had plenty of time to source replacements that were an exact match for the originals. Victorian tiles are still very popular and there are several companies in the UK where you can find a good match for your project failing that there’s always eBay.

Armed with a bucket of adhesive and a tile cutter I spent the whole day laying what is essentially a tile pattern jigsaw. The path was then left to dry overnight. I also taped the area off like a crime scene to ensure pedestrians would steer clear.

Sealing a Victorian Tiled Pathway

The weather window held out and the next day I was able to move onto sealing the tiles with Tile Doctor X-Tra Seal. This is an oil-based sealer that is fully breathable sealer and will cope well with the ravages of the UK weather. The new sealer will protect the tiles for ingrained dirt going forward making the path very easy to clean. Also, the new sealer did a great job of blending in the new and replacement tiles.

Victorian Pathway After Restoration Surbiton Victorian Pathway After Restoration Surbiton

Once complete the path looked like it had only just been laid and was completely transformed by the work I had done. Needless to say, the owner of the property was very happy with the outcome and I bet the postman will be surprised the next time he visits.

Victorian Pathway After Restoration Surbiton

For aftercare cleaning I recommended the use of Tile Doctor Neutral Tile Cleaner. Most tile cleaning products you find in supermarkets are simply too strong for the sealer and can degrade them prematurely.


Professional Victorian Tiled Pathway Floor Maintenance in Surrey

Damaged Victorian Tiled Pathway Fully Restored in Surbiton Read More »

Soiled Victorian Path Repair Restoration Esher

Neglected Victorian Tiled Pathway Repaired and Restored in Esher

This customer in Esher requested help renovating their Victorian tiled pathway which as you can see from the photograph below was looking very neglected and in a poor state of repair. As well as some damage and missing tiles, dirt had been come ingrained and, in some places, there was vegetation growing between the tiles.

Soiled Victorian Tiled Pathway before renovation Esher

When working on external Victorian tiles like this example you really do need to have warm weather and I will often put requests for restoration work like this one on hold until the spring on summer.

Restoring a Heavily Soiled Victorian Tiled Path

To remove all the vegetation and clean up the tiles, I applied a mixture of acid-based Tile Doctor Grout Clean-up and left it to dwell and soak in for a good thirty minutes. This product removes mineral deposits from the tile and will neutralise salt problems such as efflorescence.

The solution was worked into the tiles using a rotary floor buffer fitted with a coarse 100-grit diamond pad. The industrial diamonds in the pad skim the surface of the tile exposing its original colour. All dirt is washed away and removed using a wet vacuum. The tiles were then left to dry.

While drying I carefully removed all the broken tiles with a hammer and chisel. Old Victorian tiles are super tough but often brittle so care must be taken when removing a single tile as very often the one next to it will pop out as a result some tiles should just be left where they are or you end up replacing half the path. I do have to warn customers that due to the age of the installation an “as new” result is an unrealistic expectation. These paths are often over 100 years old and are susceptible to our weather. I often tell customers they can expect some “Characterful” features once the job is done.

Once the path was cleared of debris, I set about cutting and fitting replacement tiles which I had managed to source earlier. Victorian tiles are still very popular and there are several companies in the UK where you can find a good match for your project.

Sealing a Victorian Tiled Pathway

The weather was excellent so it wasn’t long before I was able to move onto sealing the tiles with a couple of coats of Tile Doctor Colour Grow. This is a fully breathable sealer that will cope with the weather and as its name suggests it enhances the colours in the tile, the new sealer will protect the tiles for ingrained dirt going forward making the path very easy to clean. Also, the new sealer did a great job of blending in the new and replacement tiles.

Soiled Victorian Tiled Pathway after renovation Esher

Once complete the path was completely transformed and looked so much healthier. Naturally there were some “Characterful” imperfections but as I mentioned earlier this just echoes the history of the property.

For aftercare cleaning I recommended the use of Tile Doctor Neutral Tile Cleaner. Most tile cleaning products you find in supermarkets are simply too strong for the sealer and can degrade them prematurely.


Professional Victorian Tiled Pathway Floor Maintenance in Surrey

Neglected Victorian Tiled Pathway Repaired and Restored in Esher Read More »

Victorian Tiled hallway Floor Before After Restoration Weybridge College

Astonishing Victorian Floor Restoration at Weybridge College

I was asked by the facilities manager of St Georges College in Weybridge to survey a Victorian tiled floor for restoration. Having worked there for twenty years he lifted a carpet over the summer in the main reception of the original building as part of renovation work. Underneath he found an original Victorian mosaic tiled floor dating back over a hundred and fifty years to when the school was established. However, for some reason in the distant past they had been partially covered with concrete levelling screed and just to make it more challenging for me the carpet had been secured with adhesive.

Victorian Floor Before Renovation Weybridge College

After visiting the school to survey the floor I could see this going to be a very challenging job for one person. Fortunately Tile Doctor has a network of over 50 specialists like me all around the Country, so I reached out to neighbouring East Surrey Tile Doctor Mick Conlon who is also very experienced in floor restoration. Together we broke down the job into sections, e.g. remove the adhesive, remove the screed, hone the tiles, repair any missing, broken or damages tiles and finally seal. All in the work would take five days to complete.

Victorian Floor Before Renovation Weybridge College

Removing Carpet Adhesive from Victorian Floor Tiles

The first task was to smother the surface in Tile Doctor Remove and Go which in turn was covered by plastic sheeting. By trapping the product under a plastic sheet, it couldn’t dry out and thereby remains active for longer.

Victorian Floor During Adhesive Removal Weybridge

After a couple of hours, it had broken down the adhesive which we swept up and disposed of. This was unpleasant work which required us to wear protective gloves, masks and goggles.

Victorian Floor During Adhesive Removal Weybridge Victorian Floor During Adhesive Removal Weybridge

Removing Cement Screed from Victorian Floor Tiles

On day two we turned our attention to the removal of the concrete screed and cleaning up the tiles. This was done with a process called honing. A circular 200-grit pad was attached to a floor buffer and run over the tiles using water for lubrication. The honing pad is impregnated with industrial diamonds which gradually cuts through and removes the screed covering.

Victorian Floor During Screed Removal Weybridge

After several hours the tiles began to reveal themselves. It also became apparent that after over 100 years of thousands of pupils walking over them some of the tiles were somewhat dipped in the middle. Using a handheld buffer these areas had extra attention with a very coarse 100-grit diamond pad. This process took most of the day with one man honing whilst the other constantly rinsed the floor with more water and extracted the waste.

Replacing Broken Victorian Floor Tiles

Once the tiles were totally free of concrete screed it exposed several broken and missing tiles. Some tiles had been removed and not replaced but back filled with concrete. Fortunately, I had managed to source matching reclaimed tiles was able to cut and fit replacements. All holes and cracks were filled so the floor was ready for sealing the next day.

Victorian Floor During Adhesive Removal Weybridge

Sealing a Victorian Tiled Floor

Given the age of the floor and the high amount of floor traffic this floor would receive I advised against using a high shine sealer and recommended an impregnating breathable matt sealer instead. There were two main reasons for this, first old floors don’t have a damp-proof membrane installed so it’s important to use a sealer that will allow the floor to breath and allow moisture to rise through the tiles. Secondly, only an impregnating sealer which soaks into the pores of the tile would cope with the anticipated heavy footfall.

Victorian Floor After Sealing Weybridge College

With that agreed several coats of Tile Doctor Colour Grow sealer were applied to the tiles leaving the floor looking great and completely transformed. At end of the last day the headmistress came to give her approval as did the whole secretarial staff. My favourite word was “astonishing”. Hard to disagree.

Victorian Floor After Sealing Weybridge College


Professional Restoration of a Victorian Tiled College Hallway in Surrey

Astonishing Victorian Floor Restoration at Weybridge College Read More »

Damaged Victorian Hallway Fully Restored in Epsom

Damaged Victorian Tiled Hallway Fully Restored in Epsom

A customer from Epsom called me regarding the restoration of her Victorian tiled hallway which was previously covered in carpet and in a poor state of health. Intrigued and having spoken on the phone I agreed a time to call in and survey the floor and work out a way forward. I visited the property and could immediately see considerable repair work including resolving problems with the sub floor and tile replacement would be required and all this before cleaning and sealing.

Victorian Tiled Hallway Floor Before Rebuild in Epsom

This house had undergone some serious renovations recently and the floor was left till last. I’m not a structural engineer so was unable to advise what had happened to the floor, but all the faults appeared to run in a line from the kitchen to the front door. It was an old house so who knows what might have caused it, it might even have been bomb damage from the 2nd world war.

There were three main problem areas. The worst was by the front door where an area of about a metre square was just loose tiles and laid on rubble. The family had got used to jumping across the threshold so as not to make the problem worse. Next was a strip through the middle that was totally exposed and a massive trip hazard. The floor boards were visible as was the floor base. There was another area by the front room entrance that had some loose pattern tiles that clunked every time someone entered the room. Finally, there was a small area to the entrance to the basement that had been patched in with cement.

Victorian Tiled Hallway Floor Before Rebuild in Epsom Victorian Tiled Hallway Floor Before Rebuild in Epsom

It was clearly going to be a challenging restoration for several reasons. Had the customer kept all the loose tiles? If not, could I source matching replacements? Would it be possible to level the floor that appeared to be sloping towards the front door? Could I remove loose and broken tiles without disturbing others? Could I manage the customers high expectations?

Having worked on numerous Victorian floor restorations in the past I knew where I could potentially source replacement tiles. I also had the full backing of the Tile Doctor network so knew I could always reach out to other Tile Doctors should I face any major problems. Undaunted we agreed a date for me to return and start the work and in the mean time I would talk to several specialist tile suppliers about replacements.

Rebuilding a Victorian Tiled Hallway Floor

Before starting any tiling work, I photographed the whole floor extensively from different angles so I would have something to refer to later. Then I removed all the loose tiles placing them in buckets for further cleaning. I now had three areas that I could see beneath the floor boards and another area of cement that I broke up using a chisel drill. In total I filled six buckets with rubble and broken tiles, all of which were taken off site and disposed of at a local recycling centre.

Victorian Tiled Hallway Floor During Rebuild in Epsom Victorian Tiled Hallway Floor During Rebuild in Epsom

The next step was to ensure I had a level and flat base in the newly exposed areas on which to lay the tiles. I managed this by laying down a self-levelling compound. The compound is mixed in a bucket and poured into the holes up to the required level allowing gravity to do the levelling work for you. It is then left to dry and harden overnight.

Victorian Tiled Hallway Floor During Rebuild in Epsom Victorian Tiled Hallway Floor During Rebuild in Epsom

The next day I started by re-fixing the loose tiles in areas where the subfloor was still solid. Close packed Victorian tiles are very tough but can be brittle, often removing a single tile can cause chips or break surrounding tiles. I always buy more replicas than the job requires for this very reason. This can be very frustrating work, so I find its best approach is to remove as few tiles as possible. I explained to the customer that the floor is over 100 years old and some chips and scratches give the floor character. Perfection is an unrealistic expectation where some marks are permanent.

Part of the other renovations included the removal of two antique radiators leaving some strips of carpet and adhesive attached to the floor. I removed this using a strong mixture of tile doctor remove and go and a little encouragement from a 50-grit diamond block.

The preparation continued with the cleaning up of the three buckets of tiles recovered at the beginning of the restoration. Old adhesive and cement must be removed before refitting to ensure they can be laid flush to the adjacent tiles. Luckily for me the weather was warm and sunny, so I sat on the garden wall for the afternoon using a combination of a wet tile cutter, Fein tool and diamond blocks to get them clean while I took in the sun.

Victorian Tiled Hallway Floor During Rebuild in Epsom

The next day was spent re-laying the tiles. The tiles are in an intricate pattern and in various shapes and sizes. The main area by the front door took all day. The difference in thickness between the original and replacement tiles made the work particularly difficult. Interested neighbours came and went commenting on my progress throughout.

Victorian Tiled Hallway Floor During Rebuild in Epsom

Cleaning a Victorian Tiled Hallway Floor

The next day I soaked all the tiles with tile doctor Acid Gel and left to dwell for 30 minutes. This was to work into the porous areas and to break down years of dirt. Then attaching a very coarse 100-grit diamond encrusted pad attached to a rotary floor machine I cleaned the tiles with a dilution of Tile Doctor Pro-Clean. This process skims away a small layer of the tiles thus the dirt too. All the soil was extracted from the floor using a wet vacuum. I repeated this process twice for maximum effect. The customer was amazed at the result and I wasn’t finished yet. When wet the contrast between the white tiles and dark were astonishing, however this was temporary so I made sure the customer aware that without a sealer they would look washed out and colourless. I left the scene overnight with a couple of warm air movers in place to fully dry out the tiles.

Sealing a Victorian Tiled Floor

The tiles need to be dry before sealing so the next day my first action was to test the floor for moisture using a damp meter. They passed and were ready to take a sealer, so I discussed the different options and finishes with the customer. It was a very interesting house, full of retro artefacts so we needed something that would blend in, more importantly she had four children and a husband who bought a cycle through the house twice a day. I recommended Tile doctor seal and Go Extra. It’s super tough, offering great protection and gives a subtle sheen that I felt would suit the house. Three coats later and I was done, closing the door behind me as everyone was at school and work

Victorian Tiled Hallway Floor After Rebuild in Epsom Victorian Tiled Hallway Floor After Rebuild in Epsom

I popped back later that evening to discuss the job. The newly applied sealer had intensified the depth of colour in the Victorian tiles and returned the brightness to the floor. She was very pleased and even gave me a carrot cake to take home with me.

Victorian Tiled Hallway Floor After Rebuild in Epsom


Professional Restoration of a Victorian Tiled Hallway in West Surrey

Damaged Victorian Tiled Hallway Fully Restored in Epsom Read More »

Victorian Tiled Hallway Before and After Restoration in Leatherhead

Victorian Tiled Hallway Hidden Under Carpet Restored in Leatherhead

This customer who owned a lovely period residence in Leatherhead had pulled up an old hallway carpet to discover this gem of Victorian Tiled floor. The tiles were covered in carpet adhesive, paint splashes and what looked like a hundred years of dirt. I suspect the previous owners felt it was easier to cover the hallway in carpet rather than have it cleaned properly or perhaps it was just the trend at the time.

Victorian Tiled Hallway Before Restoration in Leatherhead
Given the obvious amount of work that would be needed to restore it we got a call to pop round and provide an estimate. We do a lot of Victorian floor restorations and across the Tile Doctor network I’m confident in saying there is a Tile Doctor working on a Victorian Tiled floor every day of the week.

Victorian Tiled Hallway Before Restoration in Leatherhead
The owner was happy with the quote and we agreed a date to return and restore the floor.

Cleaning a Heavily Soiled Victorian Tiled Floor

Working in a metre square area at a time, I first applied a solution of Tile Doctor Oxy-Gel and left it to dwell for twenty minutes. Oxy-Gel is a relatively new product that being in Gel form is easy to control and stays in place allowing it to dissolve dirt and in this case loosen the adhesive.

After leaving it to dwell for 20 minutes I attacked it with a very coarse 100 grit diamond pad attached to a buffer machine. This removed a minuscule layer from the surface of the tile and with it the muck. I vacuumed up the excess with a wet vacuum then rubbed down the stubborn areas with a 50 grit hand block. This removed a lot of dirt and drastically lightened the whites and blues. Finally I neutralised the floor with two rinses of clean, warm water again using the wet vacuum to remove as much moisture as possible from the floor.

I repeated this process along the length of the hallway and then inspected the floor retreating any areas containing stubborn marks.

Sealing a Victorian Tiled Floor

The hallway wasn’t that big an area so I had agreed to do the whole floor in one day. As a result I needed to force dry the floor so I could seal the tiles in the same day. I have a number of tools to do this including an industrial air mover and a heat gun which were applied for about an hour before it was dry.

To seal the tiles I applied two coats of Tile Doctor Colour Grow which as its name suggests is a colour enhancing sealer that works by impregnating the pores of the tile protecting it from within and enriching the colours in the process. This gave a lovely contrast in colour whilst providing a matt finish; another advantage of Colour Grow is it’s a fully breathable sealer which won’t trap moisture under the tile which is important for these old floors where no damp proof membrane is installed.

Victorian Tiled Hallway After Restoration in Leatherhead
The Victorian tiled hallway floor now looks amazing.

Professional Victorian Tiled Hallway Restoration in West Surrey

Victorian Tiled Hallway Hidden Under Carpet Restored in Leatherhead Read More »

Terracotta Tiled Kitchen Before and After Cleaning in Kingston Upon Thames

Original Victorian Tiled Hallway Brought Back to Life at an Esher Flat

Esher is a small suburb in Surrey, situated just outside London. It was a fashionable area to live in amongst royalty and the aristocracy in the Victorian period, and during this time many buildings were built.

One such building has since been turned into a block of separate flats, and some of the flats still contain the original Victorian tiles in the hallway. I was contacted by one of these flat owners about restoring their tiles back to the best possible condition. Interestingly this customer’s tiles were part of a larger floor that had been divided between two flats.

Victorian Floor Tile Before Cleaning Esher

Cleaning Original Victorian Tiles

I began the restoration by spreading Tile Doctor Remove and Go across the entire set of tiles. Remove and Go is a heavy-duty stripper that helped to loosen and remove old glue deposits where carpet had been laid over the tile, it will also strip off old sealers and release ingrained muck.

The Remove and Go was worked into the tile and grout with a stiff brush and then the soiled solution rinsed off and extracted using a wet vacuum. I followed by this applying a coarse 200-grit diamond encrusted burnishing pad, fitted to a handheld buffer, to grind away the particularly stubborn dirt and stains to restore the appearance of the stone. Afterwards, I rinsed the tiles again with water and soaked up the resultant slurry with a wet vacuum.

I noticed that there remained several ingrained stains dotted across the floor, so to remove these I aggressively burnished the affected areas with a very coarse 50-grit handheld diamond block. This essentially removed the very top layer of the stone, taking with it the ingrained marks.

Next, I dried the area with a large blower and heat gun. Under normal circumstances, 48 hours needs to pass before the tiles can be sealed, but as this was a small area I was able to dry it very quickly. After carrying out a damp test, I determined the tiles were ready to be sealed.

Sealing Original Victorian Tiles

To seal the Victorian Tiles, I applied six coats of Tile Doctor Seal and Go sealer, which provides a high-quality sheen finish, as well as plenty of protection for the future. Tile Doctor have a range of suitable sealers available including Colour Grow which provides a matte finish – it’s just a matter of personal choice for the customer.

Victorian Floor Tile After Cleaning Esher
The outcome of the restoration was fantastic and the customer was very pleased, leaving the following testimonial.

“Promptly organised, delivered when promised. Good looking job when complete. Well done.”

Professional Tile Cleaning and Sealing for an Original Victorian Tiled Floor Restoration in Esher

Original Victorian Tiled Hallway Brought Back to Life at an Esher Flat Read More »

Victorian Tiled Hallway Before and After Cleaning and Sealing Weybridge

Lifeless Victorian Tiled Hallway Cleaned and Sealed in Weybridge

Details below of a tired and lifeless looking Victorian tiled hallway that I was asked to deep clean and seal at a house in the suburban town of Weybridge. The tiles were laid in a chequer pattern of Red, Yellow and Black tiles and if you look closely at the photographs you can cleanly see the ingrained dirt on the yellow tiles.

Victorian Tiled Hallway Floor Before Cleaning Weybridge Victorian Tiled Hallway Floor Before Cleaning Weybridge

Cleaning a Heavily Soiled Victorian Tiled Floor

I started the process straight away with an aggressive diamond encrusted coarse 200 grit burnishing pad fitted to a buffing machine and lubricated with water. The diamond encrusted pads really gets into the most deeply encrusted areas to remove the dirt.

Once the previous sealer and grime was removed I vacuumed up the soil using a wet vax and then gave the floor a quick blow dry with an industrial fan. For the next couple of hours, I got down to the corners to clean areas not touched by the pad. To finish I took a wire brush to any paint splash left over from recent decorating.

After further drying I was able to assess the yellow coloured tiles that would benefit from further attention. Several tiles near the heavy footfall areas benefited from a twenty-minute application of Tile Doctor Acid Gel. The gel removes mineral salt deposits and grout smears as well as breaking down deeply ingrained, long standing dirt. Once washed away and extracted using the wet vacuum I was done for the day. I warned the customer at this point that it’s common for the tiles to appear washed out in-between cleaning and sealing.

Sealing a Victorian Tiled Floor

I left the floor to dry naturally through evaporation for two days before returning to seal the floor. It’s important to ensure that the floor is bone dry before sealing as dampness can affect the sealer.

To seal the floor, I used Tile Doctor Seal and Go which gives a long lasting, tough, gloss look seal, it’s also water based so it doesn’t give off a smell as it dries like some products. Victorian tiles are quite porous so nine coats were applied, a process that took around four hours to complete.

Victorian Tiled Hallway Floor After Cleaning Weybridge
When the customer returned home from work she said the tiles looked brand new.

Professional Victorian Tiled Hallway Floor Maintenance in Surrey

Lifeless Victorian Tiled Hallway Cleaned and Sealed in Weybridge Read More »

Cafe Floor Chertsey After Cleaning

Heavily Soiled Victorian Tiled Floor Cleaned and Sealed at a Cafe in Chertsey

At Tile Doctor, we don’t just offer our tile cleaning and sealing services to residential properties, such as flats and houses we also cover tile installations in commercial properties, such as hotels and restaurants as well as

In fact, commercial properties tend to experience much higher daily foot traffic than residential floors resulting in much more strain on the sealer. This of course wears down the sealer more quickly and once the sealer had worn away the tiles are vulnerable to dirt becoming ingrained which makes the floor difficult to clean.

This Cafe in Chertsey is very popular with staff from the nearby hospital, as well as residents in the local area. Naturally, the cafe gets very busy and the Victorian tiled floor had experienced heavy traffic and was marked by footprints from hundreds of hungry customers.

Cafe Floor Chertsey Before Cleaning
I was called in to help the cafe owner restore this original feature back to its best possible condition and then seal again to protect it.

Cleaning a Heavily Soiled Victorian Tiled Floor

Once the cafe staff had left for the evening, I moved the tables aside to avoid damaging them and laid down a strong dilution of Tile Doctor Pro Clean across the floor. This is our reliable alkaline cleaner which is designed to loosen the dirt on tiles and grout.

As the dirt was deeply ingrained in the stone, I scrubbed the floor using an abrasive 200 grit pad fitted to on rotary buffer. Within seconds the pad had worked its magic and I had a trail of filthy water to suck up using a wet vacuum machine.

Once the majority of the floor had been cleaned, I took to my knees to closely inspect the stone for dirt. Any particularly stubborn areas were tackled using a wire brush in combination with Tile Doctor Remove and Go, which is a heavy-duty cleaner/coatings remover which works well on removing any old sealers, paints and adhesives.

Sealing a Victorian Tiled Floor

Once the floor was clean, I washed and neutralised the surface with plain water. While I was packing up for the day I also installed my air-blower to aid the drying process overnight.

Two nights later I returned to the cafe to seal the tiles with Tile Doctor Colour Grow. Colour Grow is a colour enhancing sealer that impregnates into the pores of the tile to bring out the natural colours whilst adding a durable matte finish that acts as a barrier to dirt.

Cafe Floor Chertsey After Cleaning
As you can see from the photo above, the result was fantastic. In fact, the customer loved her newly restored floor so much that she even told me to help myself to any cake of choice, I do like a bonus!

Professional Commercial Tiled Floor Restoration in Surrey

Heavily Soiled Victorian Tiled Floor Cleaned and Sealed at a Cafe in Chertsey Read More »

Victorian Hallway Floor West Byfleet After Sealing

Repairing and Cleaning a Checkered Victorian Tiled Hallway in West Byfleet

Victorian floors are known for their intricate and interesting patterns – so when tiles are in need of replacement, sourcing ones which are consistent with original pattern can be a difficult task.

This was the case when recently I quoted for a clean and seal of a large black and white Checkered Victorian tiled hallway at a property in the town of West Byfleet, Surrey. The customer informed me they had engaged a tiler to lay black tiles in the door thresholds to match the others. I queried why the tiler was not planning to lay tiles of the same pattern to match the rest and apparently this was due to the fact that the tiler couldn’t source the appropriate tiles.

Victorian Hallway Floor West Byfleet Door Threshold Before
Having dealt with these problems before I offered to quote separately to source and install reclaimed tiles that would provide consistency with the original pattern. The customers agreed to both jobs and I arrived at the property once I had sourced the tiles required.

Victorian Hallway Floor West Byfleet Tile Installation Victorian Hallway Floor West Byfleet Tile Installation

I set about laying the new tiles straight away, with my first action being to dig out the old cement that had been used to fill the gaps in the doorways, before making sure the sub base was flat. I then proceeded to carefully lay the tiles in a matching pattern.

Victorian Hallway Floor West Byfleet Tile Installation

Cleaning a Dirty Victorian Tiled Hallway

I then moved on to cleaning the Victorian tiles, immediately noticing numerous paint and glue stains that would have be to be tacked first. To address this problem, I applied Tile Doctor NanoTech HBU (formerly known as Ultra Clean), which uses Nano-sized particles to get beneath particularly tough stains and break them down. It’s suitable for use on a wide range of unsealed and sealed tiled surfaces, particularly where heavy dirt build-up occurs.

Victorian Hallway Floor West Byfleet Before Cleaning Victorian Hallway Floor West Byfleet Before Acid Wash

The product was scrubbed into the floor and then rinsed off using a wet vacuum to extract the soiled solution. Next I gave the tiles an acid wash using Tile Doctor Grout Clean-up, this acidic cleaner is good for tackling old cement and grout haze left on the surface of the tiles and following this I gave the floor a thorough rinse and steam to remove any trace of product.

Victorian Hallway Floor West Byfleet After Cleaning

Sealing a Victorian Tiled Hallway

I left the floor to dry completely for four days. Upon my return to the property, I gave the hallway a final light clean with Tile Doctor Neutral Tile Cleaner, just to ensure that the tiles were in the possible condition possible before being sealed.

Once satisfied with the results, I applied a single coat of Tile Doctor Colour Grow to seal the tiles. This is an impregnating sealer that will provide a long-lasting protection from the inside to mitigate the effect of the heavy wear caused by the high traffic of people walking in this area. In addition, the natural colours and shades in the black and white Victorian tiles are now enhanced, thanks to the colour intensifying properties in the product.

Victorian Hallway Floor West Byfleet After Sealing
I left the floor for a couple of hours before further sealing it with four coats of Tile Doctor Seal and Go to add surface protection and to add a nice low sheen to the appearance of the Victorian tiles.

Victorian Hallway Floor West Byfleet After Sealing
The customers were very pleased with the finished results, even going so far to call later that night to thank me. They also left the following feedback on the Tile Doctor feedback system:

“Bill Bailey installed total confidence in us as customers. Completely sympathetic to our needs, with a total understanding to our requirements. Now whilst this wasn’t the cheapest quote we had, it was the most honest, which is why we decided it was the one for us. I can honestly say that Bill’s work surpassed our expectations and I would thoroughly recommend Bill Bailey to anyone who is thinking about having any tile restoration done or expert cleaning also. A very, very happy customer who will be using Bill Bailey for any tiling jobs we have in the future.”

Professional Victorian Tile Restoration in Surrey

Repairing and Cleaning a Checkered Victorian Tiled Hallway in West Byfleet Read More »

=================================

West Surrey Tile Doctor

================================= Read More »

Scroll to Top