
Surrey

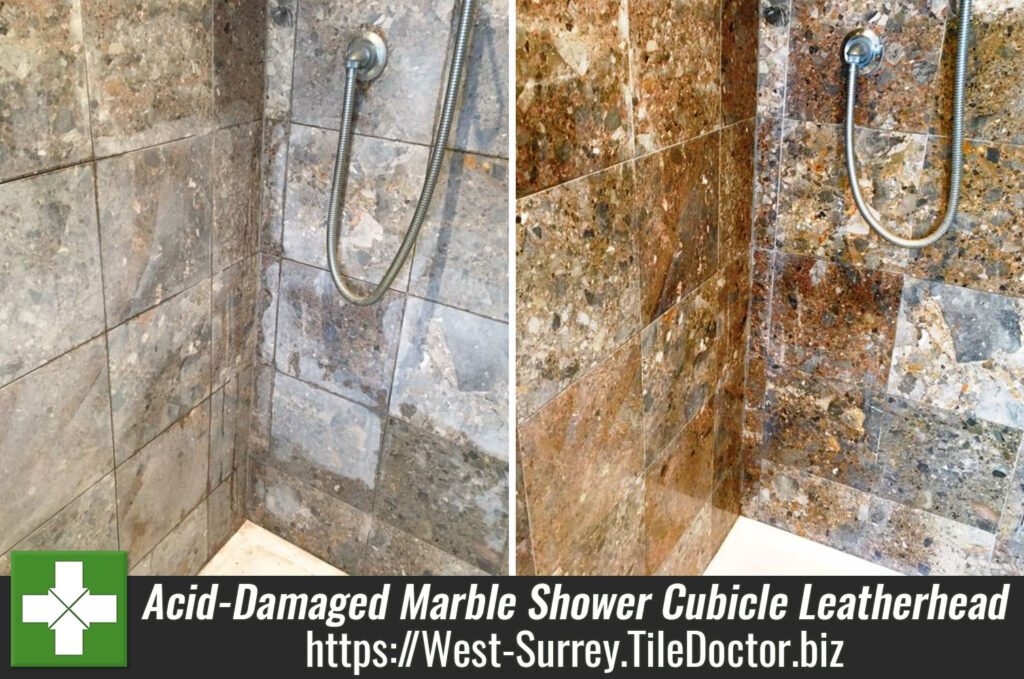
Acid-Damaged Marble Shower Cubicle Restored in Leatherhead

Acid-Damaged Marble Shower Cubicle Restored in Leatherhead

Marble tiles are a fantastic choice of stone for a shower cubicle because of its distinctive characteristics and quality. It can really add a luxurious feel and when used in a bathroom take it to the next level.

However, it’s extremely important to note that Marble like all natural stone is a porous and acid-sensitive material. It must therefore be cleaned with care using suitable products. This particular Marble tiled shower cubicle at a property in Leatherhead is a good example of this done wrong. The owner had used an acid-based cleaning product to clean the stone, resulting in damage to the sealer and causing unappealing streaks to form.
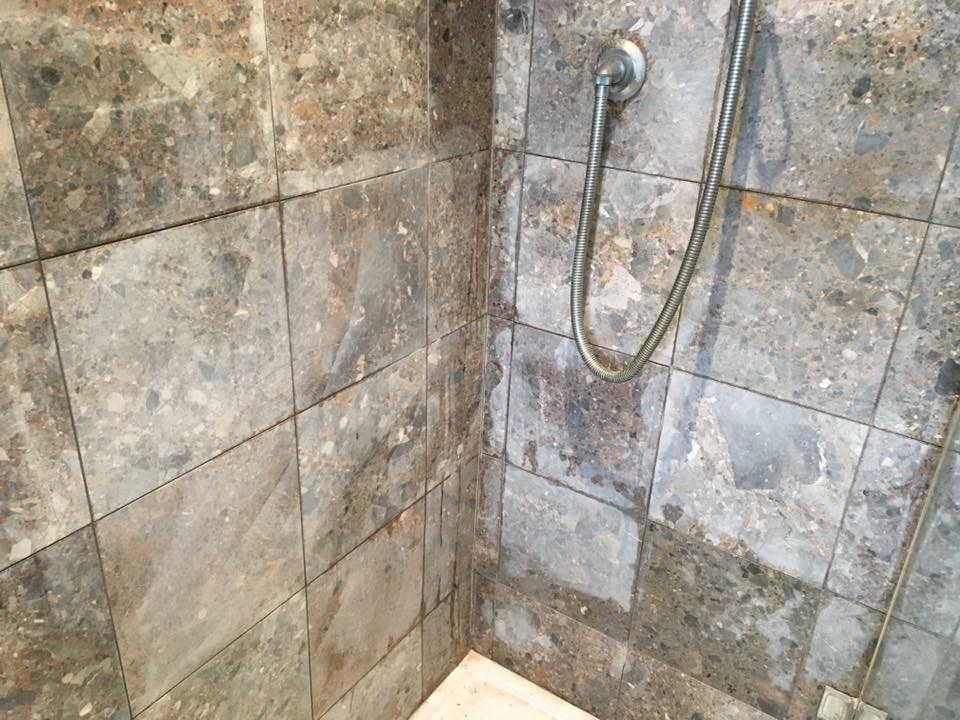
Marble Shower Wall Leatherhead Before Cleaning
This type of damage can appear irreparable but, with the right combination of cleaning methods and products, it can be fixed. Once the old sealer has been removed, and the tiles have been cleaned, polished and re-sealed, they can look as a good as new. Here’s how I helped this customer restore the Marble shower cubicle.

Cleaning and Polishing a Marble Shower Cubicle

To begin the restoration, I scrubbed the dirty grout lines using Tile Doctor Pro-Clean, which is a highly reliable and multi-purpose alkaline-based product. I then rinsed the tiles with water to remove the traces of cleaning product.

Next, I moved on to the polishing stage of the restoration – what we often refer to as burnishing. This involved the use of small six-inch diamond-encrusted burnishing pads applied with a hand buffer and with different levels of grit – ranging from Coarse to Very Fine. I started with the Coarse grit pad and worked my way sequentially through our four-pad system, polishing the stone with Medium, Fine and eventually the Very Fine pad to really bring up the polish.

Sealing a Marble Shower Cubicle

Once the shine had returned to the Marble and the damage had been removed, I re-sealed the tiles using two coats of Tile Doctor Colour Grow, a penetrating sealer designed to enhance the natural colours and patina of the stone. Once dry, I gave the tiles a final polish with a white buffing pad to put the finishing touches on the restoration.
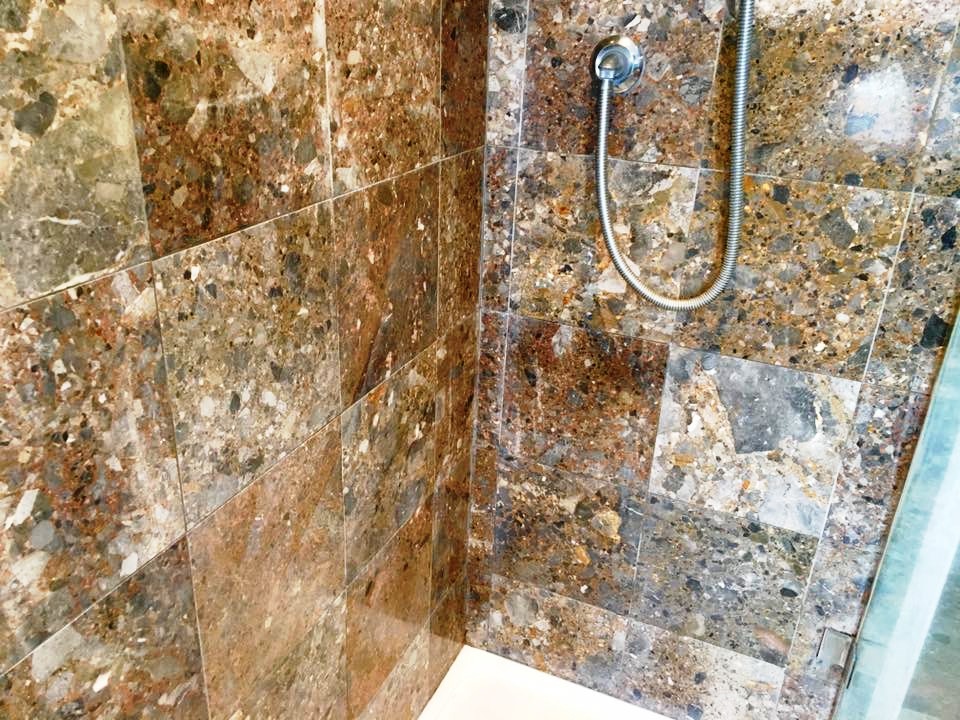
Marble Shower Wall Leatherhead After Cleaning
The customer was thrilled with the results, saying:
“I’m really happy with the result and we will make sure we don’t use supermarket cleaners again on natural stone. Rupert was a very personable tradesman who took pride in what he was doing. He has identified Tile Doctor Neutral Tile Cleaner as being the product we should have used in the first place and has sent me the website details.”
Another satisfied customer!

Professional Restoration of a Damaged Marble Tiled Shower Cubicle in Surrey

Acid-Damaged Marble Shower Cubicle Restored in Leatherhead Read More »

Victorian Tiled Hallway Before and After Cleaning and Sealing Weybridge

Lifeless Victorian Tiled Hallway Cleaned and Sealed in Weybridge

Details below of a tired and lifeless looking Victorian tiled hallway that I was asked to deep clean and seal at a house in the suburban town of Weybridge. The tiles were laid in a chequer pattern of Red, Yellow and Black tiles and if you look closely at the photographs you can cleanly see the ingrained dirt on the yellow tiles.

Victorian Tiled Hallway Floor Before Cleaning Weybridge Victorian Tiled Hallway Floor Before Cleaning Weybridge

Cleaning a Heavily Soiled Victorian Tiled Floor

I started the process straight away with an aggressive diamond encrusted coarse 200 grit burnishing pad fitted to a buffing machine and lubricated with water. The diamond encrusted pads really gets into the most deeply encrusted areas to remove the dirt.

Once the previous sealer and grime was removed I vacuumed up the soil using a wet vax and then gave the floor a quick blow dry with an industrial fan. For the next couple of hours, I got down to the corners to clean areas not touched by the pad. To finish I took a wire brush to any paint splash left over from recent decorating.

After further drying I was able to assess the yellow coloured tiles that would benefit from further attention. Several tiles near the heavy footfall areas benefited from a twenty-minute application of Tile Doctor Acid Gel. The gel removes mineral salt deposits and grout smears as well as breaking down deeply ingrained, long standing dirt. Once washed away and extracted using the wet vacuum I was done for the day. I warned the customer at this point that it’s common for the tiles to appear washed out in-between cleaning and sealing.

Sealing a Victorian Tiled Floor

I left the floor to dry naturally through evaporation for two days before returning to seal the floor. It’s important to ensure that the floor is bone dry before sealing as dampness can affect the sealer.

To seal the floor, I used Tile Doctor Seal and Go which gives a long lasting, tough, gloss look seal, it’s also water based so it doesn’t give off a smell as it dries like some products. Victorian tiles are quite porous so nine coats were applied, a process that took around four hours to complete.

Victorian Tiled Hallway Floor After Cleaning Weybridge
When the customer returned home from work she said the tiles looked brand new.

Professional Victorian Tiled Hallway Floor Maintenance in Surrey

Lifeless Victorian Tiled Hallway Cleaned and Sealed in Weybridge Read More »

╳
Scroll to Top