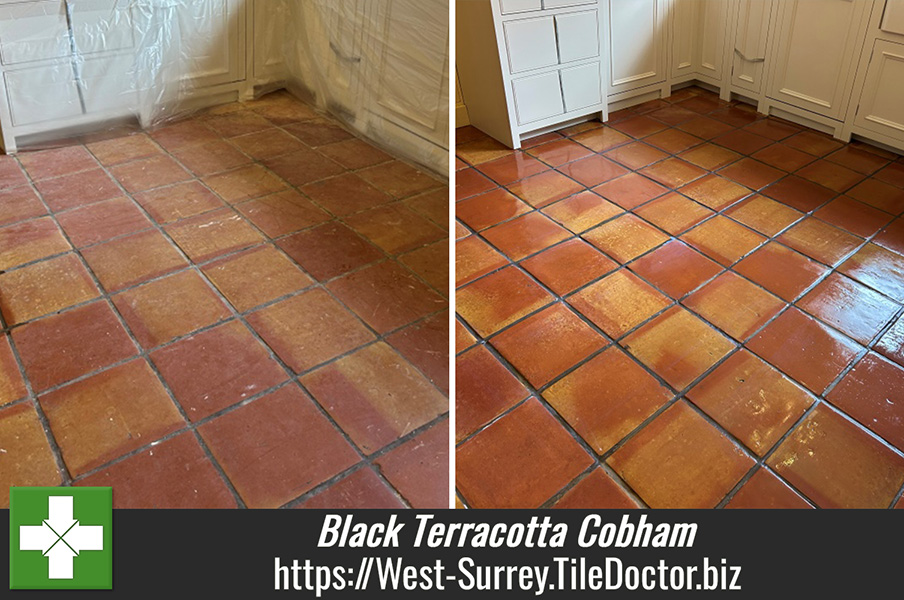
Terracotta Floor Restored at 400-Year-Old Cottage in Cobham
This Terracotta tile cleaning project in Cobham took a while off the ground as a new kitchen was being installed. Ideally its best to deep clean and seal the floor after the old kitchen is removed and before the new one is installed however you risk the installers making a mess on the floor after it’s been renovated.
In this case we agreed to do the work post installation when the workmen had gone and I would have the kitchen to myself. The quote was agreed and a date agreed well into the future to avoid any delays from the kitchen company.
Deep Cleaning a Terracotta Tiled Kitchen Floor
When the date finally arrived work started by removing wooden kickboards and dressing the new cabinets in protective plastic sheets. This would protect the kitchen units from splashing during the cleaning process.

Once the units were protected work moved onto cleaning the grout by running a strong dilution of Tile Doctor Pro-Clean along the grout lines and letting it soak in for ten minutes. This gives the product time to soak into the grout and breakdown the dirt and stains that can get caught in the cementitious top layer. The grout was then hand scrubbed using a stiff brush and the soling extracted with a wet vacuum.
Next step was to repeat the process with the Terracotta tiles, again using more Pro-Clean and leaving it to soak for ten minutes before working it in. This time though I used a floor buffer fitted with a 17-inch carbide brush to do the work. These pads are great for cleaning floors and help to lift ingrained dirt out of the pores of the tile up to the surface where if can be easily cleaned away.
The floor was extracted again with the wet vacuum and then rinsed with water and extracted again. Once done the floor was inspected and any stubborn areas re-treated or spot cleaned until I was satisfied the floor was as clean as it possibly could be.
Sealing a Victorian Tiled Hallway Floor
The Terracotta need to be dry before sealing and with it being a very porous material, I made sure to get the floor as dry as possible using the wet vacuum before leaving for the day and left it to dry out fully overnight.
The next day the floor was texted for moisture using a damp meter to confirm it was dry. The readings were acceptable and so the first of what would be several coats of sealer was applied leaving around thirty minutes between coats.
To seal the floor Tile Doctor Seal & Go was used which leaves an appealing satin finish and will work to protect the floor by keeping dirt on the surface where it can be easily cleaned away. The Terracotta tile and grout responded really well to the treatment and finished the transformation of the kitchen.

For the aftercare of sealed Terracotta floors, I recommend using Tile Doctor Neutral Tile Cleaner which is mild yet effective tile and grout cleaner that won’t impact the sealer. Many of the products you find in supermarkets are bleach based and are too strong for use on a sealed floor resulting in the sealer being eroded prematurely, they can also bleach the colour out of grout.
Professional Renovation of a Terracotta Tiled Kitchen Floor in Surrey
Terracotta Floor Restored at 400-Year-Old Cottage in Cobham Read More »