grout cleaning

Slate Floor Tile and Grout Renovation Farnham Utility

Neglected Slate Tiled Utility Room Floor Cleaned and Sealed in Farnham

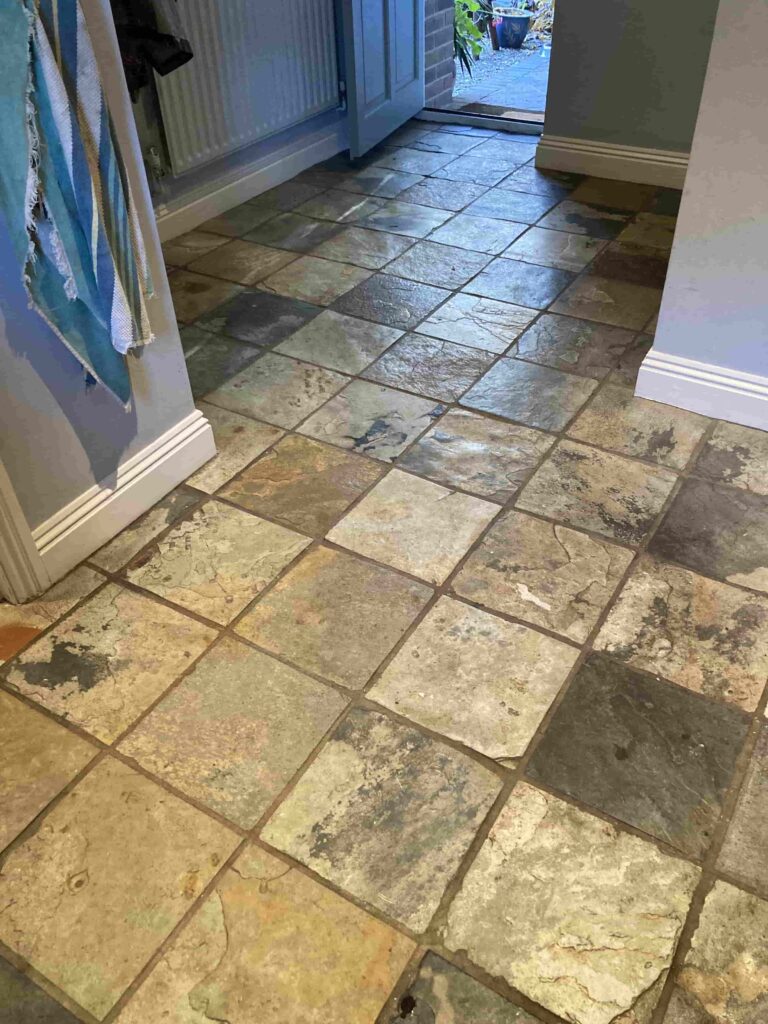
The Slate floor in this room at a property in Farnham was in quite a state. “Heavily soiled” is a polite description. The floor was situated in the utility room and hadn’t been cleaned properly since the house was constructed ten years ago.

The room was mainly used as a dumping ground for walking boots and was also where the dog slept. Being out of sight it was therefore out of mind but eventually they decided it was time to do something about it and reached out to Tile Doctor for help.

Slate Floor Before Cleaning Farnham Kitchen Slate Floor Before Cleaning Farnham Kitchen

I visited the property, surveyed the tiles and was confident the floor could be restored! From my survey I was also able to provide a quote for a deep clean and seal of the Slate tiles which was accepted and a date set for my return.

Cleaning a Slate Tiled Utility Room Floor

I cleaned the grout first with Tile Doctor Pro-Clean, this was done using the usual method of applying it directly to the grout and leaving it to soak in for ten minutes before using an abrasive wire brush to scrub the grout clean. The floor was then rinsed then the waste extracted with a wet vacuum. This was repeated until I was happy the grout was as clean as possible.

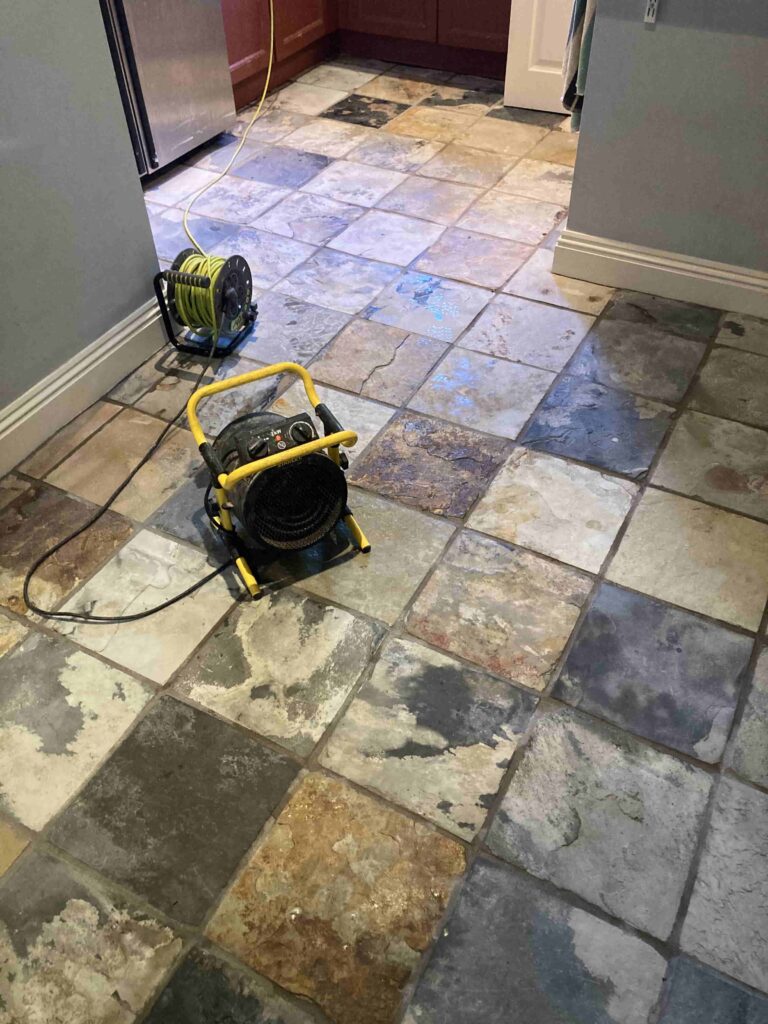
Slate Floor During Cleaning Farnham Kitchen Slate Floor During Cleaning Farnham Kitchen

Next up, I sprayed a strong dilution of more Tile Doctor Pro Clean over the tiles and left it to dwell this time for twenty minutes. The surface gradually turned yellow indicating that the product was working. Then using a tough carbide brush attached to a handheld polisher I slowly cleaned the tiles. Slate has a riven surface with lots of nooks and crannies that the brush can get into. All the waste soil was removed again with a wet vacuum and I then neutralised the floor rinsing it twice with hot water.
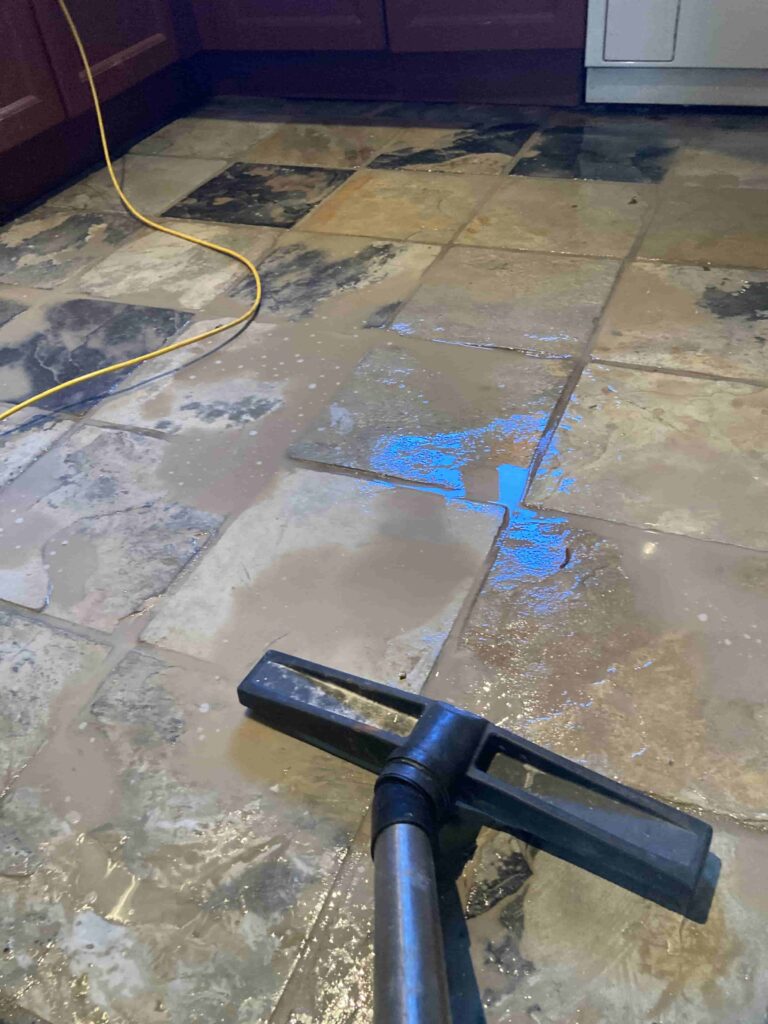
Slate Floor During Cleaning Farnham Kitchen Slate Floor During Cleaning Farnham Kitchen

Sealing a Slate Tiled Utility Room Floor

For the next hour or so I dried the floor with a heater and while waiting I cleaned the small brick patio by the front door which made the entrance look a lot more inviting!

Once the floor looked dry, I tested with the damp meter to make sure it was ready to seal. Satisfied the levels were good, I applied three coats of Tile Doctor Seal and Go Extra. This is a moder tough sealer that’s ideal for busy floors that leaves an attractive sheen finish.

Once dry the floor looked so much clear and appealing, much to the relief of my client who was very happy with the work we carried out- and so was the dog!

Slate Floor During Sealing Farnham Kitchen Slate Floor During Sealing Farnham Kitchen

For aftercare I recommended using Tile Doctor Neutral Cleaner which is a Neutral pH tile and grout cleaner and will help ensure the floor stays in great condition for many years to come. It always worth readying the label of a Tile Cleaning product to check its suitable for use on a sealed floor as most household products are usually acidic and can trip a sealant off a floor with repeated use.


Professional Restoration of a Slate Tiled Utility Room in West Surrey

Neglected Slate Tiled Utility Room Floor Cleaned and Sealed in Farnham Read More »

Limestone Kitchen Floor Cleaning and Polishing Weybridge

Large Limestone Tiled Floor Stripped and Resealed in Weybridge

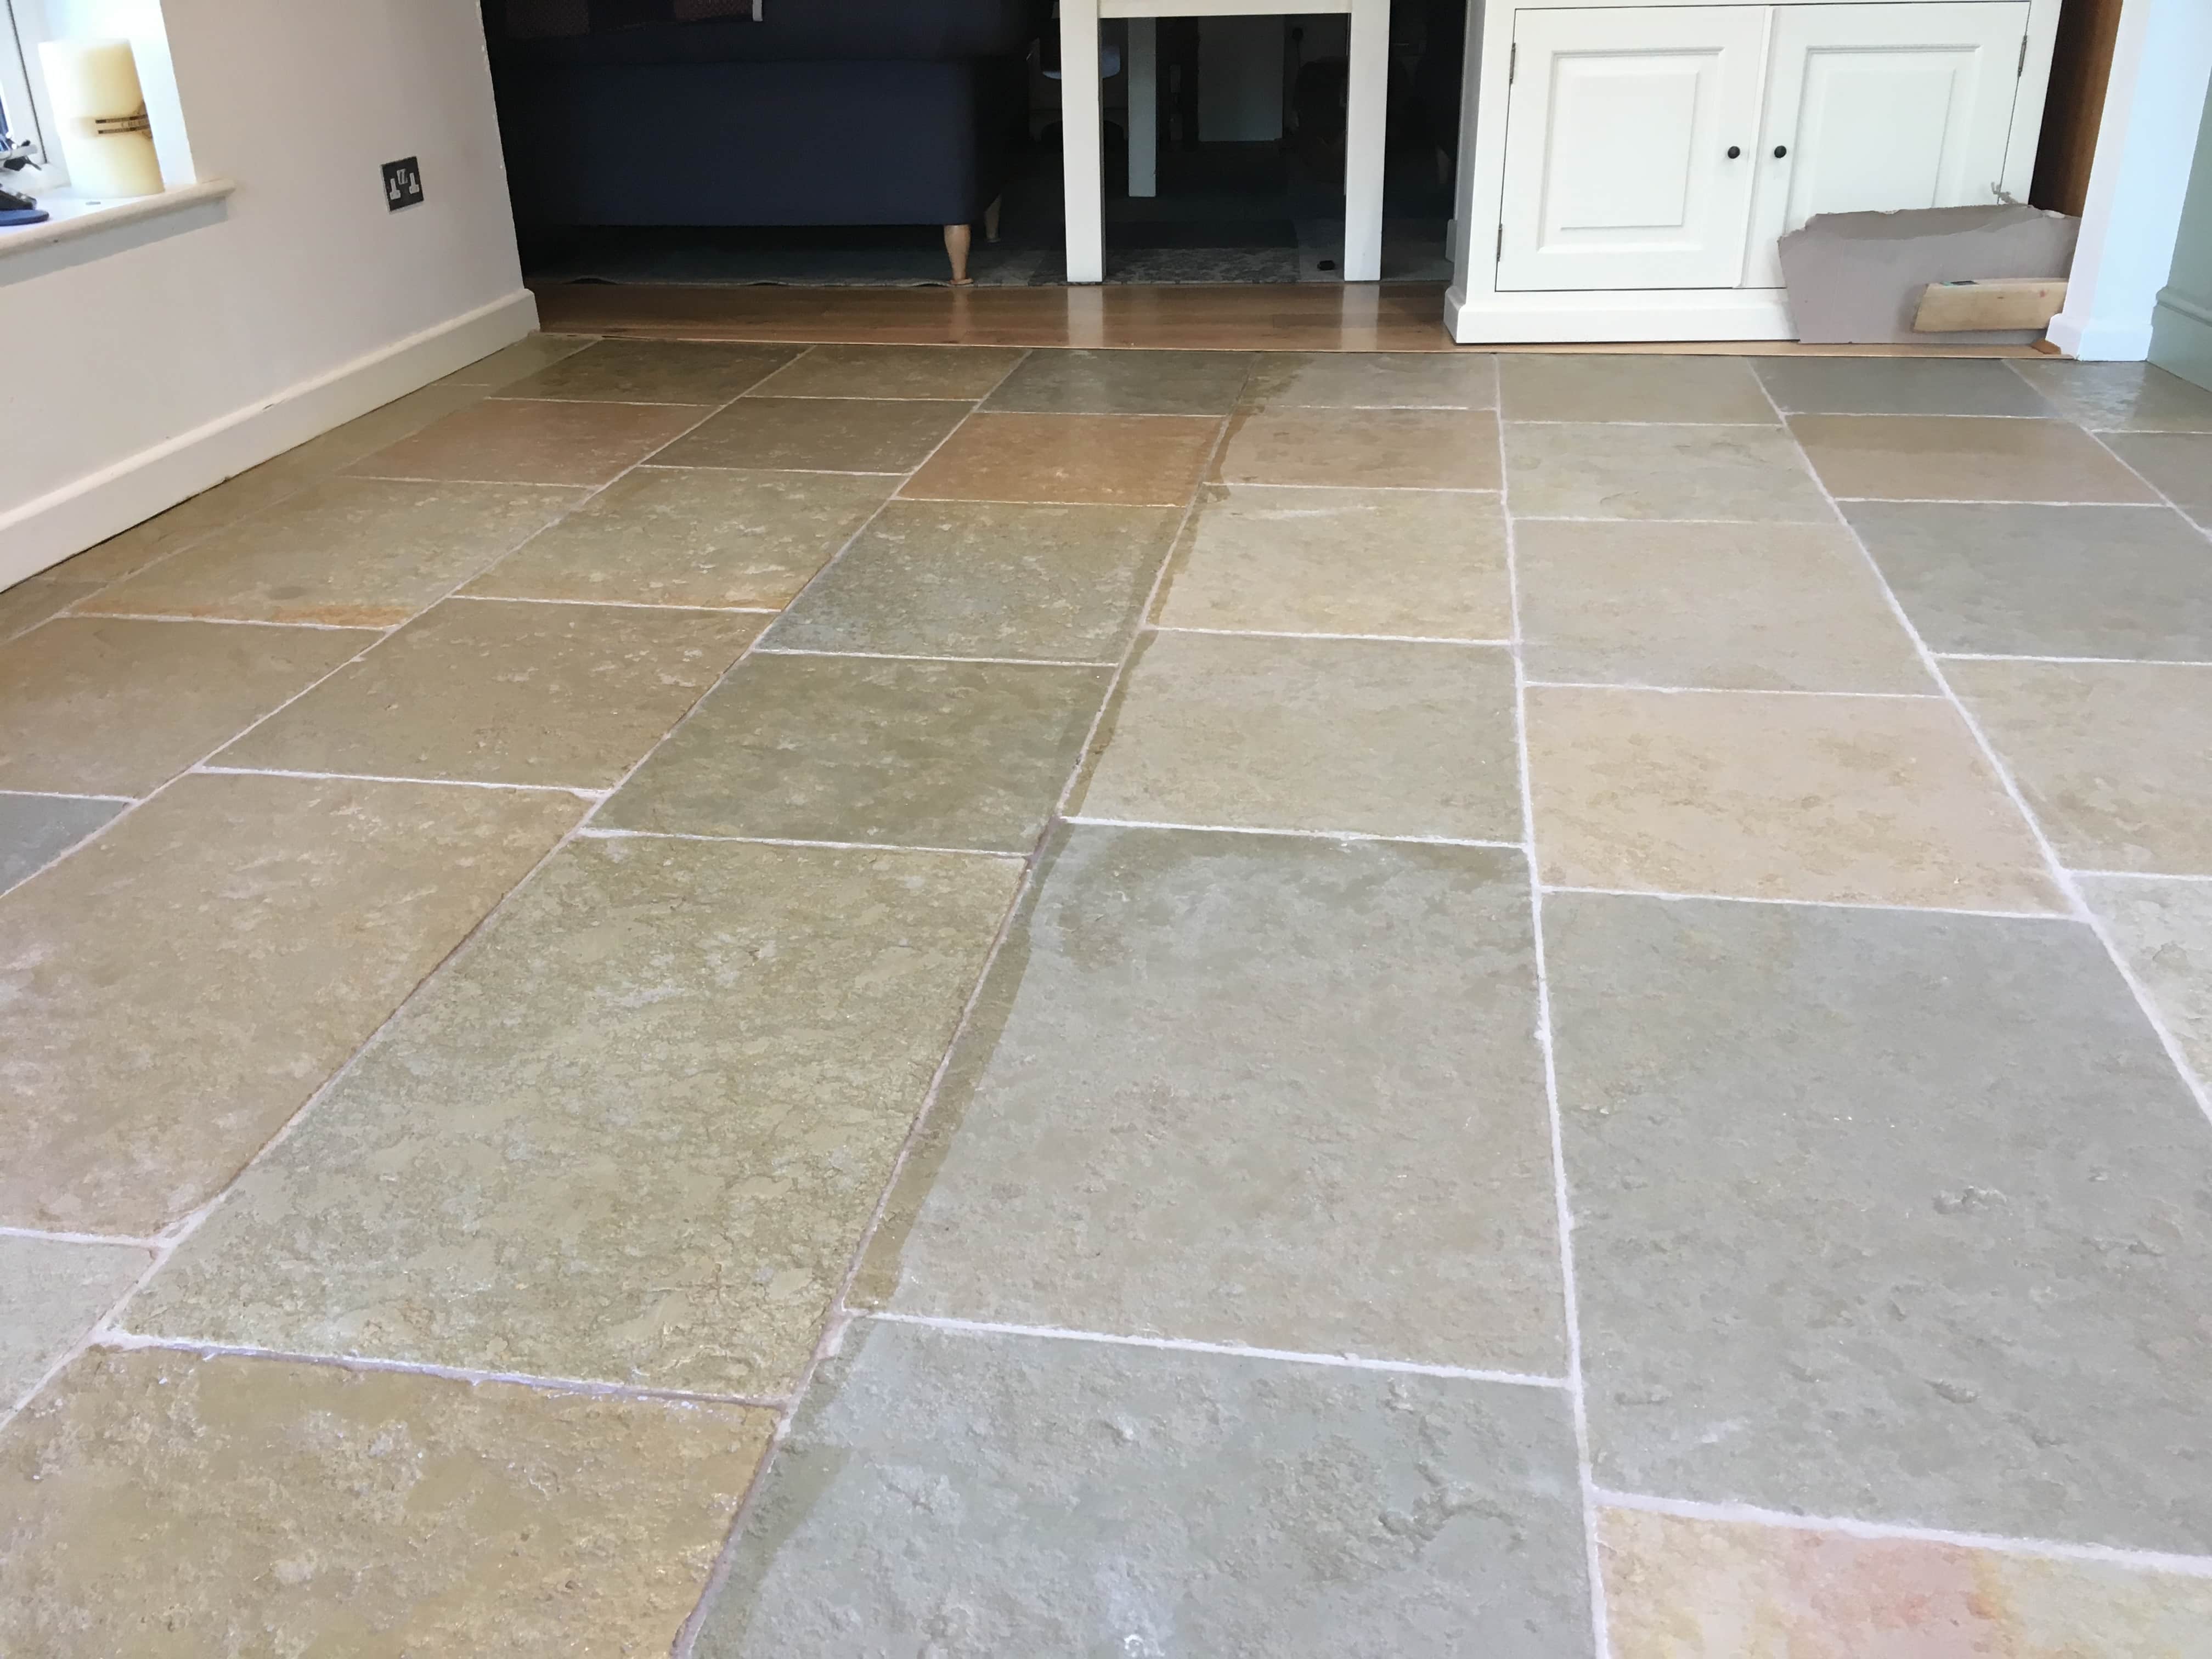
The photographs below were taken at a property in Weybridge where the owner had Limestone tiles installed throughout the Kitchen and adjacent dining room. Like any stone floor the sealer and appearance will degrade with use and in this case the tiles and especially the grout had become darker with ingrained dirt. The owners had decided it was time to the floor professionally cleaned and asked me to quote for the work.

Limestone is a beautiful stone that cleans up really well but to get the best out of it needs to be polished with burnishing pads using heavy equipment, something the tile shop salesman usually forgets to mention.

Limestone Kitchen Floor Before Cleaning Weybridge

Having surveyed the floor I worked out a renovation plan which included tile and grout cleaning, stone polishing and finally sealing to protect it going forward. Happy with my quote we set a date for the work to begin.

Resealing a Polished Limestone Floor

My first job was to protect the kitchen cabinets from splashing with a sheet of decorator’s plastic about a foot from the ground upwards. I also like to apply a thin line of transparent mastic at the base of the cabinets where they meet the tile as this is usually a place where unwanted water can find its way in.

Once the kitchen woodwork was protected, I set about deep cleaning the grout. To do this I run a dilution of Tile Doctor Pro-Clean along the grout lines then leave it to dwell for five minutes and then scrubbed by hand using a wire brush until clean. All the waste is then rinsed off and extracted with a wet vacuum.

With the grout now clean and the soil removed I set up my rotary floor cleaning machine ready to burnish the stone tile and restore the finish with a set of diamond encrusted burnishing pads.

The first pad in the set to be applied is a coarse 400 grit pad that is designed to open the pores of the stone allowing dirt to be flushed out and removes existing sealers in the process. Water is used for lubrication and the during the following hours the process was repeated with the medium 800 grit and fine 1500 grit pads which gradually close the pores, buildup the polish and return the shine. This is a wet process which generates a slurry which is removed with after each pad with the wet vacuum.

Once the whole floor had been burnished it was given a final rinse and dried as much as possible with the wet vacuum. It was then left to fully dry off fully overnight.

Sealing Limestone Tiles

Returning the next day, I tested the floor was dry with a damp meter which confirmed the floor ready for sealing. The customer wanted a natural look to the floor so we chose to apply Tile Doctor Ultra-Seal which adds almost invisible protection. This sealer is an impregnator which soaks into the pores of the stone preventing dirt from becoming ingrained and keeping it on the surface where it can be easily removed. Two coats were applied and this should keep the floor protected for many years to come.

Limestone Kitchen Floor After Cleaning and Polishing Weybridge

Once complete I advised the owner to stay off the floor for an hour or so and then they can return the furniture. For aftercare cleaning I recommend Tile Doctor Stone Soap which is a gentle but effective cleaner that will keep the floor clean whilst maintaining the patina and without harming the sealer.


Stripping and Resealing a Polished Limestone Floor in West Surrey

Large Limestone Tiled Floor Stripped and Resealed in Weybridge Read More »

Travertine Kitchen Tile Renovation Cobham

Travertine Floor Tiles Cleaned and Sealed in a Cobham Kitchen

The property in Cobham had a large Travertine tiled floor in the kitchen, which was not looking its best, and was now in need of a deep clean and re-seal to bring it back to life.

Travertine Kitchen Tile Before Cleaning Cobham

Travertine is a beautiful, natural stone that needs some regular attention to keep it looking at its best. Like any natural stone its vulnerable to dirt becoming ingrained in the pores and to prevent this it needs to be sealed. A sealer keeps the dirt on the surface where it can be easily removed through regular cleaning, however a sealer will usually only last for three to four years depending on how the floor is used and maintained.

Another issue specific to Travertine is its acid sensitivity which comes from the calcium carbonate that it’s formed from. You need to be careful not to use acidic products on the stone as this can cause it to dissolve over time leading to pitts and potentially holes forming in the surface. If the pitts are not filled they will attract dirt easily making the floor hard to keep clean.

Travertine Kitchen Tile Before Cleaning Cobham Travertine Kitchen Tile Before Cleaning Cobham

I visited the property to survey the floor and gave the client a price for its renovation which would take two days. Whilst there I also carried out a small cleaning test to ascertain the best cleaning method and to demonstrate what could be achieved. They were happy to go ahead with the quote so we agreed a suitable date for the work to start.

Cleaning a Travertine Tiled Kitchen Floor

On day one I started by wrapping the kitchen cabinets in decorator’s plastic to protected them and applied a thin line of mastic where the tiles meet the floor. This is done to keep unwanted water out during the cleaning process.

The travertine floor had been laid using different sizes of tile in an irregular pattern which resulted in a lot of grout lines that needed cleaning. I find the best way to do this is with Tile Doctor Pro-Clean, scrubbing it in by hand with a wire brush, its hard work but its effective although it did take up most of the morning. Afterwards the grout was rinsed with water and the waste removed with a wet vacuum.

After lunch, I turned my attention to the tiles which needed to be burnished using a series of diamond pads fitted to a buffing machine fitted with extra weight to increase traction. Work started with the application of a coarse 400-grit pad which is run over each tile three to four times using only water for lubrication. The floor was then rinsed and the soiling extracted before moving onto the next pad in the series which is 800-grit and then onto 1500-grit.

This wet process pores in the stone allowing the dirt to be flushed out and then slowly closes them again leaving the floor clean and ready for sealing. By the end of day one all the Stone and Grout was clean and was left to dry out overnight.

Sealing a Travertine Tiled Kitchen Floor

The following day I checked the moisture levels of the floor with a damp meter to make sure it was dry and ready to accept a sealer. The results were good, so I set about applying the first of what would be two coats of Tile Doctor Ultra-Seal. This sealer is an impregnator that soaks into the pores of the stone preventing dirt from becoming ingrained there, it doesn’t contain a colour enhancer so leaves a very natural finish.

Travertine Kitchen Tile After Cleaning Sealing Cobham

The floor was then once polished with the final burnishing pad in the set which is a very fine 3000-grit, this last pad removes any excess sealer and leaves a nice subtle appealing shine on the floor. The client was very happy with the finish we had achieved, the floor now has a lovely sheen and should stay looking good for some time.

Travertine Kitchen Tile After Cleaning Sealing Cobham

For aftercare cleaning I recommended the use of Tile Doctor Stone Soap which is ideal for sealed stone floors. Not only is it pH neutral so its safe to use on sealed travertine but it also includes a patina enhancer that will help maintain the shine.


Professional Renovation of a Travertine Tiled Kitchen Floor in West Surrey

Travertine Floor Tiles Cleaned and Sealed in a Cobham Kitchen Read More »

Ceramic Tile and Grout Cleaned in Woking

Ceramic Tile and Grout Cleaning in a Woking Kitchen

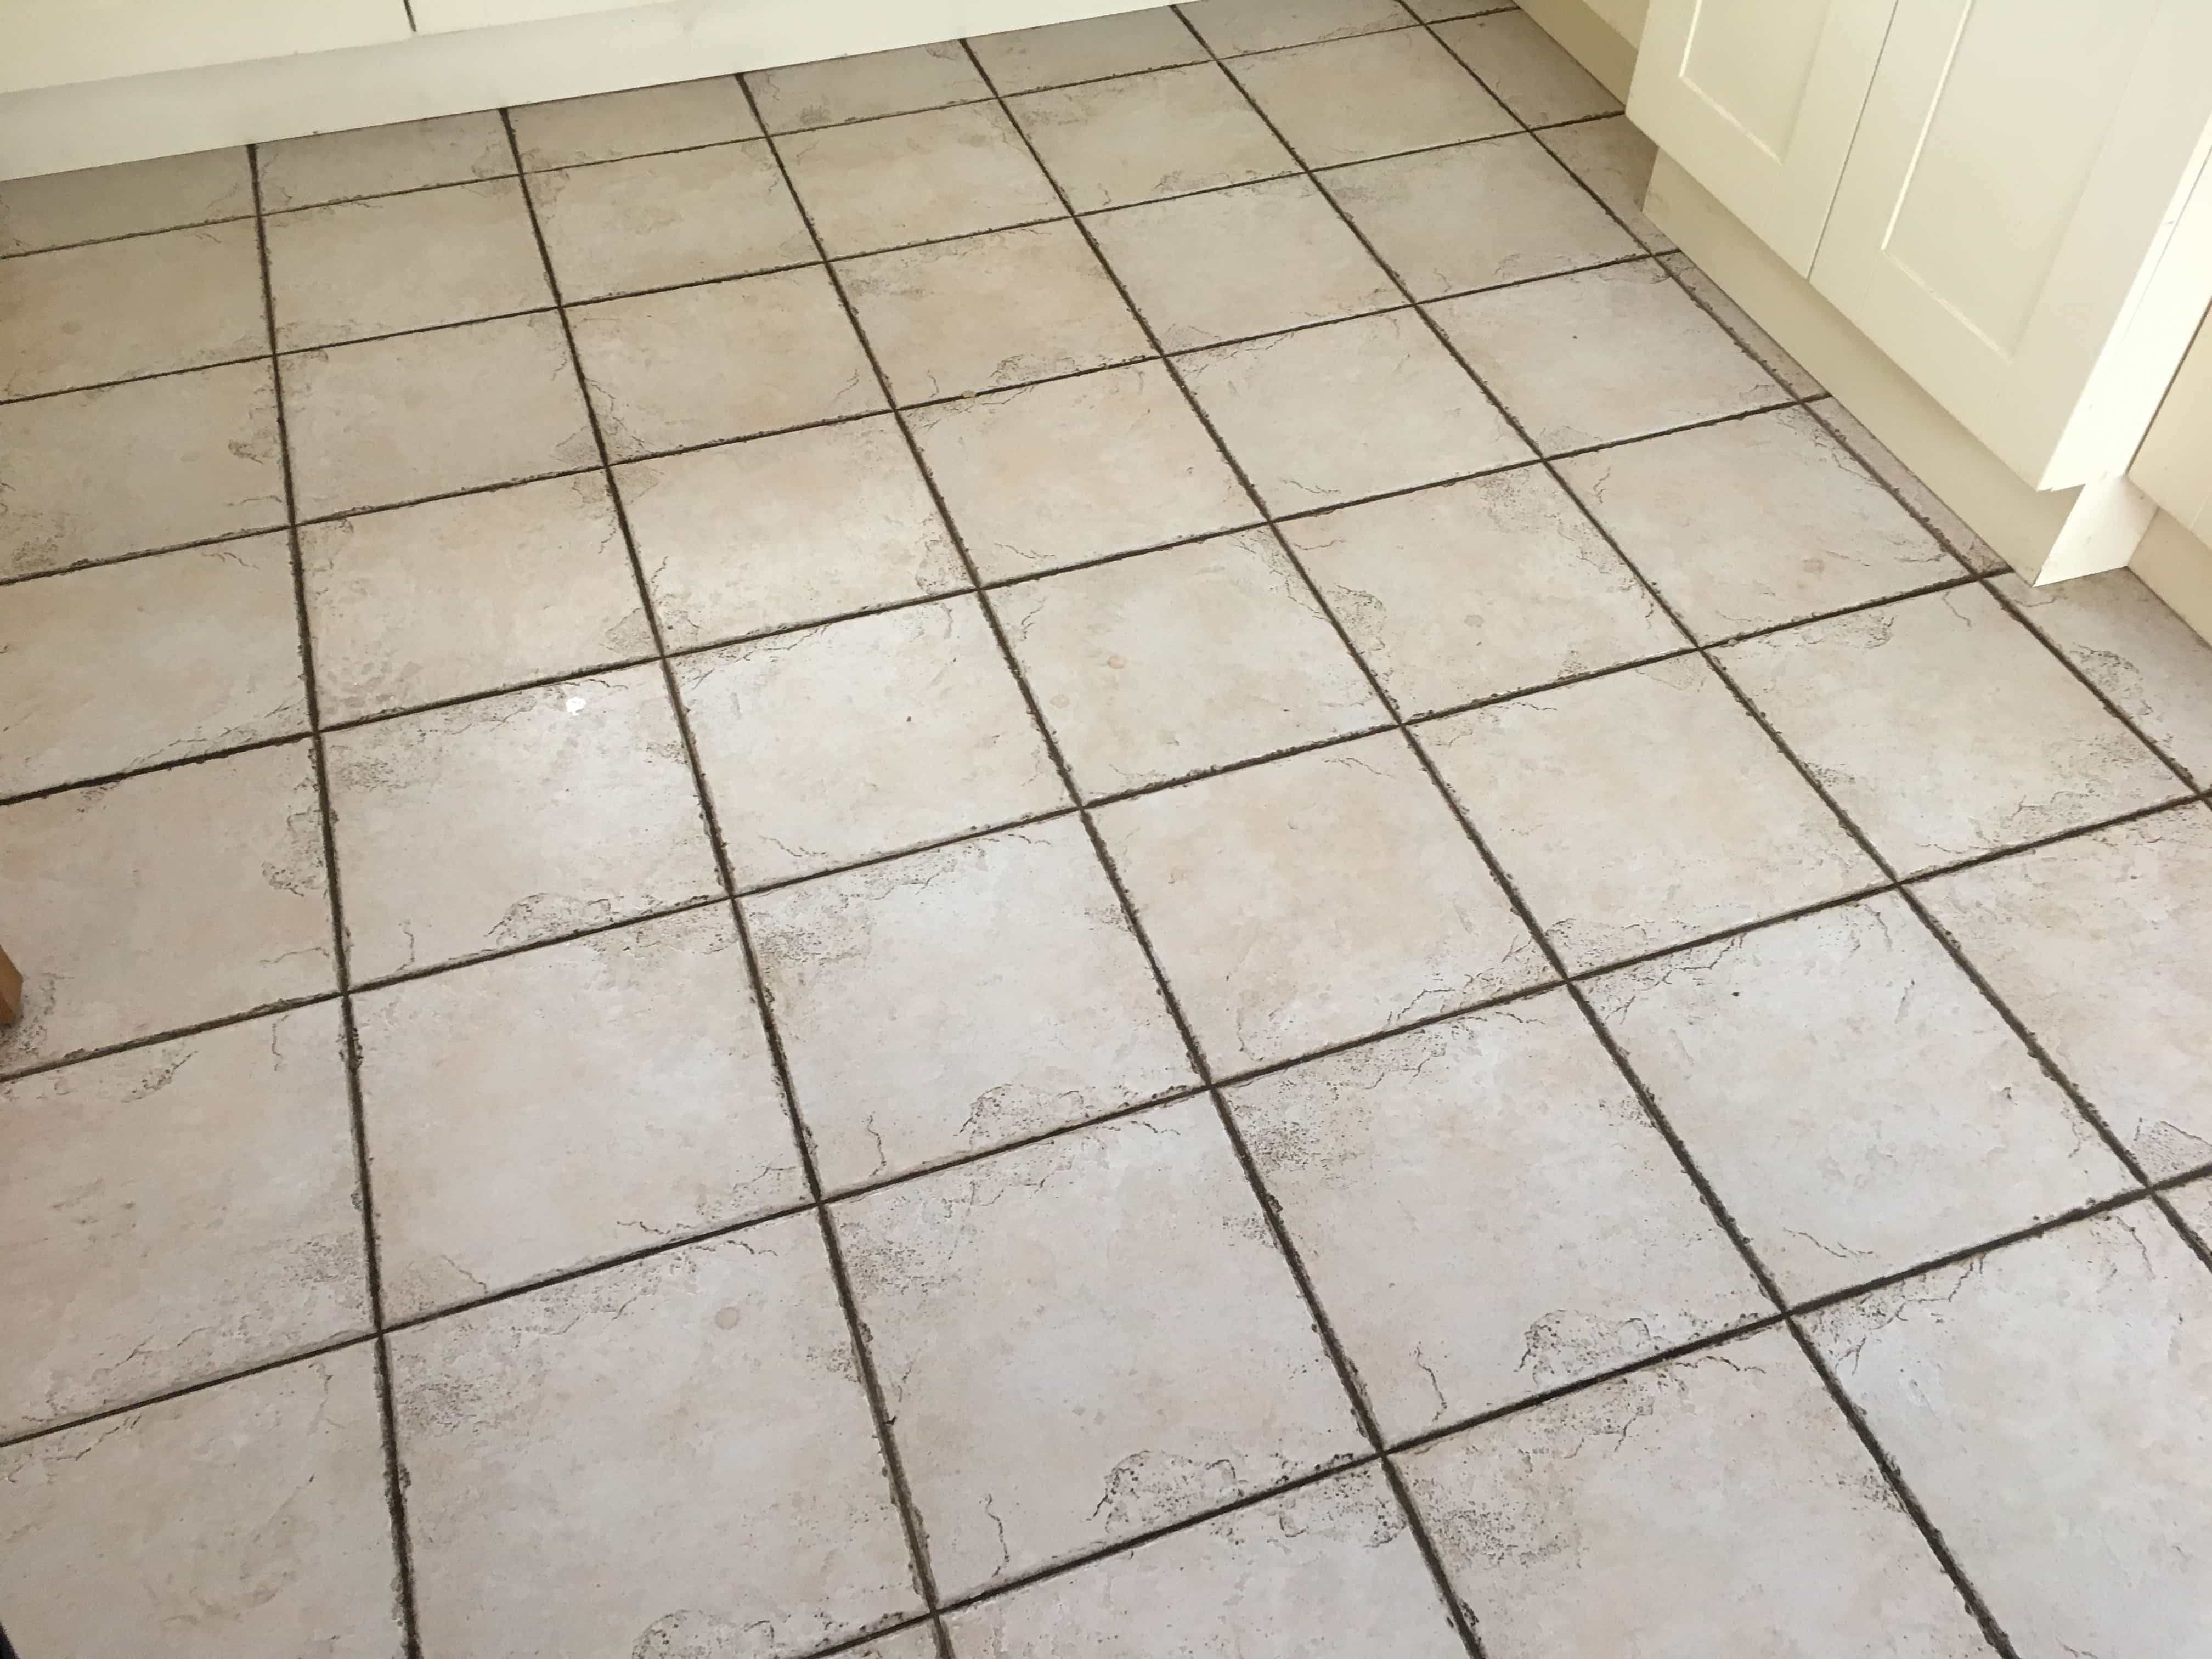
I took the photographs below of a Ceramic Tiled kitchen floor at a property in Woking. Two adults, two children and a dog so a lot of foot fall coming in and out of the patio doors that opened to the garden. Ceramic tiles are an ideal choice for a busy floor like this however we all know that children and animals don’t tend to wipe their feet and so they were struggling to keep the tile and grout clean.

Ceramic Tiled Kitchen Floor Before Cleaning Woking Ceramic Tiled Kitchen Floor Before Cleaning Woking

Ceramic tiles are usually very easy to keep clean however grout has a rough cementitious surface and so easily attracts dirt turning it black. Also, we find that dirt is washed into the grout line during cleaning which doesn’t help.

Happy to assist I quoted for deep cleaning the tile and grout with a weighted mechanical floor buffer which would scrub the floor clean again, the work would also involve manually cleaning the grout as the pads can struggle to reach into the recesses of the grout line.

Deep Cleaning Kitchen Ceramic Tile and Grout

On arrival I ran a thin line of transparent mastic along the kickboards where they meet the tiles. Unwanted water can be destructive and cause the boards to warp. I leave the mastic in place once I’ve finished as it looks subtle and offers added protection.

With that done I sprayed the tiles with and 1:5 dilution of Tile Doctor Pro-Clean and left this to soak into the floor for twenty minutes. The Pro-Clean breaks down the dirt turning it a shade of yellow. While this was happening, I retrieved a weighted floor polisher from the van. The iron bars I use as weights improves traction to make the clean more.

Once the Pro-Clean had soaked in I went around the grout lines giving them a good scrub with more Pro-Clean and a wire brush. I’m yet to find a machine that does this as effectively as hand brushing so for best results I get on my hands and knees and give it a good scrub. You can see from the pictures the dirt being released.

Ceramic Tiled Kitchen Floor During Grout Cleaning Woking

Once the grout was done the buffing machine was brought in fitted with a black scrubbing pad that won’t scratch the tiles but does a job of releasing the dirt. All the dirt is vacuumed up with a wet vax. Then just to be sure I neutralise with fresh, warm water. This is also removed leaving the tiles to dry.

Ceramic Tiled Kitchen Floor During Cleaning Woking

Once dry the floor was inspected and any stubborn areas spot treated until both I and the customer were satisfied the tile and grout was as clean as it could be.

Normally after cleaning the final step would be to seal the tiles, however Ceramic tiles won’t take a sealer so once the cleaning was done the job was completed, and in less than a day.

Ceramic Tiled Kitchen Floor After Cleaning Woking Ceramic Tiled Kitchen Floor After Cleaning Woking


Professional Clean of a Ceramic Tiled Kitchen in West Surrey

Ceramic Tile and Grout Cleaning in a Woking Kitchen Read More »

Exterior Ceramic Tiled Rooftop Patio Grout Cleaning Guildford

Grout Cleaning a Ceramic Tiled Rooftop Patio in Guildford

How about this for something different, a roof top patio in Guilford that was tiled with Ceramic Tiles. The work has been done some years prior and I understand from the owner that a crane was needed to bring all the materials onto site. The owner had called me in because grout had turned brown and there was what appeared to be limescale forming in some places.

Ceramic tiles by their very nature are very easy to clean however grout can be problematic due to its cementitious rough texture that can trap dirt and cause it to discolour. Ceramic tiles actually make the problem worse as their glazed coating makes them impervious and dirt washes off the tile straight into the grout line.

Exterior Ceramic Tiled Rooftop Patio Before Grout Cleaning Guildford

It was clear to me that deep cleaning the grout would improve the general appearance of the patio and after agreeing the solution with the client a date was agreed for my return to do the work which should only take a day. I needed a dry period to do the work and fortunately the weather gods were in our favour so the date worked out.

Cleaning a Ceramic Tiled Patio Floor

I returned on the scheduled date and set about preparing the tile and grout with strong dilution of Tile Doctor Pro-Clean. This product is our go to tile and grout cleaning product and works best when left to soak in for ten minutes first. I then scrubbed all the grout lines by hand with a wire brush to really work the solution into the grout and get the best result. Once done the now dirty cleaning solution was rinsed off with water and extracted with a wet vacuum.

Although an improvement there were several areas that had experienced deep seated staining. I suspect the overhanging trees and other greenery were to blame for some of the staining but being outside and exposed to the British weather can also cause issues. To resolve I removed the stained grouting by running a sharp blade along the joints and a Fein oscillating tool. Once done the grout was replaced with a matching product.

Next, I removed the limescale with Tile Doctor Grout Clean-up and a Stanley blade. For maximum effect the product is left to soak in for around twenty minutes first so I used this time to bring up my machinery in preparation for cleaning the tiles. I use a rotary floor cleaner fitted with a black nylon pad to remove the dirt. After vacuuming away the limescale and other detritus I cleared the area of all tools so I could seal the grout.

Sealing Grout on a Rooftop Patio

I left the patio to dry out for a few hours and then proceeded to apply the sealant for which I used Tile Doctor Ultra-Seal. We find the best method is drop the sealer along the grout line using a Pipette and then to rub off the excess later.

Exterior Ceramic Tiled Rooftop Patio After Grout Cleaning Guildford

Sealing grout this way is a slow but very effective method but it’s worth doing as it will protect the grout from future staining, allowing it to keep its appearance for longer and make it easier to clean. I often get asked how long sealers last but it’s a tricky question to answer in this case as being external it really depends on the weather.


Professional Clean of a Ceramic Tiled Rooftop Patio in Surrey

Grout Cleaning a Ceramic Tiled Rooftop Patio in Guildford Read More »

Travertine Tiled Shower Before After Reburb Oxshott

Mouldy Travertine Tiled Shower Cubicle Refurbished in Oxshott

I received a call from a customer in Oxshott regarding a Travertine Tiled Shower Cubicle which was grubby and needed refurbishing. As it turns out his wife was about to give birth to their first child and he wanted the bathroom shower cubicle cleaned asap.

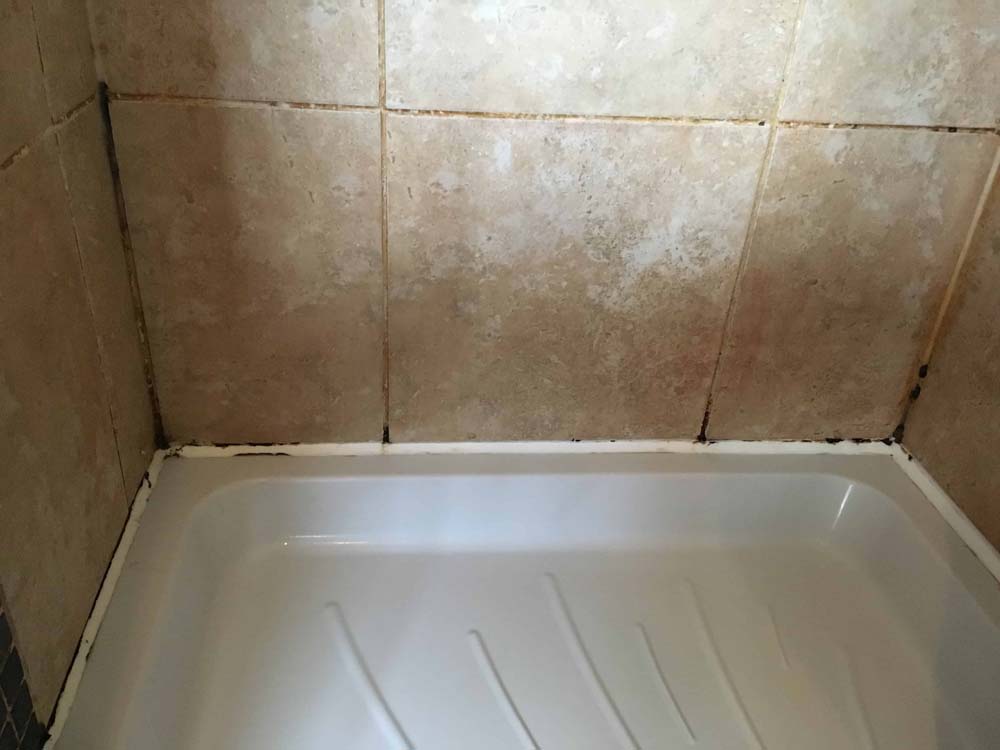
Travertine Shower Cubicle Tiles Before Refurbishment Oxshott

The tiles were Travertine and apart from the usual staining from soaps etc I didn’t expect they would present too much trouble; however, the Grout was stained with dirt and mold and I could see this is where the focus would need to be.

Travertine Shower Cubicle Tiles Before Refurbishment Oxshott

Cleaning a Travertine Tiled Shower Cubicle

Focusing on the grout lines first I decided to apply a Tile and Grout cleaning product called Tile Doctor Duo Clean which comes with spray head for easy application. The spray mixes the solution with air making it lighter and sticks to the tiles more easily, it’s also good at breaking down mold.

With the dirt beginning to become loose and lifted out of the pores of the grout the next step was to apply a gel-based cleaner called Tile Doctor Oxy-Gel. Being a gel, it really sticks well to vertical surfaces allowing it to have a longer dwell time. Next step was to work the cleaning agents into the grout lines even further with a wire brush. After cleaning the dirt was rinsed off with water and the soiling removed with a wet vacuum.

The next step was to remove all the existing silicone mastic with a sharp knife from around the shower tray and along the verticals. Once mold gets a grip on the mastic sealant it’s very difficult to remove so easier to replace. Once all the rubbish was swept out, I dried any remaining dampness from the grout and tiles with a heat gun.

Travertine Shower Cubicle Tiles During Refurbishment Oxshott

Sealing a Travertine Tiled Shower Cubicle

The next step was to seal the Travertine tiles, they do have to be dry for that however it was such a small area I was able to speed up the drying process and it wasn’t long before I was able to start the application. For Travertine I like to use a sealer called Tile Doctor Colour Grow, as its name suggests it contains a colour enhancing formula which brings out the natural brown colours in the stone. Its also fully breathable and works by seeping into the pores of the stone protecting it from within.

Whilst waiting for the sealer to dry I also cleaned up the shower glass and replaced the mastic sealant I had stripped out after cleaning with an anti-mold product that should help prevent the problem in future.

Travertine Shower Cubicle Tiles After Refurbishment Oxshott

Before leaving I discussed the mold problem with my customer explaining that the best solution to that problem though is to increase ventilation as it thrives in humid conditions; other things you can do include leaving a window and door open afterwards to improve cross ventilation and you can also run cold water through the shower afterwards. With a sealed stone shower, you also must be careful what product you use to clean the tiles with afterwards, never use acidic products like limescale remover or bleach that can etch the stone. We recommend using Tile Doctor Aqua-Pro which is a mild but effective cleaner that can be applied after showering.


Travertine Tiled Shower Cubicle Cleaning and Grout Recolouring in Surrey

Mouldy Travertine Tiled Shower Cubicle Refurbished in Oxshott Read More »

Sandstone Tiled Kitchen Floor Renovation Farnham

Restoring a Sandstone tiled kitchen floor in Farnham

Laid six years ago at a house in Farnham this Sandstone tiled kitchen floor was routinely trampled on by two teenagers, gardening parents and two large dogs. All of this had taken its toll of the sealer which had worn off and without its protection the Sandstone tile and grout had turned an indistinguishable sea of brown.

Sandstone Kitchen Floor Before Cleaning Farnham

The floor now needed a deep clean and reseal to restore it appearance and get it looking its best for which I had planned should take two days, the first day for cleaning and drying, the second for sealing and quoted accordingly. My client was happy with the quote and we scheduled a date to do the work.

Sandstone Kitchen Floor Before Cleaning Farnham

Farnham is a market town in Surrey and is largest town in the borough of Waverley. It is quite a historic town, with many old buildings, including a number of Georgian houses. With good access links to the A3 and London by train its popular with commuters and I often get requests to work here.

Cleaning a Sandstone Tiled Kitchen Floor

I began by taping up the wooden skirting and the plinths in the kitchen to protect them from splashing during the work. Then armed with Tile Doctor Pro-Clean and a stiff brush I set about cleaning up the grout. The dirt released was removed with a wet vacuum before it had a chance to dry then using more Pro-Clean and a 17” buffing machine fitted with a rotating black nylon pad I cleaned the tiles.

The unamused dogs had been banished to the garden. I love dogs but they were chasing my machine around, so I needed to keep them out of the way. The floor tiles were surprisingly dirty, and the client was quite shocked by the amount of dirt I manged to extract.

Once finished I left the floor to dry off fully overnight, sealing a damp floor is never recommended and can result in a patchy appearance.

Sealing a Sandstone Tiled Kitchen Floor

Returning the next day, I first checked for areas that needed further attention and then took several moisture readings with a damp meter to check the floor was dry. Satisfied that it was, I was ready to apply the sealer.

Sandstone Kitchen Floor During Sealing Farnham

We had discussed choice of sealer previously and for this floor I had recommended a Tile Doctor sealer called Seal and Go Extra which would be ideal for her traffic heavy floor. Sealing is an important step as it protects the tiles and grout from dirt becoming ingrained in the stone and improves the look of the stone. Seal and Go Extra is also super tough and should last for years if cleaned with the right product. It sets with a subtle sheen but not a shine which she definitely didn’t want. Three coats of sealer were applied which takes around two hours to be dry to the touch but really needs 24 hours for it to cure.

Sandstone Kitchen Floor After Cleaning Farnham

The sealer brought out the variety of colours in the stone floor and the family were happy with their new floor, now they just had to keep the dogs out of the way for 24 hours!

For aftercare I recommended the use of Tile Doctor Neutral Tile Cleaner to keep the floor in great condition.

Sandstone Kitchen Floor After Cleaning Sealing Farnham


Professional Restoration of a Sandstone Tiled Kitchen in West Surrey

Restoring a Sandstone tiled kitchen floor in Farnham Read More »

Worktop Grout Before After Renovation Guilford

Re-colouring of Grout on Ceramic Tiled Worktops in Guildford

The Splashback and Worktops in this Guilford Kitchen had been made from Glazed Ceramic tiles. However, the kitchen units had been extended several times and each time it seems a different shade of grout had been used. Dark grey, light grey and even grout with a brown tint in places. Naturally, she wanted a consistent colour throughout, and the grout needed a good clean.

Tiled Worktop Before Grout Colouring in Guilford

You don’t see so many tiled worktops these days, Granite, Marble, Corian and laminates are more popular however it was an interesting project, and I was happy to help. I was confident we could achieve a consistent appearance by recolouring the grout which would also make the grout easier to clean and give the appearance of the Kitchen a lift.

Tiled Worktop Before Grout Colouring in Guilford

Cleaning Ceramic Tiled Worktops

Firstly, I prepared the whole area by cleaning the grout. Grout colours achieve better adhesion when the grout is free of dirt and grease and Tile Doctor Grout Colourant Pre-Treat Cleaner is ideal for this. It’s an acid-based grout cleaner that cleans and etches the surface of the grout to make a superior bond with the colourant.

Another option is to use Tile Doctor Grout Clean-Up and as I already had a large bottle of this on the van, I decided to go with this instead diluted 50:50 with water. Working in sections I brushed it into the worktop and splashback grout and left it to dwell for thirty minutes before scrubbing it in with a firm wire brush. This action released the dirt which was then rinsed away with more water and then extracted with a wet vacuum to keep the mess to a minimum.

Following the cleaning the grout was now wet, so for the next half an hour I speed dried the grout with a heat gun. The colourant needs to be applied to dry grout, so this was a necessary step to ensure the best result.

The client had selected to use Tile Doctor Grout Colourant in Light Grey so once dried I started the colouring, brushing it in carefully with a narrow paint brush. The product dries quickly so any excess that gets onto the tile must be wiped off immediately. The process is quite slow and meticulous requiring a steady hand, but the results speak for themselves.

There was no need to apply a sealant over the colourant and the nature of the product acts as a barrier over the grout making it much easier to keep clean. Tile Doctor has a range of Grout Colourants in ten popular colours so there is plenty of choice. Using a colourant is much easier and less labour intensive than scraping the old grout out and re grouting. My client was also keen to avoid the mess of this option.

Tiled Worktop After Grout Colouring in Guilford

Once complete the tiles looked so much better, certainly my client was very pleased with the finish and left the following review.

“I’m very happy with every aspect of Rupert’s work, he renovated my kitchen worktops and splash backs. Great job. Thank you.”

Tiled Worktop After Grout Colouring in Guilford


Professional Renovation of Tiled Worktops and Splashbacks in Surrey

Re-colouring of Grout on Ceramic Tiled Worktops in Guildford Read More »

Slate Tiled Floor Before After Maintenance Epsom

Maintaining a Slated Tiled Floor and Grout Recolouring in Epsom

I thought you might be interested to know that I have numerous clients that I visit every year to maintain the finish on their floor. We call this service “a maintenance program” and is ideal for clients who wish to maintain a deep polish on their stone which will diminish with use and over time. The example below details a recent maintenance visit to a client in Epsom who has a Slate tiled Kitchen and Conservatory floor and likes the high gloss finish of the Slate topped up every year.

Slate Floor Before Annual Maintenance Epsom Surrey Slate Floor Before Annual Maintenance Epsom Surrey

The process usually involves a basic clean and the reapplication of a fresh coat of sealer and polish. The big advantage with a maintenance plan is I know the history of the floor so there are no surprises and no need for a pre-site visit. On this occasion however my client wanted me to do something about the colour of the grout. The problem is he has three spaniels and three cats who gradually discolour the white grout with dirt. Although I clean it on each visit it was clear that the white grout was a problem and so he asked me to colour the grout in a charcoal colour to match the slate to make the problem less obvious.

Cleaning a Slate Tiled Kitchen and Conservatory Floor

Over the years I had probably applied 15 plus coats of sealer to these tiles and grout. There is no way I could paint the grout colourant on top of the sealer as it just wouldn’t adhere. To resolve this, I started by using a Fein tool with an occulting abrasive blade along the grout line. It was painstaking work but did the job of removing the sealer and ironically any dirt.

Slate Floor During Grout Maintenance Epsom Surrey Slate Floor with Cats Maintenance Epsom Surrey

I used a vacuum to clean up and then set about cleaning the floor and bringing up the polish on the Slate tiles using a 3000-grit diamond pad fitted to a rotary floor buffer. A small amount of water is squirted onto the tiles during buffing to help the process but essentially the floor is dry. Once done the Slate tiles were now ready for a new application of sealer but not the grout.

Colouring White Grout Charcoal in Epsom

For the next four hours I painstakingly painted charcoal grey grout colourant into the grout lines being careful not to touch the tiles. Grout colourant is an excellent product but dries very quickly. Any excess must be removed immediately.

Applying Charcoal Grout Colourant Epsom Surrey

Normally I recommend using a Grout Colourant Pre-Treater before applying the colourant as you get a better bond with the colourant. On this occasion however the Fein Tool had already cleaned and roughened the surface of the grout, so it wasn’t necessary.

Sealing a Slate Tiled Kitchen and Conservatory Floor

Once the grout colourant was dry, I was able to move onto the last phase of the visit and apply the sealer. The three coats of Tile Doctor Seal and Go were used to seal the floor which I find works well on Slate and as you can see from the photos gave the desired gloss effect the customer wished for. Each coat is left to dry before applying the next one.

I don’t normally recommend using a gloss effect sealer on Slate where you have pets who can scratch the tile, especially in a high traffic area such as a kitchen however he understands this but I guess he likes the shine.

Slate Floor After Maintenance Epsom Surrey Slate Floor After Maintenance Epsom Surrey


Professional Restoration of a Slate Tiled Kitchen and Conservatory in West Surrey

Maintaining a Slated Tiled Floor and Grout Recolouring in Epsom Read More »

Fired Earth Limestone Floor Before After Renovation Godalming

Fired Earth Limestone Floor Renovated in Godalming

This property in Godalming had the whole downstairs floor tiled with Fired Earth Limestone tiles nine years prior and had never had it cleaned or maintained professionally. The once beautiful stone was now looking dull and the grout had turned black with dirt leaving the floor looking uninviting.

This is quite normal for stone floors as it is the sealer that protects the stone from dirt and enhances its look. Most sealers wear off after three to four years sealer and in this case after nine years it was well overdue a deep clean and reseal.

Fired Earth Limestone Floor Before Clean and Seal Godalming

I visited the property to survey the floor. It was indeed looking in need of some attention and the kitchen was particularly bad. To restore the appearance of the Limestone tile and grout the floor would need to be stripped of what remains of the old sealer, then deep cleaned with attention to the grout, polished with burnishing pads and then finally resealed. I was confident I could get it restored to a nearly new finish and to prove it I completed a small demonstration clean which the homeowner was very happy with. They agreed to my quote and we scheduled in a couple of days to carry out the work.

Fired Earth Limestone Floor Before Clean and Seal Godalming

Cleaning a Limestone Tiled Kitchen Floor

On day one I started by cleaning the grout using a strong dilution of Tile Doctor Pro-Clean. its run along the grout line and then left to soak in for about ten minutes so it can get to work breaking down dirt and old sealer. The grout is then scrubbed using a grout brush which is then scrubbed backwards and forwards along the grout line until clean. The area is then rinsed with water and all the waste removed with a wet vacuum cleaner.

Next, I turned my attention to the Limestone tiles which needed stripping of any remaining sealer, cleaned and polished. I find the best way to do this is by apply a set of diamond encrusted Burnishing pads in sequence starting with a coarse 400-grit followed by 800, 1500 and finally finishing with an extra fine 3000 grit. Water is used to lubricate the burnishing process and the slurry is rinsed and extracted off the floor between pads. Each pad is run over the tiles three times, and it was a large floor so as you can imagine this process took most of the day.

Sealing a Limestone Tiled Kitchen Floor

I left the floor to dry out overnight and returned the next day to seal the Limestone. Before doing that, I reviewed my previous day’s work and I cleaned up any areas that needed further attention. Next step was to ensure the floor was dry as I don’t recommend applying a sealer to damp tile as you won’t get an even appearance, so before sealing a floor I tested for moisture using a damp meter.

To seal the floor, I applied two coats of Tile Doctor Ultra Seal which is an impregnating sealer that works by occupying the small pores in the stone to prevent dirt becoming ingrained there. Limestone is a light stone and most customers like that appearance so I find it best not to use a colour enhancing sealer as it can darken the stone. Ultra-Seal doesn’t contain any colour enhancer and leaves the floor with a natural finish whilst allowing the stone variations and patterns to show through.

Fired Earth Limestone Floor After Clean and Seal Godalming

Once the sealer was dry, I gave it a further polish with the 3000-grit pad which further brought out the natural beauty of the stone. My client was very happy with the floor, it really lifted the who area and the Kitchen in particular.

Fired Earth Limestone Floor After Clean and Seal Godalming


Professional Restoration of a Limestone Tiled Kitchen in West Surrey

Fired Earth Limestone Floor Renovated in Godalming Read More »

Flagstone Tiled Floor- After Restoration Ripley

400 Year Old Dirty Flagstone Floor Renovated in Ripley

This property in the lovely Surrey village of Ripley near Woking was over 400 years old and featured an amazingly dirty flagstone floor. The village itself has a long history that dates to Norman times so I wouldn’t surprise me if the stone in this floor was original or potentially older.

The house was a family property with a large garden that the kids and dog used and liked to walk through the house bringing the garden inside! It was fair to say the area was subject to heavy traffic and attracted a fair amount of dirt. I recommended a deep and thorough clean and then the application of a durable sealer to protect the stone going forward.

400 Year Old Flagstone Floor Before Restoration Ripley 400 Year Old Flagstone Floor Before Restoration Ripley

To demonstrate the potential of the flagstones I applied different Tile Doctor cleaning products on a small test area to see which would work best. It wasn’t long before the dirt was lifted out of the pores of the stone and you could really get an ideal of how the stone could be could transformed. They agreed my quote for the work, and we arranged a time to carry out the work which would take two days. I would start the cleaning on a Friday then we would return on the following Tuesday to seal leaving it to dry for more than two days in between.

Cleaning and Restoring a Flagstone Tiled Kitchen Floor

The first job was to clean the grout using a strong dilution Tile Doctor Pro-Clean which turned it from a dark brown to a sandy yellow colour. This work was done by hand with a hard-scrubbing brush and due to the wide joints took three hours to complete before finally rinsing and extracting the dirt off the floor with a wet vacuum.

400 Year Old Flagstone Floor During Restoration Ripley

Next task was to clean the flagstones. They were so dirty I decided to use Tile Doctor Remove and Go which is a stronger product to breakdown the ingrained dirt. Fortunately, I was able to use a standard black scrubbing pad attached to my rotary buffer to work the product into the stone. The dirt was removed with the wet vacuum cleaner as I progressed however the stone was so dirty that the soil ran back down into the grout. So, after cleaning the tiles I had to go over the grout again.

Once completed, the client was astonished at the difference. I used a lot of water in the cleaning process so the floor was left for three days so it would thoroughly dry out before I returned to apply the sealer.

Sealing a Flagstone Tiled Kitchen Floor

Returning on the Tuesday, first I checked the floor was dry with a moisture meter. My plan to leave the floor for three days had worked well and I confirmed the floor was dry and ready to be sealed.

To seal the floor, I applied three coats of Tile Doctor Seal and Go Extra with a paint pad and a soft brush. There was a lot to cover and each coat is left to dry before applying the next, so it took some time before I was done. Seal and Go Extra is a breathable sealer so it will allow moisture to rise through the floor this is an important consideration when sealing old floors which don’t have a damp-proof membrane. The sealer worked well on the stone really bringing out the colours, so the stones now looked like stones rather than black rocks.

400 Year Old Flagstone Floor After Restoration Ripley 400 Year Old Flagstone Floor After Restoration Ripley

The client was over the moon with the difference, they had literally never seen the floor looking like this. The children and dog were firmly told they would be wiping their feet before traipsing the garden through the house in future!

400 Year Old Flagstone Floor After Restoration Ripley

For aftercare I recommended they used Tile Doctor Neutral Tile Cleaner which will keep the floor clean and is not overly strong like many supermarket cleaning products which can prematurely erode the protection provided by the sealer.


Professional Restoration of a Flagstone Tiled Floor in West Surrey

400 Year Old Dirty Flagstone Floor Renovated in Ripley Read More »

Wood Effect Ceramic Tiles Before After Polymer Grout Haze Removal Guildford

Removing Polymer Grout Haze from Wood Effect Ceramic tiles in Guildford

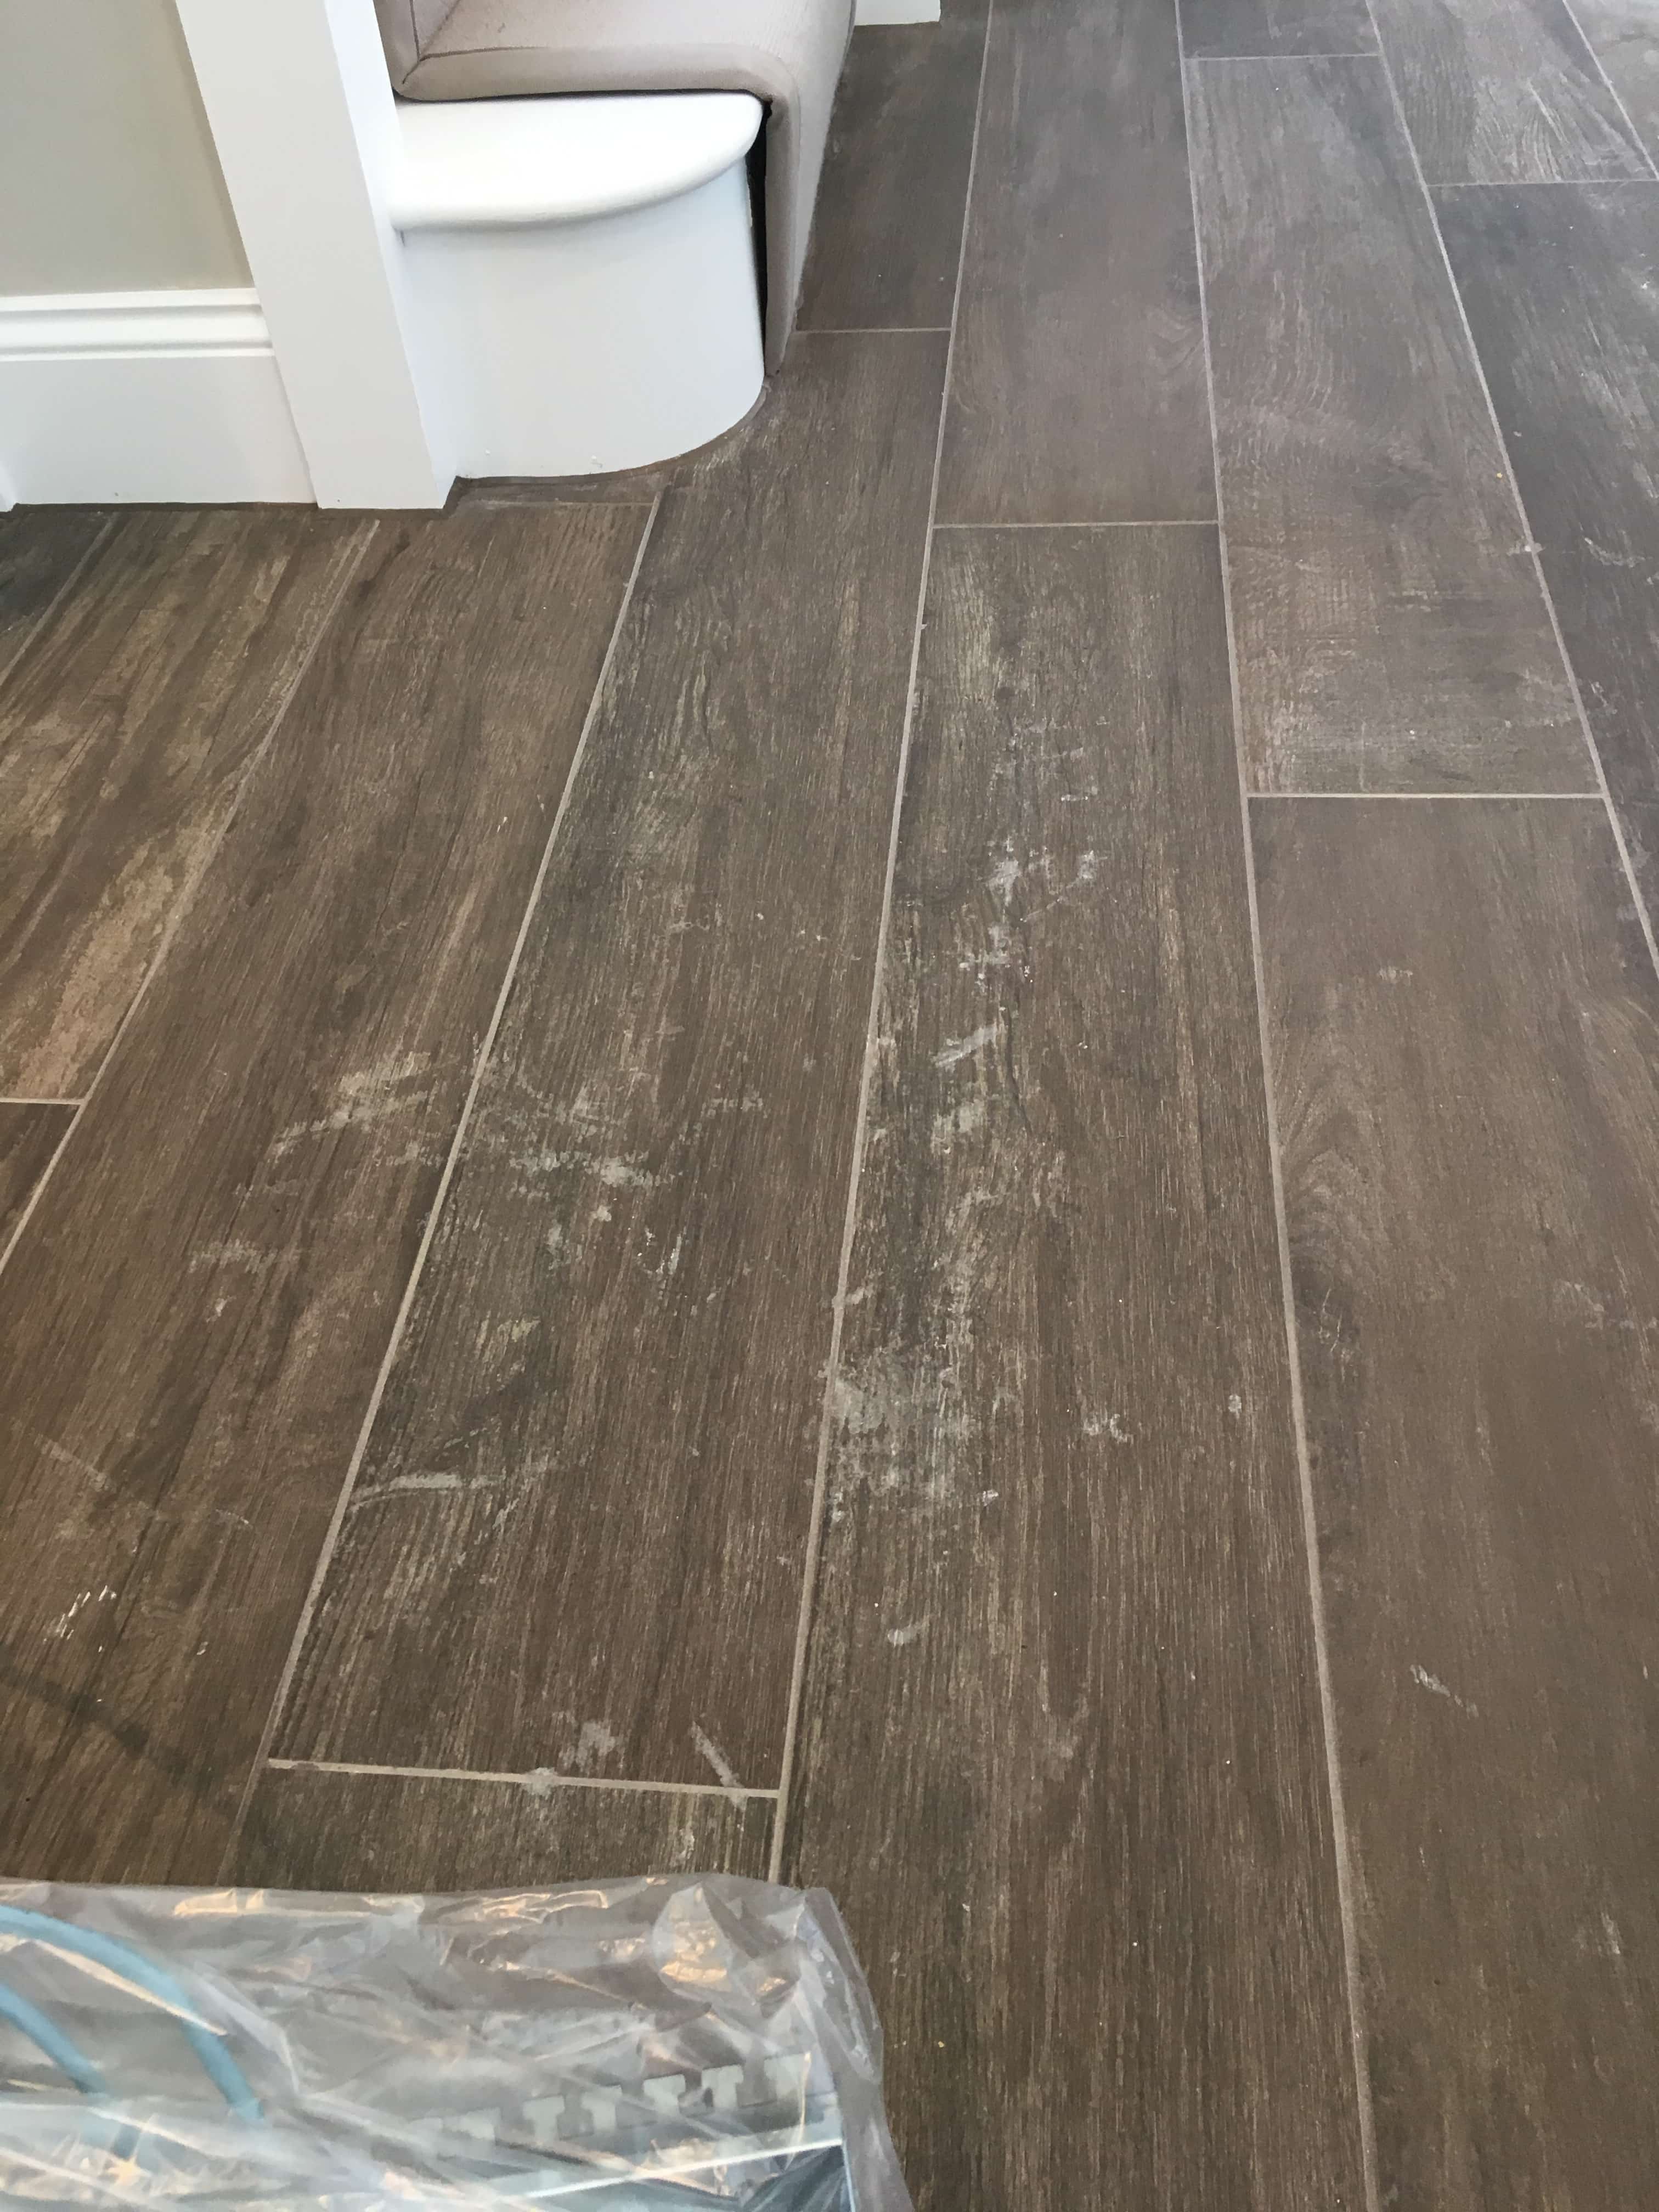
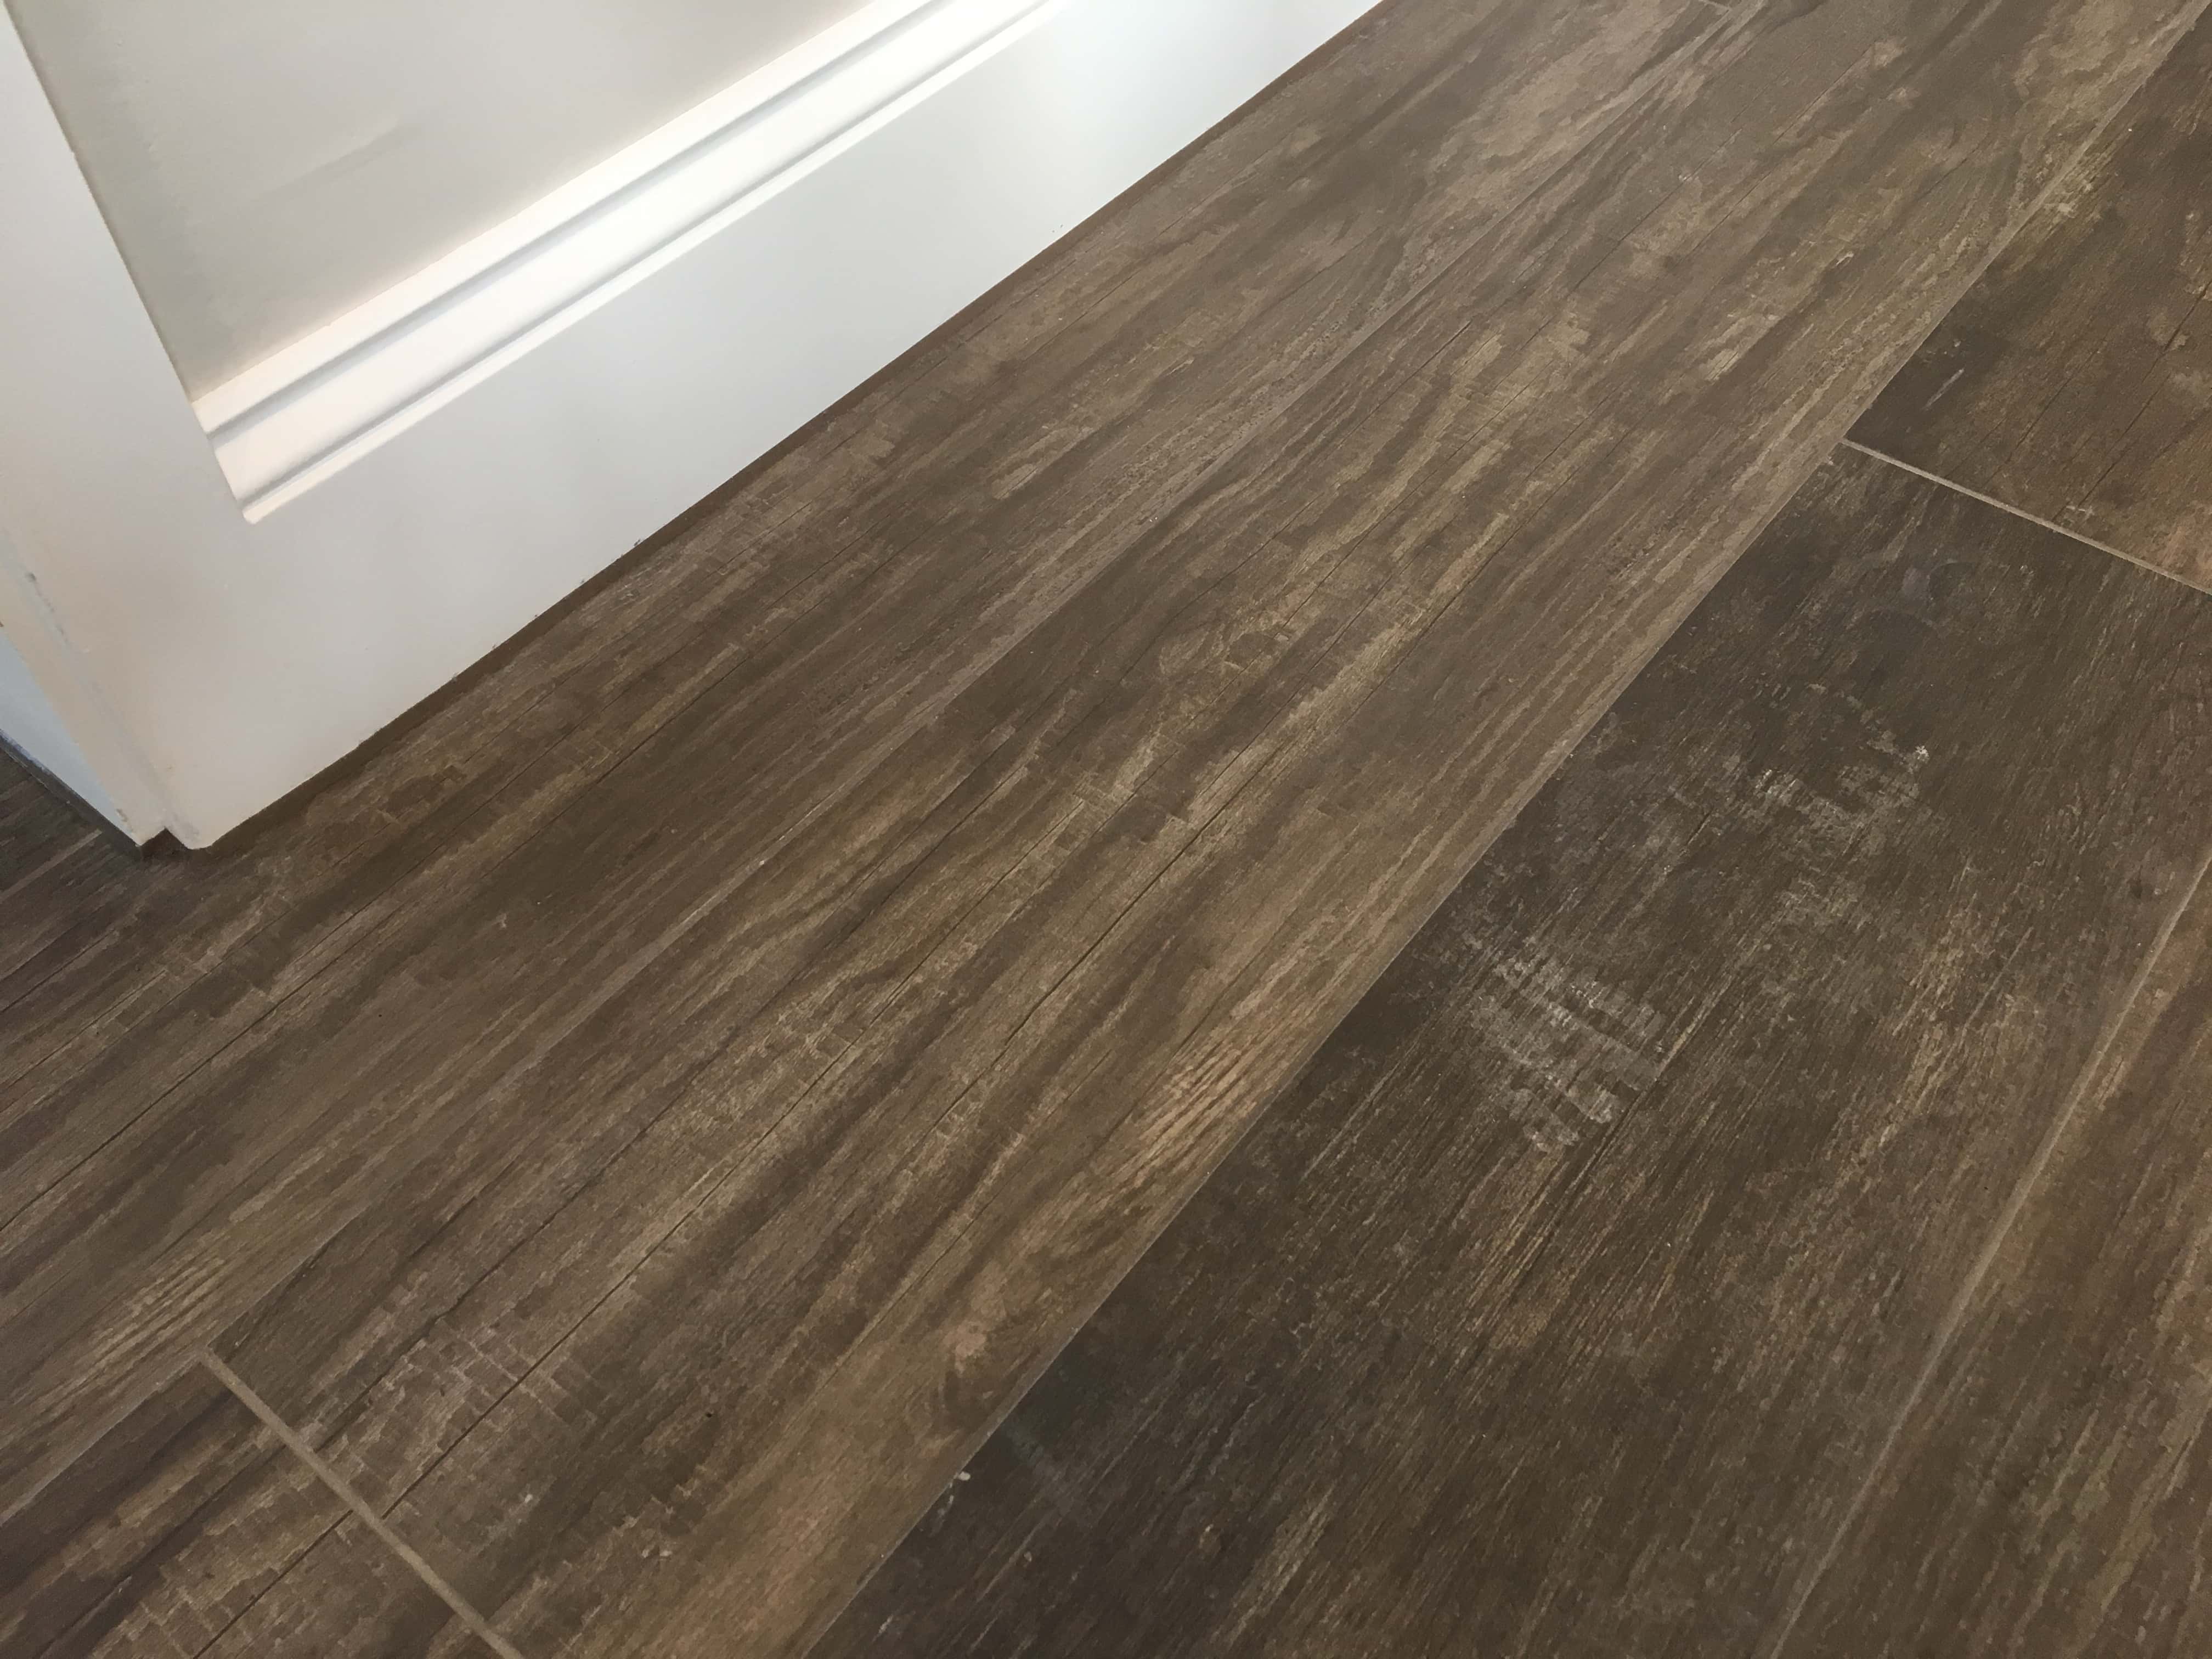
Grout haze or grout smears as it is often called can be a huge problem when laying tiles. Grout haze is basically grout that has been left to dry on the surface of the tile after installation. It’s a common problem which is exacerbated by the use of quick drying products. Take for example this interesting Wood Effect Ceramic Tile installation at a house in Guildford following installation by a builder.

I was a bit slow in following up on the initial enquiry as we had been very busy so by the time, I got in touch I was told they had employed someone else to carry out the work. I apologised for my late response and said to call me if he needed help in the future. Three days later I got a call so we arranged a visit so that I could carry out a test and quote a price.

Grout Haze on Wood Effect Ceramic Tiles Before Removal Guildford

As it turns out the builder had returned and failed to remove the grout haze and so had a rival firm that seemed more interested in selling unnecessary sealer than fixing the problem. I was astonished to see what a state the builder had left his floor. Grout was all over the floor with footprints walked across thresholds and more. I could understand it if there was some grout was missed after installation but not to this level!

I carried out a successful test and confirmed to the customer that there was absolutely no need to rip and replace his £2k floor. We agreed a date to resolve the problem and to say he was relieved was an understatement!

Grout Haze on Wood Effect Ceramic Tiles Before Removal Guildford

Removing Polymer Grout Haze

The builders had used Mapei grout which contains polymers. Polymers offer better flexibility and adhesion, however in order to remove the grout haze we would first need to break down the polymers in the grout first and this is why the rival firm failed.

With that in mind, my first action was to apply Tile Doctor Remove and Go to the floor and leave it to dwell for five to ten minutes. I then worked it into the tile using a scrubbing pad fitted to a rotary machine.

After washing the soil away with warm water and extracting with a wet vacuum I applied Tile Doctor Grout Clean-up to treat the grout. Grout Clean-up is an acid-based product that breaks down the grout so it can be rinsed away and extracted as before. Afterwards I rinsed the floor with warm water and extracted again to remove any trace of product and neutralise the floor. After removing as much moisture as possible with the wet vacuum I speed dried the tiles with a blower.

Wood Effect Ceramic Tile Installation Problem Resolved

Ceramic tiles won’t accept a sealer so once the floor had dried the job was finished and it took less than a day.

Grout Haze on Wood Effect Ceramic Tiles After Removal Guildford

The customer was over the moon with the difference. While his floor was in such a state, he has been unable to bring in new furniture as the serious possibility of removing the tiles was hanging over him.

Relieved that the problem was now resolved he kindly left the following review:

“I had a floor that had just been laid with very heavy grout haze. I had already had advice from two other professional floor cleaners who had advised me that the floor was irreparable and would need to be pulled up. As soon as I spoke with Rupert, it was clear he was extremely knowledgeable. He asked questions none of the other companies had. By understanding the specific nature of the problem, he was able to solve it by first removing the grout polymers and then applying an acid wash. The floor came up brilliantly. Rupert was the only person I spoke to that could fix this, everyone else told me I needed to replace my floor! Superbly knowledgeable, professional and did an excellent job. Don’t bother speaking to anyone else, just call Rupert! “

Grout Haze on Wood Effect Ceramic Tiles After Removal Guildford


Professional Clean of a Wood Effect Ceramic Tiled Hallway in West Surrey

Removing Polymer Grout Haze from Wood Effect Ceramic tiles in Guildford Read More »

Ceramic Tile Grout Before After Cleaning Leatherhead

Ceramic Tile and Grout Cleaning in a Leatherhead Kitchen

At this property in Leatherhead, in the Mole Valley district of Surrey there was ten years of dirt trapped in the grout and no end of cleaning by the owner could improve the situation.

Ceramic Tile Grout Before Cleaning Leatherhead Kitchen

Now desperate to get the floor looking clean again she gave Tile Doctor a call and as their local representative I was asked to go round and survey the floor. Glazed ceramic tiles are very easy to clean and maintain and are a very practical choice for a kitchen floor, however what tends to happen is the dirt gets washed into the grout lines where the rough nature of the grout traps the dirt eventually turning it black.

Ceramic Tile Grout Before Cleaning Leatherhead Kitchen

I could see what needed to be done so I discussed the solution with the client who was relieved that we could help. She agreed to my quote and we booked the work in to be completed.

Cleaning a Ceramic Tiled Kitchen Floor

I returned on the scheduled date and set about preparing the floor with an application of Tile Doctor Pro-Clean combined with Tile Doctor Remove and Go and diluted with water. The cleaning cocktail was left to dwell for approximately fifteen minutes while I unloaded the equipment I would need from the van. Tile Doctor Pro-Clean is a heavy-duty tile and grout cleaner which works best when left soak into the problem area, whilst Tile Doctor Remove and Go is a coatings stripper so I reasoned a combination of the two products would have maximum effect to deep clean the area.

Using a hard wire brush, I rubbed the muck vigorously until the dirt became released into the cleaning solution. Sometimes it is necessary to roll up your sleeves and do some things manually! The resultant slurry was then extracted with a wet vacuum. You can see from the pictures the dirt being released.

Ceramic Tile Grout During Cleaning Leatherhead Kitchen

I had to repeat the process a few times before I was happy with the condition of the grout.
Once the grout was clean, I applied more Tile Doctor Remove and Go to the tiles, scrubbing it in with a deck brush. After ten minutes, using a handheld buffer fitted with a black scrubbing pad I cleaned the tiles. Again, I vacuumed up the slurry then neutralised with plain water. Following a final vacuum, I dried the whole kitchen with an air blower.

Ceramic Tile Grout After Cleaning Leatherhead Kitchen

The client was very happy with the newly cleaned floor, it had really made a big difference to the whole floor and given it a new lease of life.

Ceramic Tile Grout After Cleaning Leatherhead Kitchen


Professional Clean of a Ceramic Tiled Kitchen in West Surrey

Ceramic Tile and Grout Cleaning in a Leatherhead Kitchen Read More »

Travertine Tiled Flooring Before and After Renovation Cobham

Dull Travertine Tiled Floor Deep Cleaned in Cobham

This client from Cobham had her kitchen and diner tiled with Travertine six years ago. With two children and three dogs living there, the sealer has gradually worn away leaving the stone exposed to dirt. The leafy village of Cobham lies in the borough of Elmbridge which is noted as being a one of the most desirable places to live in the UK. As a result, it attracts a lot of investment in property including expensive tiled floors.

I went over to survey the floor and discussed with the client how we could improve the floors appearance. The solution I proposed was to deep clean the tiles to extract all the dirt and remove what was left of the old sealer and then to re-seal the floor in order to protect it going forward. This process typically takes two days to complete; day one is spent cleaning the stone and grout, including the removal of the existing sealer and day two is spent sealing and polishing. The client was satisfied with the quotation and we arranged a time to come back and carry out the work.

Travertine Tiled Kitchen Diner Floor Before Cleaning Cobham

Cleaning a Travertine Tiled Kitchen Floor

Firstly, I asked the client to clear the floor and to help me put the dining table in the garden out of the way. Then using Tile Doctor Pro-Clean and a wire brush I cleaned the grout in the kitchen, diner and utility room. It was a large installation of Travertine, so this task took some time to complete. The floor was rinsed, and all the dirt produced was removed with a wet vacuum cleaner.

The next job was to remove what remained of the previous sealer and top layer of dirt. This was done with a rotating buffing machine with a set of diamond encrusted burnishing pads. The first one applied is a coarse 400-grit pad followed by 800 and 1500-grit, working through the pads in sequence. You might be familiar with the grit system from sandpaper, rough down to smooth. The process is lubricated with water and the slurry generated is rinsed off with water and extracted using a wet vacuum.
I left the floor to dry off overnight, they can walk on it during this time, but they needed to be careful of any spillages. The dogs were also welcomed back in from the front room.

Sealing a Travertine Tiled Kitchen Floor

The second day started with and inspection of the Travertine tile and grout looking for any areas that need further attention. I was satisfied that the floor was looking its’ best and once the preparation was complete, I applied the first coat of sealer.

On this occasion I went with Tile Doctor Ultra Seal which is doesn’t change the look of the stone giving a completely natural look. This product soaks into the pores of the stone protecting if from within and should last between three and five years depending on the amount of wear it received and how the floor is cleaned and maintained.

Two coats of sealer were applied and after each coat dried, I polished the floor using a very fine 3000-grit diamond pad. The pad is run across the Travertine dry with only a little water sprayed onto the tile using a process we call a ‘Spray Burnish’. I asked the client to keep off the travertine until it’s cured, usually for a couple of hours which is always a good excuse to go out for the evening!

Travertine Tiled Kitchen Diner Floor After Cleaning Cobham

The client was very happy the floor and they remarked it looked as good as when it was first laid. For aftercare I recommended using Tile Doctor Stone Soap which is ideal for the regular cleaning of sealed natural stone floors, many supermarket products are simply too harsh and will reduce the life of the sealer.

Travertine Tiled Kitchen Diner Floor After Cleaning Cobham


Professional Restoration of a Travertine Tiled Kitchen in West Surrey

Dull Travertine Tiled Floor Deep Cleaned in Cobham Read More »

Limestone Tiled Kitchen Floor Before and After Polishing in Cobham

Polishing and Sealing a Dirty Limestone Kitchen Floor in Cobham

This customer, who lives in the small village of Cobham had the unique situation of having been abroad for six months, leaving her adult children in charge of the house. During this time, the fantastic Limestone tiled floor in the kitchen had not received adequate maintenance and its appearance had rapidly degraded. To make the situation worse, it seemed to me that the wrong products had been used on the rare occasions that it had been cleaned.

With the customer now back in the UK and living in the house again, he was keen to have the Limestone tiles restored to their original condition. He contacted me to get the job done.

Limestone Floor Tiles Cobham Before Cleaning Limestone Floor Tiles Cobham Before Cleaning

Cleaning and Polishing Dirty Limestone Kitchen Tiles

My first task was to tackle the dirty grout lines between the Limestone tiles, which were brown and stained. Tile Doctor Pro Clean, which is our reliable alkaline-based tile cleaner, was applied with a grout brush and the stains immediately vanished.

The next stage of the restoration involved polishing the Limestone using our four-pad Tile Doctor diamond-encrusted burnishing pad system. Firstly, I applied a Coarse 400 grit pad to strip away what remained of the old sealer which had been worn down in the high traffic areas of the floor. I then applied the Medium 800 grit and Fine 1500 grit pad to gradually close the pores of the stone which, in turn, restores the polished effect.

Each pad is used in combination with a small amount of water and any excess moisture is removed with a wet vacuum. To end the first day of work, I left the floor to dry and arranged to return in 48 hours to finish the job with sealing.

Sealing Limestone Kitchen Tiles

Upon my return, I ran some quick damp tests to check the floor could be sealed and quickly polished the surface again using a soft white nylon pad to remove the paw prints caused by the customer’s dog in the interim period!

Next, using a small quantity of water, I used the Very Fine 3000 grit burnishing pad to hone the stone to its highest possible quality. Once dry, I applied to the floor two coats of Ultra- Seal, which is a penetrating sealer designed to provide maximum stain protection while providing a natural look finish. One final polish later and the restoration was complete.

Limestone Floor Tiles Cobham After Cleaning Limestone Floor Tiles Cobham After Cleaning

Here’s what the customer said:

“Very professional service, very thorough, and careful with moving furniture. Very informative about the ongoing care and treatment of the flooring. Would most certainly recommend Rupert.”

Professional Tile Cleaning, Polishing and Sealing for a Dirty and Stained Limestone Kitchen Tiled Floor Restoration in Cobham

Polishing and Sealing a Dirty Limestone Kitchen Floor in Cobham Read More »

Marble Shower Wall Leatherhead After Cleaning

Acid-Damaged Marble Shower Cubicle Restored in Leatherhead

Marble tiles are a fantastic choice of stone for a shower cubicle because of its distinctive characteristics and quality. It can really add a luxurious feel and when used in a bathroom take it to the next level.

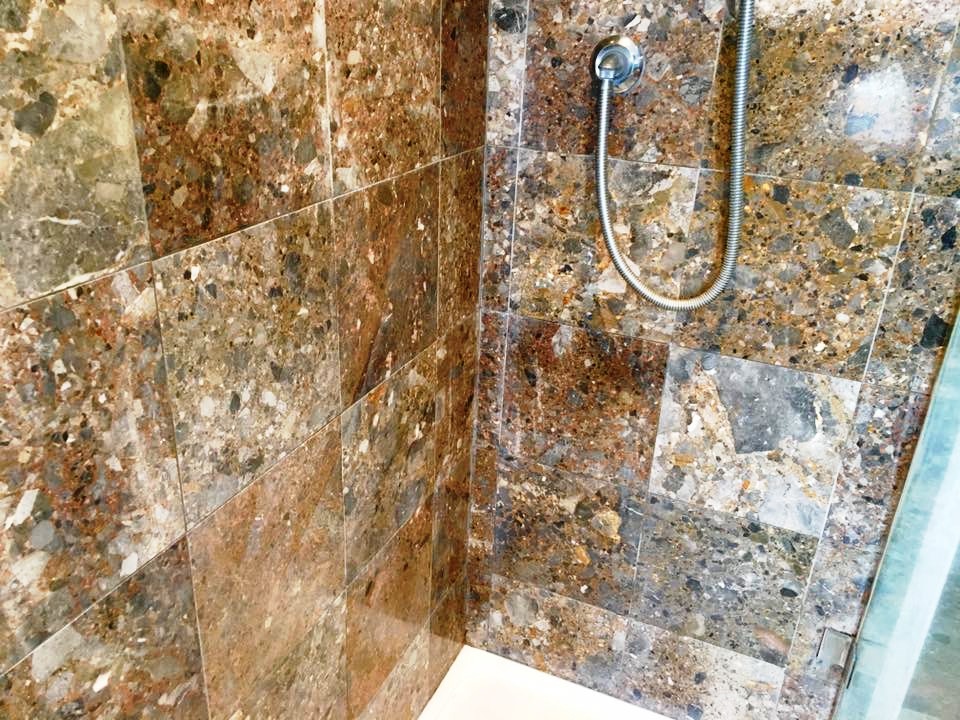
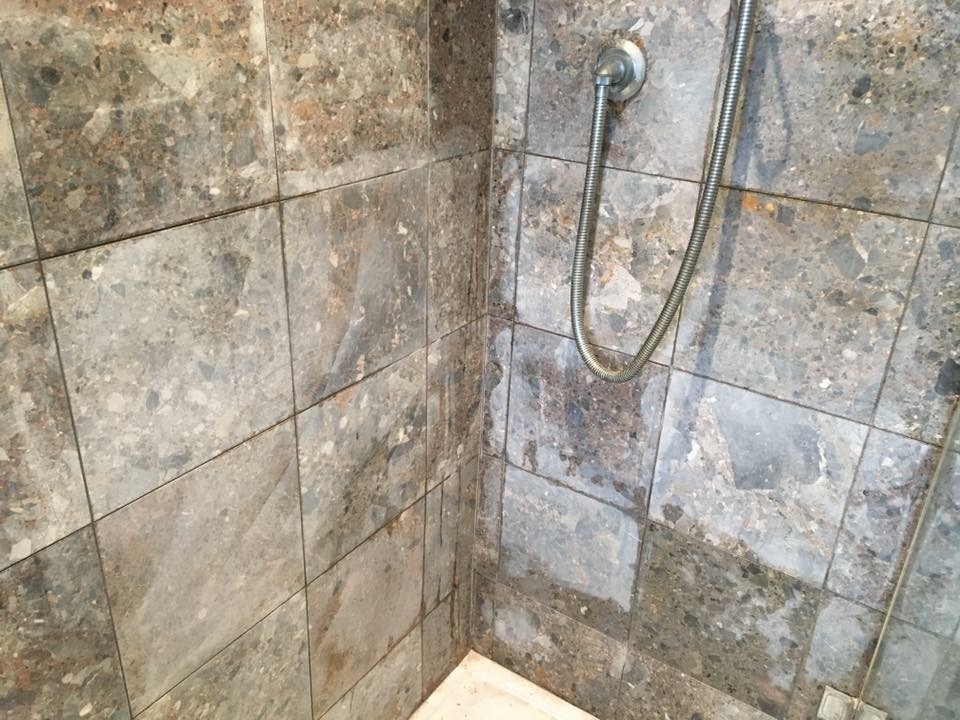
However, it’s extremely important to note that Marble like all natural stone is a porous and acid-sensitive material. It must therefore be cleaned with care using suitable products. This particular Marble tiled shower cubicle at a property in Leatherhead is a good example of this done wrong. The owner had used an acid-based cleaning product to clean the stone, resulting in damage to the sealer and causing unappealing streaks to form.

Marble Shower Wall Leatherhead Before Cleaning
This type of damage can appear irreparable but, with the right combination of cleaning methods and products, it can be fixed. Once the old sealer has been removed, and the tiles have been cleaned, polished and re-sealed, they can look as a good as new. Here’s how I helped this customer restore the Marble shower cubicle.

Cleaning and Polishing a Marble Shower Cubicle

To begin the restoration, I scrubbed the dirty grout lines using Tile Doctor Pro-Clean, which is a highly reliable and multi-purpose alkaline-based product. I then rinsed the tiles with water to remove the traces of cleaning product.

Next, I moved on to the polishing stage of the restoration – what we often refer to as burnishing. This involved the use of small six-inch diamond-encrusted burnishing pads applied with a hand buffer and with different levels of grit – ranging from Coarse to Very Fine. I started with the Coarse grit pad and worked my way sequentially through our four-pad system, polishing the stone with Medium, Fine and eventually the Very Fine pad to really bring up the polish.

Sealing a Marble Shower Cubicle

Once the shine had returned to the Marble and the damage had been removed, I re-sealed the tiles using two coats of Tile Doctor Colour Grow, a penetrating sealer designed to enhance the natural colours and patina of the stone. Once dry, I gave the tiles a final polish with a white buffing pad to put the finishing touches on the restoration.

Marble Shower Wall Leatherhead After Cleaning
The customer was thrilled with the results, saying:
“I’m really happy with the result and we will make sure we don’t use supermarket cleaners again on natural stone. Rupert was a very personable tradesman who took pride in what he was doing. He has identified Tile Doctor Neutral Tile Cleaner as being the product we should have used in the first place and has sent me the website details.”
Another satisfied customer!

Professional Restoration of a Damaged Marble Tiled Shower Cubicle in Surrey

Acid-Damaged Marble Shower Cubicle Restored in Leatherhead Read More »

Epsom Downs Shower Cubicle Finished

Mouldy Ceramic Tiled Shower Refreshed in Epsom Downs

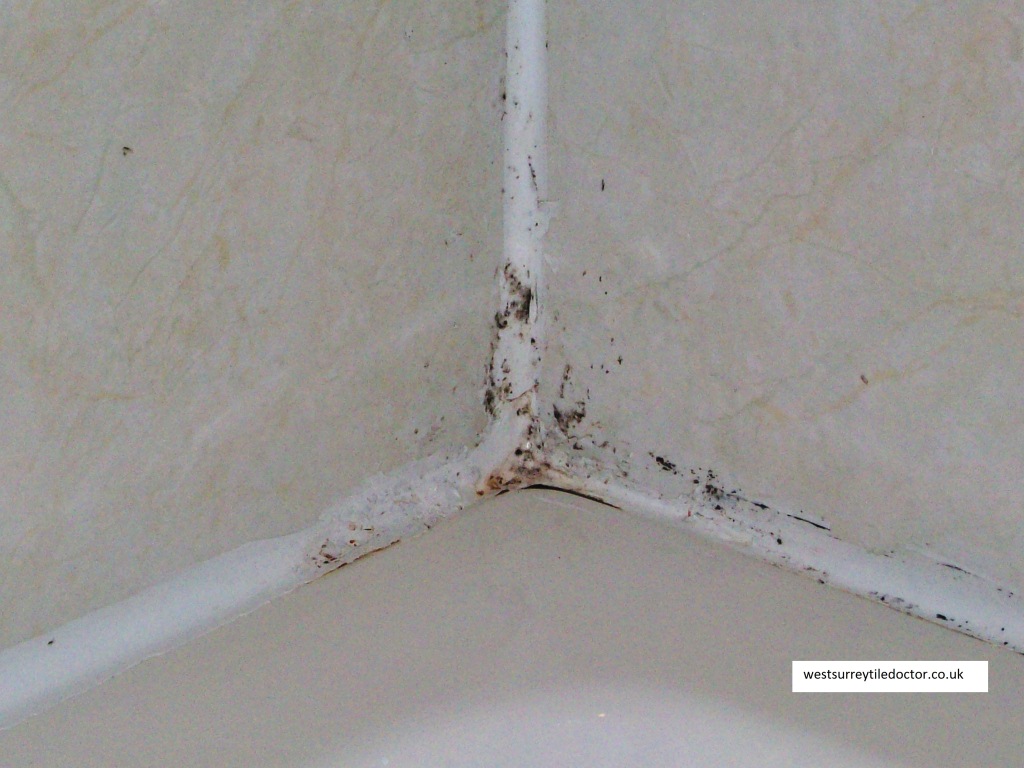
A customer contacted us regarding a Ceramic Tiled Shower Cubicle problem they had with their house in Epsom Downs, Surrey. All the grout and mastic had started to go black and grow mould which is quite a common problem in modern houses and our busy lifestyles and insulated homes with insufficient ventilation.

Epsom Downs Shower Cubicle MouldyGrout Epsom Downs Shower Cubicle MouldyGrout

Cleaning Ceramic Tile and Grout

We started by giving the tiles a good scrub with Tile Doctor Pro-Clean and our non-scratch scrubbing brushes, then we thoroughly scrubbed the grout with more Pro-Clean and a special grout brush designed to get right into the grout and scrub the soil out. We then went over the grout where there was any marks and residue soil with our grout brush and Tile Doctor Grout Clean-up which is a stronger product that can remove mineral deposits and even excess grout from a tile surface.

Grout Sealing

Prevention is better than the cure so the tile and grout was dried with cloths and a heat gun and then left for half an hour. We then damp tested the area to make sure it was dry and was no damp present in the grout before applying Tile Doctor Grout Seal and Go which will seal the grout making it waterproof and stop the mould coming back

Last step was to cut out all the old mastic and seal around the shower and replace it with new silicone sealer finishing the job off nicely

Epsom Downs Shower Cubicle Finished Epsom Downs Shower Cubicle Finished


Refreshing a Ceramic Tiled Shower Cubicle in Epsom

Mouldy Ceramic Tiled Shower Refreshed in Epsom Downs Read More »
Scroll to Top