Weybridge

Limestone Kitchen Floor Cleaning and Polishing Weybridge

Large Limestone Tiled Floor Stripped and Resealed in Weybridge

The photographs below were taken at a property in Weybridge where the owner had Limestone tiles installed throughout the Kitchen and adjacent dining room. Like any stone floor the sealer and appearance will degrade with use and in this case the tiles and especially the grout had become darker with ingrained dirt. The owners had decided it was time to the floor professionally cleaned and asked me to quote for the work.

Limestone is a beautiful stone that cleans up really well but to get the best out of it needs to be polished with burnishing pads using heavy equipment, something the tile shop salesman usually forgets to mention.

Limestone Kitchen Floor Before Cleaning Weybridge

Having surveyed the floor I worked out a renovation plan which included tile and grout cleaning, stone polishing and finally sealing to protect it going forward. Happy with my quote we set a date for the work to begin.

Resealing a Polished Limestone Floor

My first job was to protect the kitchen cabinets from splashing with a sheet of decorator’s plastic about a foot from the ground upwards. I also like to apply a thin line of transparent mastic at the base of the cabinets where they meet the tile as this is usually a place where unwanted water can find its way in.

Once the kitchen woodwork was protected, I set about deep cleaning the grout. To do this I run a dilution of Tile Doctor Pro-Clean along the grout lines then leave it to dwell for five minutes and then scrubbed by hand using a wire brush until clean. All the waste is then rinsed off and extracted with a wet vacuum.

With the grout now clean and the soil removed I set up my rotary floor cleaning machine ready to burnish the stone tile and restore the finish with a set of diamond encrusted burnishing pads.

The first pad in the set to be applied is a coarse 400 grit pad that is designed to open the pores of the stone allowing dirt to be flushed out and removes existing sealers in the process. Water is used for lubrication and the during the following hours the process was repeated with the medium 800 grit and fine 1500 grit pads which gradually close the pores, buildup the polish and return the shine. This is a wet process which generates a slurry which is removed with after each pad with the wet vacuum.

Once the whole floor had been burnished it was given a final rinse and dried as much as possible with the wet vacuum. It was then left to fully dry off fully overnight.

Sealing Limestone Tiles

Returning the next day, I tested the floor was dry with a damp meter which confirmed the floor ready for sealing. The customer wanted a natural look to the floor so we chose to apply Tile Doctor Ultra-Seal which adds almost invisible protection. This sealer is an impregnator which soaks into the pores of the stone preventing dirt from becoming ingrained and keeping it on the surface where it can be easily removed. Two coats were applied and this should keep the floor protected for many years to come.

Limestone Kitchen Floor After Cleaning and Polishing Weybridge

Once complete I advised the owner to stay off the floor for an hour or so and then they can return the furniture. For aftercare cleaning I recommend Tile Doctor Stone Soap which is a gentle but effective cleaner that will keep the floor clean whilst maintaining the patina and without harming the sealer.


Stripping and Resealing a Polished Limestone Floor in West Surrey

Large Limestone Tiled Floor Stripped and Resealed in Weybridge Read More »

Block Paved Patio Cleaning in Weybridge

Brick Block Paved Patio Cleaning in Weybridge

This is a great example of a Block Paved Patio at a house in Weybridge that I was asked to renovate. Garden patios are exposed to a multitude of elements in this country, wind, rain, snow etc. They are often surrounded by vegetation. The rough nature of block paving and stone attracts dirt so it can benefit from an annual deep clean to keep them in check.

Block Paved Patio Before Deep Cleaning in Weybridge

Another problem we face is black spot from lichen which thrives on rough surfaces in the damp and shady conditions that are so common in the UK. The characteristics of the lichen are that as it matures, it sends out tendrils (hyphae) into the pores of the material seeking nutrients from the minerals in the brick and the detritus that collects on the patio. These gradually spread through the affected surface.

I visited the property to take a detailed look at the patio and decide on the best remedy to get it renovated. I discussed the process with them, gave them a price and arranged a time to return to complete the work.

Cleaning a Brick Block Paved Patio

I find the most effective way to clean a patio affected by the UK weather is to start with an industrial jet wash. These machines are quite powerful and apply water under high pressure to dislodge the detritus and exposes what lies beneath.

The next step was to carefully apply Tile Doctor Patio & Brick Driveway Cleaner, it is a very strong product sold for professional use. Due to its’ high strength you need to wear rubber gloves and eye protection, however you need to use a powerful product like this to power through the blackspots, lichen, moss, and stains.

For the best results you need to allow this product to soak in for at least thirty minutes before scrubbing it in with a deck brush and then rinsing off with water. For deep staining you need to leave the product on for longer.

Once done we made sure the area was thoroughly rinsed with water. There is no need for this type of patio to be sealed. However, we did recommend scheduling in an annual return visit to keep the driveway in good condition, we do offer a Tile Doctor Maintenance plan.

Block Paved Patio After Deep Cleaning in Weybridge

As you can see from this example the method worked well and the patio came up like new. Needless to say, my client was very happy with the work we carried out.

It’s worth knowing that Tile Doctors have the equipment and products to clean all types of hard surfaces internal and external so if you need help with your driveway or patio do get in touch.


Professional Renovation of a Brick Block Paved Patio in West Surrey

Brick Block Paved Patio Cleaning in Weybridge Read More »

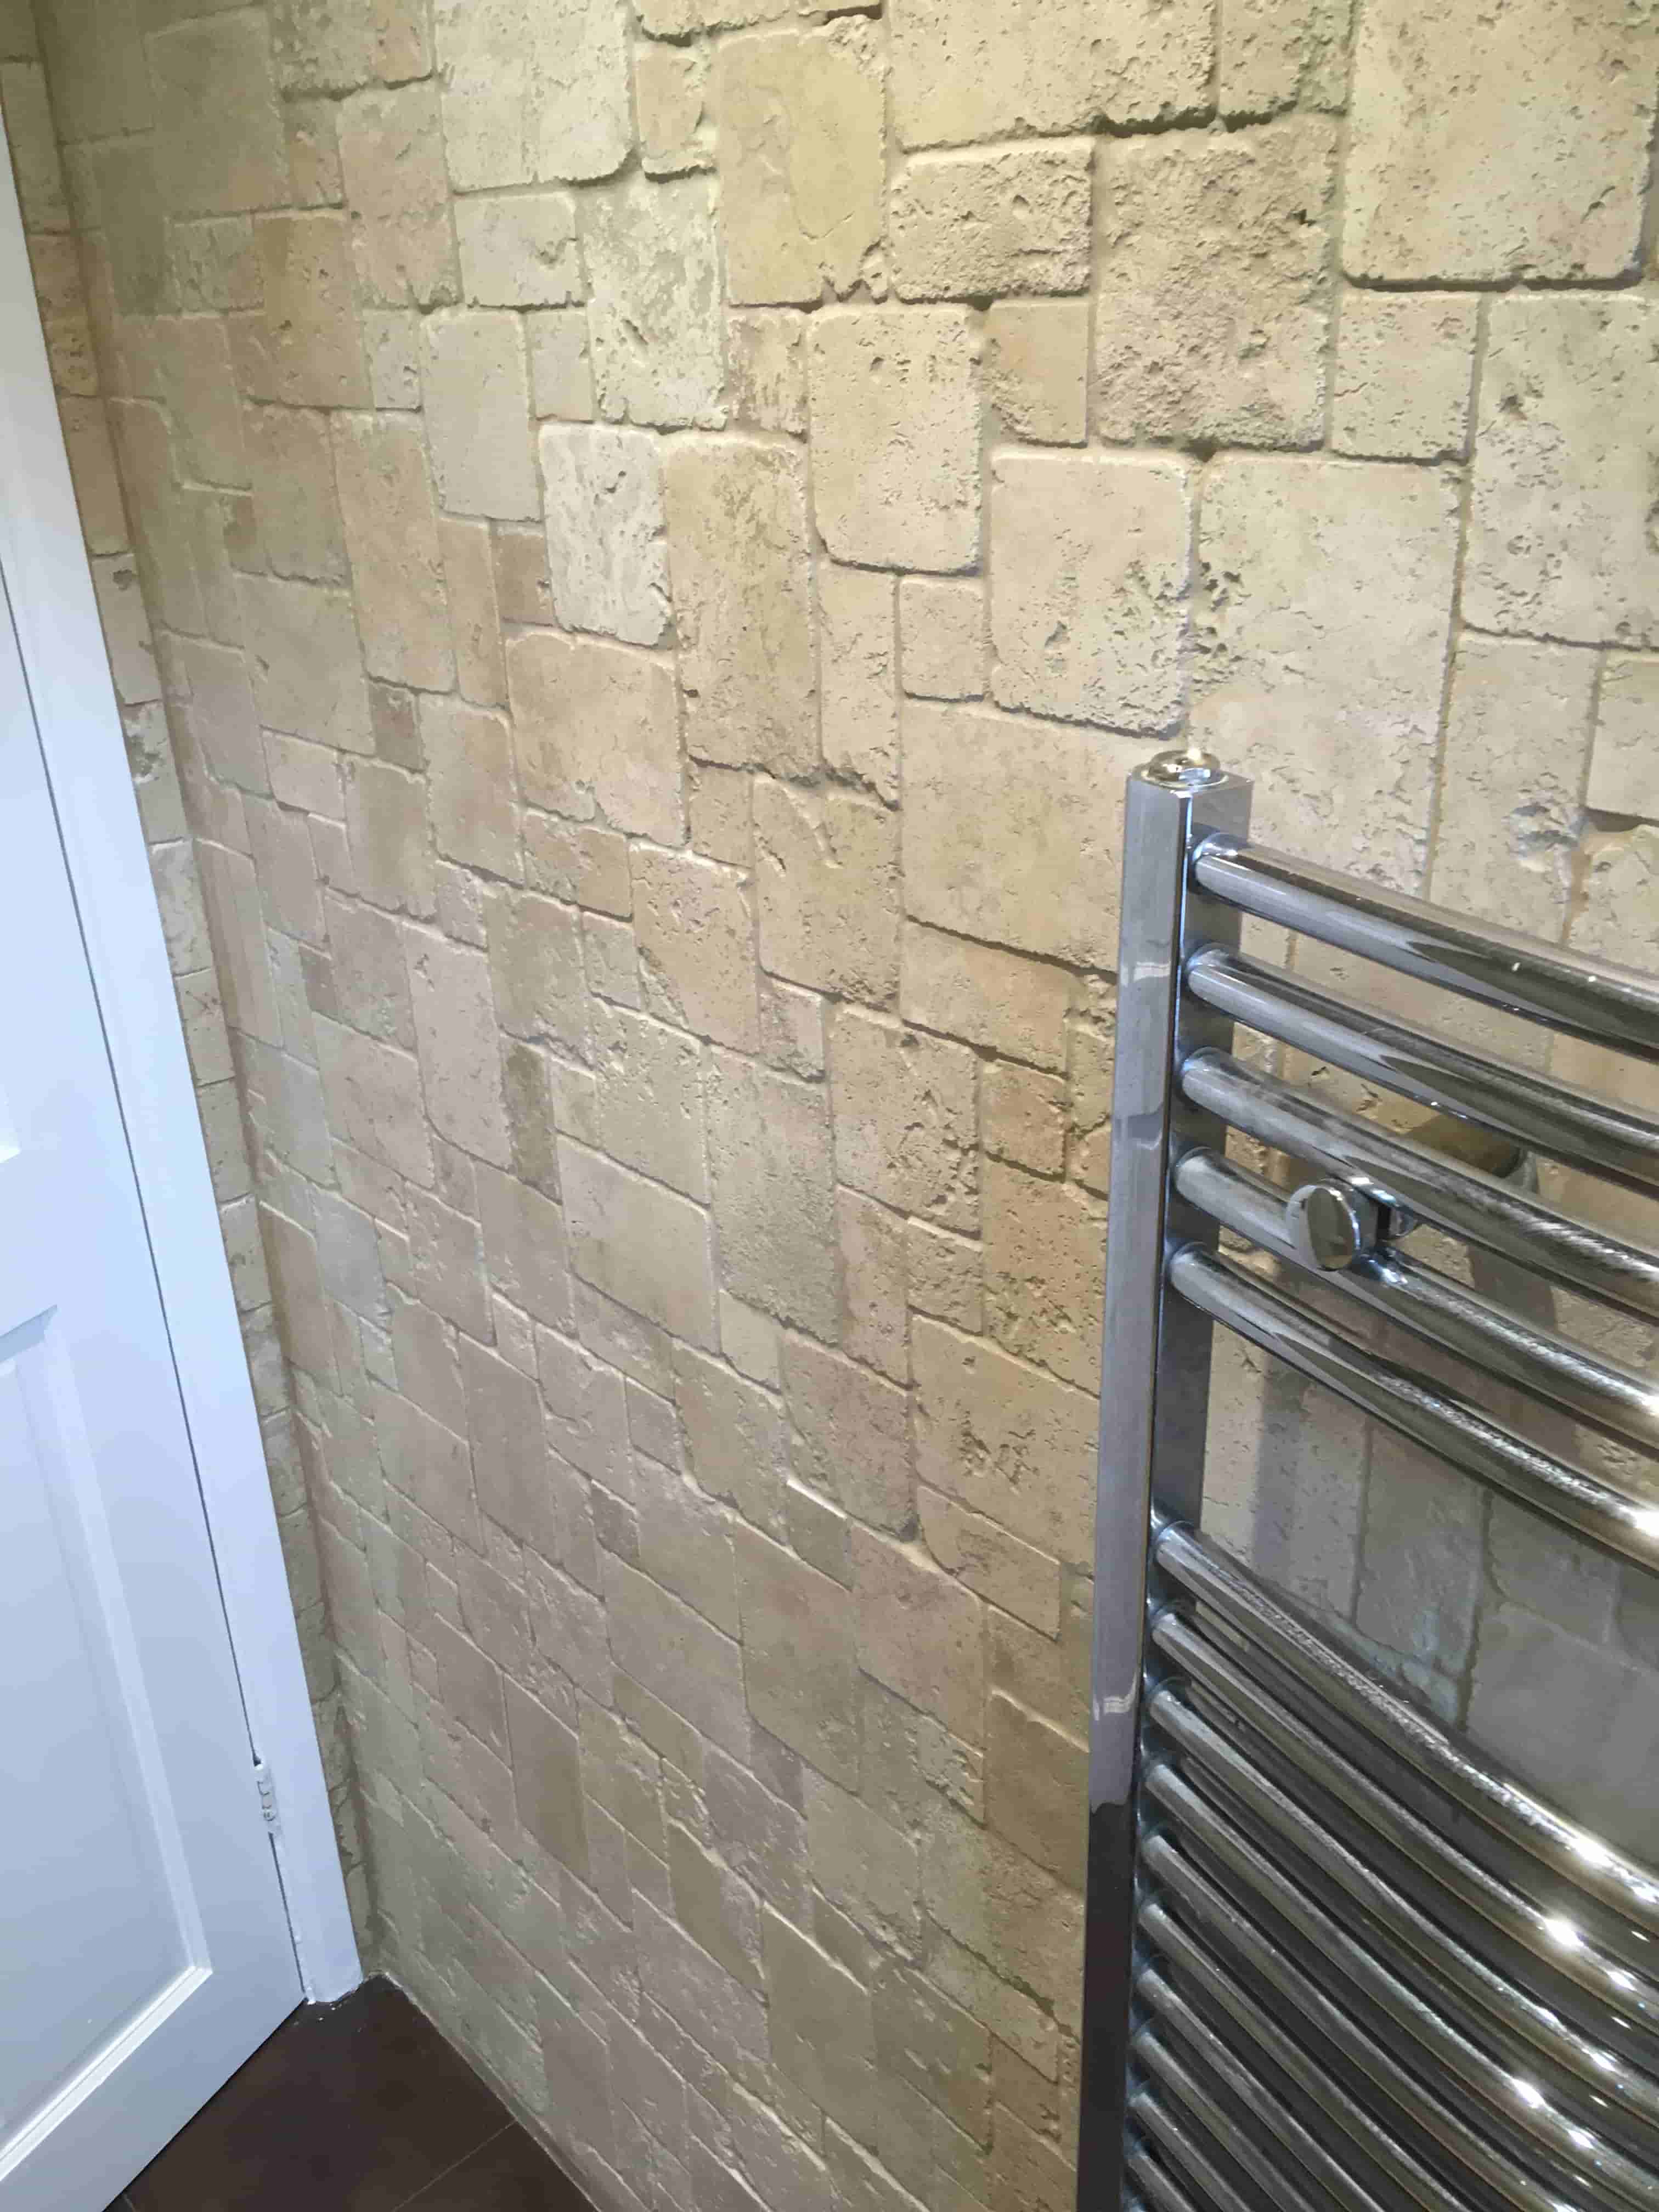
Travertine Tiled Wall Before After Replacing Sealer Weybridge

Changing the Sealer on a Travertine Bathroom Wall in Weybridge

A client had downsized to flat in Weybridge and before moving in had decided to have a new bathroom fitted which included the installation of Travertine wall tiling.

While she loved the stone, she didn’t like the colour enhancing sealer that the tiler had applied to enhance and protect the tiles. What was once a natural pale colour had turned into a shade of yellow. Unhappy with the colour and getting nowhere with the tiler she decided to call Tile Doctor and have it rectified.

Travertine Bathroom Wall Weybridge Flat Before Sealer Removed

The final appearance of stone whether it is laid on the floor or the wall is a very personal choice and very difficult to make until you see the finished result. I find colour enhancing sealers usually help to bring out the natural features and colours in the stone however I do find lots of clients asking for the natural look.

I’m afraid the photographs on this page didn’t come out that well, there was little natural light in the small bathroom and so they don’t really do the Travertine tiles justice.

Stripping a Colour Enhancing Sealer from Travertine Wall Tiles

To resolve the problem, I first had to remove the old sealer which was done by wetting the walls with water and then applying Tile Doctor Oxy-Gel. Being a gel this tile cleaning product sticks to vertical surfaces allowing for longer dwell times. This was then left to soak in for about half an hour, then using a set of four six-inch diamond burnishing pads, I slowly burnished the walls until the sealer was removed.

The process of burnishing is a messy business and involves the application of four different grades of pad starting with a coarse pad and ending with a polishing pad. The process does generate a fine soil, thankfully being in the bathroom however it was easier to contain. The soiling was removed using more water and a wet vacuum.

I then speed dried the room with a large warm air blower so I could apply the new sealer later in the day.

Sealing a Travertine Tiled Bathroom Wall

After lunch I checked the Travertine wall tiles for moisture using a damp meter and it confirmed they were dry and ready for sealing. To seal I applied a couple of coats of Tile Doctor Ultra-Seal which adds protection but is also invisible leaving the stone with a natural look. This was not a colour enhancing product as per the client’s earlier instruction.

Finally, I cleared up the mess and polished the glass shower screen whilst I was waiting for the sealer to dry. Needless to say, my client was very happy and finally had the desired appearance.

Travertine Bathroom Wall Weybridge Flat After Sealing

For after care I recommend the use of Tile Doctor Aqua-Pro which is a mild but effective cleaner that isn’t too strong for use on sealed stone and can be used daily after a shower. This will keep the sealer in the best condition and the bathroom looking pristine.


Professional Restoration of a Travertine Tiled Bathroom in West Surrey

Changing the Sealer on a Travertine Bathroom Wall in Weybridge Read More »

Victorian Tiled hallway Floor Before After Restoration Weybridge College

Astonishing Victorian Floor Restoration at Weybridge College

I was asked by the facilities manager of St Georges College in Weybridge to survey a Victorian tiled floor for restoration. Having worked there for twenty years he lifted a carpet over the summer in the main reception of the original building as part of renovation work. Underneath he found an original Victorian mosaic tiled floor dating back over a hundred and fifty years to when the school was established. However, for some reason in the distant past they had been partially covered with concrete levelling screed and just to make it more challenging for me the carpet had been secured with adhesive.

Victorian Floor Before Renovation Weybridge College

After visiting the school to survey the floor I could see this going to be a very challenging job for one person. Fortunately Tile Doctor has a network of over 50 specialists like me all around the Country, so I reached out to neighbouring East Surrey Tile Doctor Mick Conlon who is also very experienced in floor restoration. Together we broke down the job into sections, e.g. remove the adhesive, remove the screed, hone the tiles, repair any missing, broken or damages tiles and finally seal. All in the work would take five days to complete.

Victorian Floor Before Renovation Weybridge College

Removing Carpet Adhesive from Victorian Floor Tiles

The first task was to smother the surface in Tile Doctor Remove and Go which in turn was covered by plastic sheeting. By trapping the product under a plastic sheet, it couldn’t dry out and thereby remains active for longer.

Victorian Floor During Adhesive Removal Weybridge

After a couple of hours, it had broken down the adhesive which we swept up and disposed of. This was unpleasant work which required us to wear protective gloves, masks and goggles.

Victorian Floor During Adhesive Removal Weybridge Victorian Floor During Adhesive Removal Weybridge

Removing Cement Screed from Victorian Floor Tiles

On day two we turned our attention to the removal of the concrete screed and cleaning up the tiles. This was done with a process called honing. A circular 200-grit pad was attached to a floor buffer and run over the tiles using water for lubrication. The honing pad is impregnated with industrial diamonds which gradually cuts through and removes the screed covering.

Victorian Floor During Screed Removal Weybridge

After several hours the tiles began to reveal themselves. It also became apparent that after over 100 years of thousands of pupils walking over them some of the tiles were somewhat dipped in the middle. Using a handheld buffer these areas had extra attention with a very coarse 100-grit diamond pad. This process took most of the day with one man honing whilst the other constantly rinsed the floor with more water and extracted the waste.

Replacing Broken Victorian Floor Tiles

Once the tiles were totally free of concrete screed it exposed several broken and missing tiles. Some tiles had been removed and not replaced but back filled with concrete. Fortunately, I had managed to source matching reclaimed tiles was able to cut and fit replacements. All holes and cracks were filled so the floor was ready for sealing the next day.

Victorian Floor During Adhesive Removal Weybridge

Sealing a Victorian Tiled Floor

Given the age of the floor and the high amount of floor traffic this floor would receive I advised against using a high shine sealer and recommended an impregnating breathable matt sealer instead. There were two main reasons for this, first old floors don’t have a damp-proof membrane installed so it’s important to use a sealer that will allow the floor to breath and allow moisture to rise through the tiles. Secondly, only an impregnating sealer which soaks into the pores of the tile would cope with the anticipated heavy footfall.

Victorian Floor After Sealing Weybridge College

With that agreed several coats of Tile Doctor Colour Grow sealer were applied to the tiles leaving the floor looking great and completely transformed. At end of the last day the headmistress came to give her approval as did the whole secretarial staff. My favourite word was “astonishing”. Hard to disagree.

Victorian Floor After Sealing Weybridge College


Professional Restoration of a Victorian Tiled College Hallway in Surrey

Astonishing Victorian Floor Restoration at Weybridge College Read More »

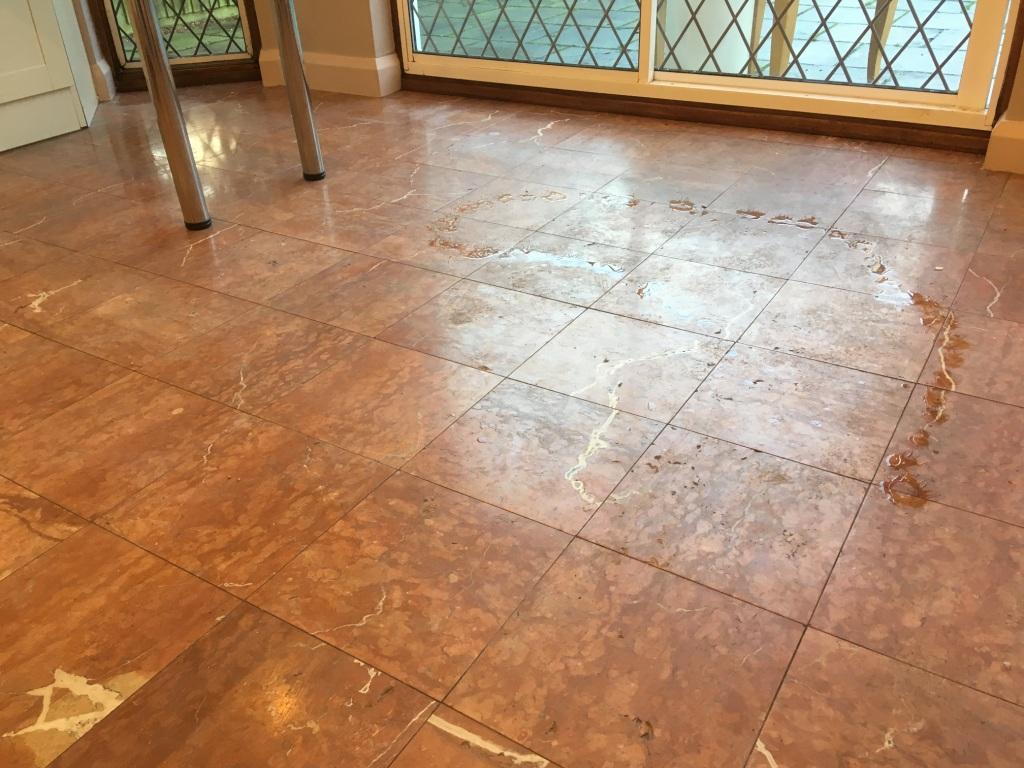
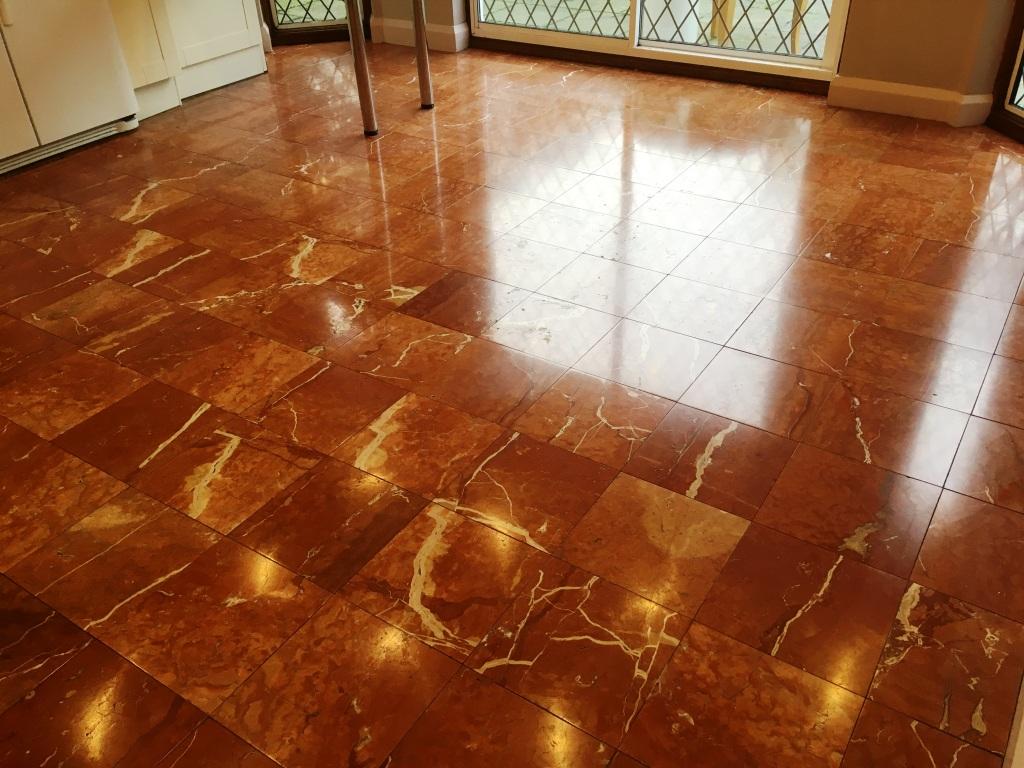
Red Brown Marble Tiled Floor Before After Polishing Weybridge

Red and Brown Marble Tiled Kitchen Floor Polishing Weybridge

If you have a Mable tiled floor which is not looking its best, then the transformation I achieved on this floor at a property in Weybridge will definitely be on interest. Having first spoken with the owner on the phone I went over to the house to take a better look at the floor and found that the deep red and brown Marble tiled kitchen floor was really dirty and totally lacking in colour or polish.

The floor hadn’t been professionally cleaned for some time and was now dirty and suffering from the actions of a puppy which likes to charge up and down. The Marble was also full of holes which the client explained had been getting larger. This is not usual for natural stone as it can be very sensitive to acidic cleaning products which if used constantly over time will start to dissolve the stone.

We discussed the remedies available, agreed a cost and arranged a mutually convenient time to carry the work out. I always like to do a site visit to survey the tiles and ideally run a test clean to determine the best methods for resolving the problems. This enabled me to give a more accurate quote and it also gives the customer confidence in my abilities.

Marble Tiled Floor Before Polishing Weybrige

Deep Cleaning Red and Brown Marble Kitchen Tiles

Firstly, I removed the existing sealer with a 400-grit diamond burnishing pad which is applied with water. Although this initially appears to make the floor look worse, this is only temporary, sometimes you have to make it look a little worse before it can get better! Once this was done the floor was rinsed with water to remove the slurry generated and this was then extracted off the floor with a wet vacuum.

Then for the next couple of hours I worked my way from the back door to the front filling all holes with a special expanding resin, then smoothing off as I went to ensure the smoothest of finish could be achieved. Some of the holes were indeed quite large, so there was quite a lot of work to do.

Once the filler had dried I started the polishing process using the 800 and then 1500 grit burnishing pads, once again with more water to lubricate and rinsing the floor in between polishing and removing the slurry as before. This process took much of the day, so I left the floor to dry off and came back the next day to complete the polishing and seal the Marble.

Sealing Red and Brown Marble Kitchen Tiles

The next day I returned and completed the polishing process by applying the fourth burnishing pad which is an extra fine 3000 grit pad, you apply the pad dry with only a little amount of water sprayed onto the floor in process we call a spay burnish and this final pad really brings up the polish in the Marble.

Once the polishing had finished I left the floor for a little while to make sure it was nice and dry and then I applied two coats of Tile Doctor Colour Grow sealer. This is a colour intensifying sealer that provides durable protection by impregnating the pores in the stone with sealer, so dirt cannot become ingrained there. As you can see from the pictures the sealer dramatically enhanced the natural colours in the stone.

Once dry I backed my way out of the house with a final finishing polish using a white buffing pad to remove any excess sealant and bring up the sheen of the tiles even further. I left instructions with the client to keep off for a couple of hours while the sealer cured.

The client was over the moon with the end result, the floor was left shiny, protected and looking in a fabulous condition.

Marble Tiled Floor After Polishing Weybrige


Professional Restoration of a Marble Tiled Kitchen Floor in West Surrey

Red and Brown Marble Tiled Kitchen Floor Polishing Weybridge Read More »

Limestone Tiled Floor Before and After resealing Weybridge

Large Limestone Tiled Floor Stripped and Resealed in Weybridge

Weybridge is an affluent commuter town with good train connections into London Waterloo, as a result, there are some impressive houses here, many of which feature beautiful polished stone floors. This particular residence in Weybridge had a very large Limestone tiled floor installed in their Kitchen/Dinning Room, the floor had been cleaned and sealed about a year prior, so it was still in good condition however the customers ageing dog had a few accidents which had damaged the sealer.

Limestone Tiled Floor Before Cleaning in Weybridge
Urine contains Uric Acid which being an acid can damage the sealer, this is why for daily cleaning we always recommend using pH neutral cleaning product such as Tile Doctor Neutral Tile Cleaner or Stone Soap if the floor is polished. Limestone and Travertine are especially vulnerable to acids due to their high levels of calcium carbonate and often results in pock marks or small holes forming in the stone.

Resealing a Polished Limestone Floor

Once we’d moved the furniture to another room I started with a deep grout clean. I ran a dilution of Tile Doctor Pro-Clean along the grout lines then left it to dwell for five minutes while I got the wet vacuum from the van. When ready I cleaned the grout by hand with a hard nylon brush and then extracted the soiled cleaning solution with the wet vacuum.

With the grout now clean and the soil removed I set up my rotary floor cleaning machine ready to burnish the stone tile and restore the finish with a set of diamond encrusted burnishing pads.

The first pad in the set to be applied is a coarse 400 grit pad that is designed to remove existing sealers and dirt and is run over the tiles with water for lubrication. During the following hours the process was repeated with the medium 800 grit and fine 1500 grit pads which gradually polish the stone and return the shine. The floor is rinsed between each pad to remove the soil which is generated from burnishing.

This process took up much of the day so after rinsing the floor after the 1500 grit pad and extracting the soil with the wet vacuum I left the customer strict instructions not to spill anything on the unsealed floor. The tiles need to be dry before re-applying the sealer and any remaining moisture from the rinsing should evaporate overnight.

Sealing Limestone Tiles

Returning the next day, I tested the floor was dry the applied the first coat of Tile Doctor Ultra-Seal which is a natural look impregnating sealer that soaks into the pores of the stone protecting it from within. Once I’d wiped away any excess I left it to dry for half an hour before applying a second coat.

Breaking for lunch allowed sufficient time for the sealer to dry and I was able to complete the floor with a final polish.

Limestone Tiled Floor After Cleaning in Weybridge
 

Stripping and Resealing a Polished Limestone Floor in West Surrey

Large Limestone Tiled Floor Stripped and Resealed in Weybridge Read More »

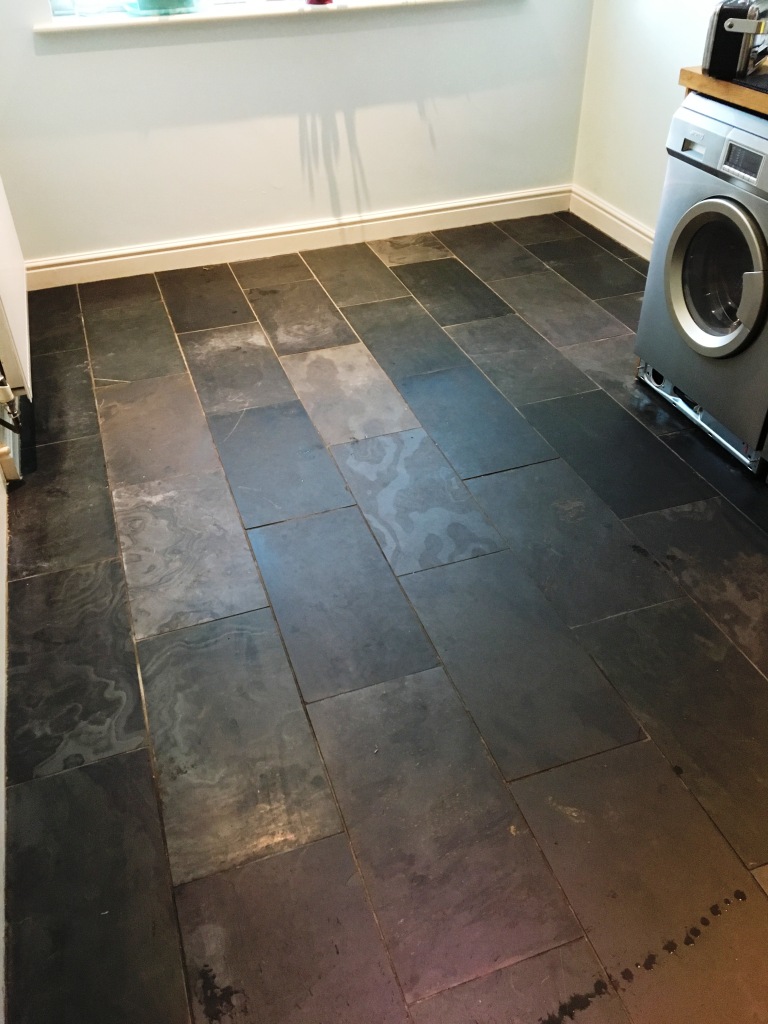
Slate Tiled Kitchen Floor Before and After Restoration in Weybridge

Repairing a Scratched Slate Tiled Kitchen floor in Weybridge

This property owner in Weybridge recently had a new fridge delivered by a well-known electrical retailer that has an unusual policy of not protecting its customers’ floors when installing heavy appliances. Predictably, the lack of care and consideration resulted in multiple unsightly scratches being left on the fantastic Slate tiled floor, mostly notably in front of the dishwasher, which was also newly installed.

Understandably, the property owner was not best pleased. He was keen to have the situation remedied as soon as possible. At Tile Doctor, we not only provide tile cleaning services but we also have the experience and equipment to hand all sorts of related issues including the restoration of scratched tiles. Happy to help. I travelled over to Weybridge to address the problem.

Scratched Slate Floor Tiles Before Cleaning Weybridge

Repairing and Sealing a Damaged Slate Tiled Kitchen Floor

The surface of the stone was damaged and the only way to repair it without the repair standing out was to strip and polish the whole floor. I therefore began the restoration by stripping the whole floor of its old sealer. The customer had marked all the deep scratches he wanted to have removed with sticky notes. I explained to him that burnishing, a type of polishing carried out using diamond encrusted handheld blocks in combination with a little water, would be perfect for this job.

The process of burnishing essentially grinds away the damaged layer and then re-polishes the stone, the process would remove the scratches and rebuild the shine. It involves the application of different grades of pads from coarse to extra fine and a little water to lubricate the process followed by a rinse with more water in-between each pad to remove the slurry generated by the process. After burnishing the floor is left polished but damp, however to save time I able to speed dry the whole floor using a powerful industrial air mover.

Once the floor was dry the final task was to re-seal the tiles. I did this using a couple of coats of Tile Doctor Colour Grow, a colour intensifying, impregnating sealer which soaks into the pores of the stone protecting it from within against ingrained dirt and stains for many years to come.

Scratched Slate Floor Tiles After Cleaning Weybridge
The customer was very satisfied with the service provided and left the following comment on the Tile Doctor feedback system:

“Great advice, open, honest and helpful. Turned up on time, explained the job well and it looks great. Very happy with the process and the finished results.”

Professional Repair of a Scratched Slate Tiled Kitchen Floor in Surrey

Repairing a Scratched Slate Tiled Kitchen floor in Weybridge Read More »

Victorian Tiled Hallway Before and After Cleaning and Sealing Weybridge

Lifeless Victorian Tiled Hallway Cleaned and Sealed in Weybridge

Details below of a tired and lifeless looking Victorian tiled hallway that I was asked to deep clean and seal at a house in the suburban town of Weybridge. The tiles were laid in a chequer pattern of Red, Yellow and Black tiles and if you look closely at the photographs you can cleanly see the ingrained dirt on the yellow tiles.

Victorian Tiled Hallway Floor Before Cleaning Weybridge Victorian Tiled Hallway Floor Before Cleaning Weybridge

Cleaning a Heavily Soiled Victorian Tiled Floor

I started the process straight away with an aggressive diamond encrusted coarse 200 grit burnishing pad fitted to a buffing machine and lubricated with water. The diamond encrusted pads really gets into the most deeply encrusted areas to remove the dirt.

Once the previous sealer and grime was removed I vacuumed up the soil using a wet vax and then gave the floor a quick blow dry with an industrial fan. For the next couple of hours, I got down to the corners to clean areas not touched by the pad. To finish I took a wire brush to any paint splash left over from recent decorating.

After further drying I was able to assess the yellow coloured tiles that would benefit from further attention. Several tiles near the heavy footfall areas benefited from a twenty-minute application of Tile Doctor Acid Gel. The gel removes mineral salt deposits and grout smears as well as breaking down deeply ingrained, long standing dirt. Once washed away and extracted using the wet vacuum I was done for the day. I warned the customer at this point that it’s common for the tiles to appear washed out in-between cleaning and sealing.

Sealing a Victorian Tiled Floor

I left the floor to dry naturally through evaporation for two days before returning to seal the floor. It’s important to ensure that the floor is bone dry before sealing as dampness can affect the sealer.

To seal the floor, I used Tile Doctor Seal and Go which gives a long lasting, tough, gloss look seal, it’s also water based so it doesn’t give off a smell as it dries like some products. Victorian tiles are quite porous so nine coats were applied, a process that took around four hours to complete.

Victorian Tiled Hallway Floor After Cleaning Weybridge
When the customer returned home from work she said the tiles looked brand new.

Professional Victorian Tiled Hallway Floor Maintenance in Surrey

Lifeless Victorian Tiled Hallway Cleaned and Sealed in Weybridge Read More »

Scroll to Top