sealing

Limestone Tiled Floor Before and After resealing Weybridge

Large Limestone Tiled Floor Stripped and Resealed in Weybridge

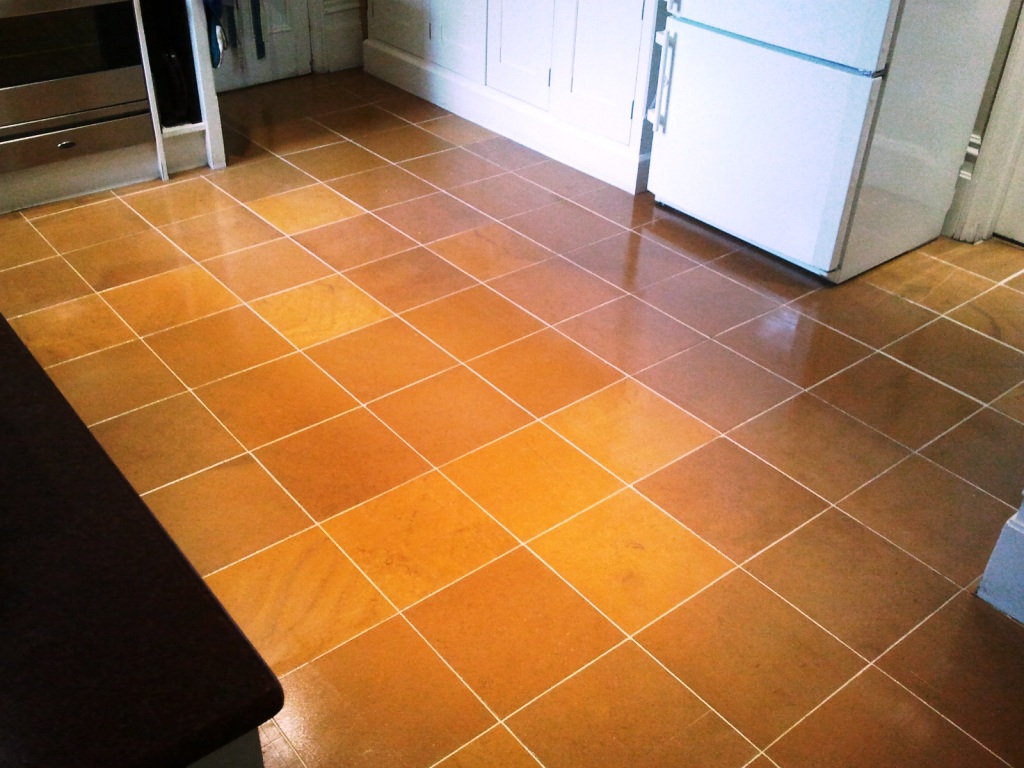
Weybridge is an affluent commuter town with good train connections into London Waterloo, as a result, there are some impressive houses here, many of which feature beautiful polished stone floors. This particular residence in Weybridge had a very large Limestone tiled floor installed in their Kitchen/Dinning Room, the floor had been cleaned and sealed about a year prior, so it was still in good condition however the customers ageing dog had a few accidents which had damaged the sealer.

Limestone Tiled Floor Before Cleaning in Weybridge
Urine contains Uric Acid which being an acid can damage the sealer, this is why for daily cleaning we always recommend using pH neutral cleaning product such as Tile Doctor Neutral Tile Cleaner or Stone Soap if the floor is polished. Limestone and Travertine are especially vulnerable to acids due to their high levels of calcium carbonate and often results in pock marks or small holes forming in the stone.

Resealing a Polished Limestone Floor

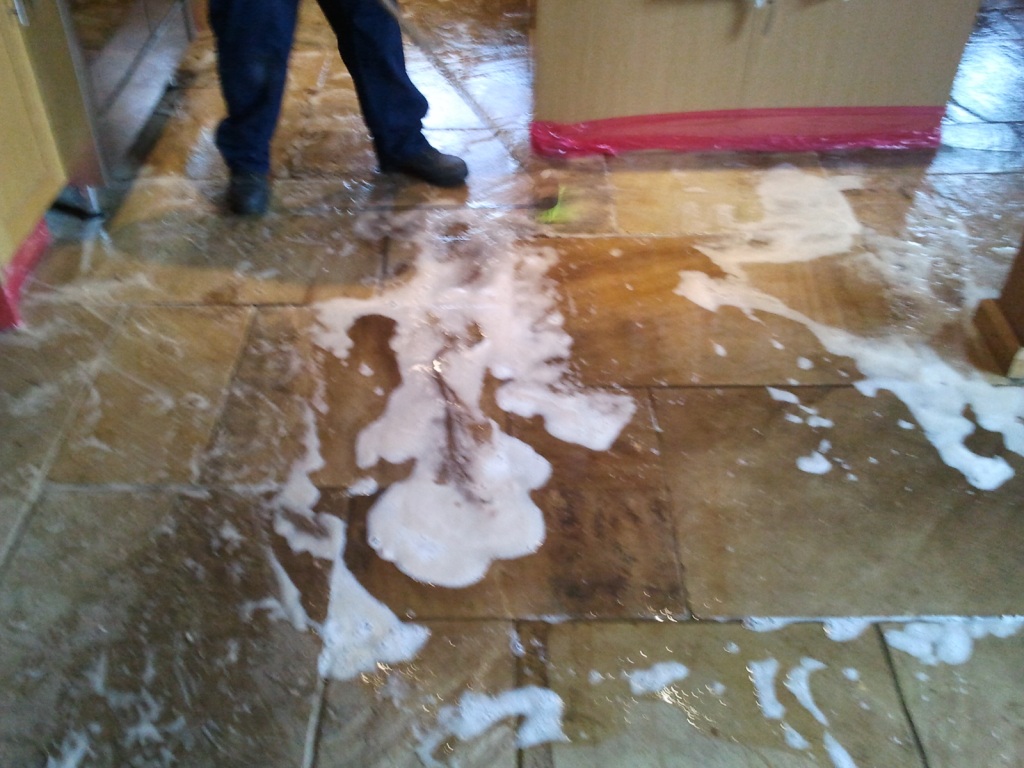
Once we’d moved the furniture to another room I started with a deep grout clean. I ran a dilution of Tile Doctor Pro-Clean along the grout lines then left it to dwell for five minutes while I got the wet vacuum from the van. When ready I cleaned the grout by hand with a hard nylon brush and then extracted the soiled cleaning solution with the wet vacuum.

With the grout now clean and the soil removed I set up my rotary floor cleaning machine ready to burnish the stone tile and restore the finish with a set of diamond encrusted burnishing pads.

The first pad in the set to be applied is a coarse 400 grit pad that is designed to remove existing sealers and dirt and is run over the tiles with water for lubrication. During the following hours the process was repeated with the medium 800 grit and fine 1500 grit pads which gradually polish the stone and return the shine. The floor is rinsed between each pad to remove the soil which is generated from burnishing.

This process took up much of the day so after rinsing the floor after the 1500 grit pad and extracting the soil with the wet vacuum I left the customer strict instructions not to spill anything on the unsealed floor. The tiles need to be dry before re-applying the sealer and any remaining moisture from the rinsing should evaporate overnight.

Sealing Limestone Tiles

Returning the next day, I tested the floor was dry the applied the first coat of Tile Doctor Ultra-Seal which is a natural look impregnating sealer that soaks into the pores of the stone protecting it from within. Once I’d wiped away any excess I left it to dry for half an hour before applying a second coat.

Breaking for lunch allowed sufficient time for the sealer to dry and I was able to complete the floor with a final polish.

Limestone Tiled Floor After Cleaning in Weybridge
 

Stripping and Resealing a Polished Limestone Floor in West Surrey

Large Limestone Tiled Floor Stripped and Resealed in Weybridge Read More »

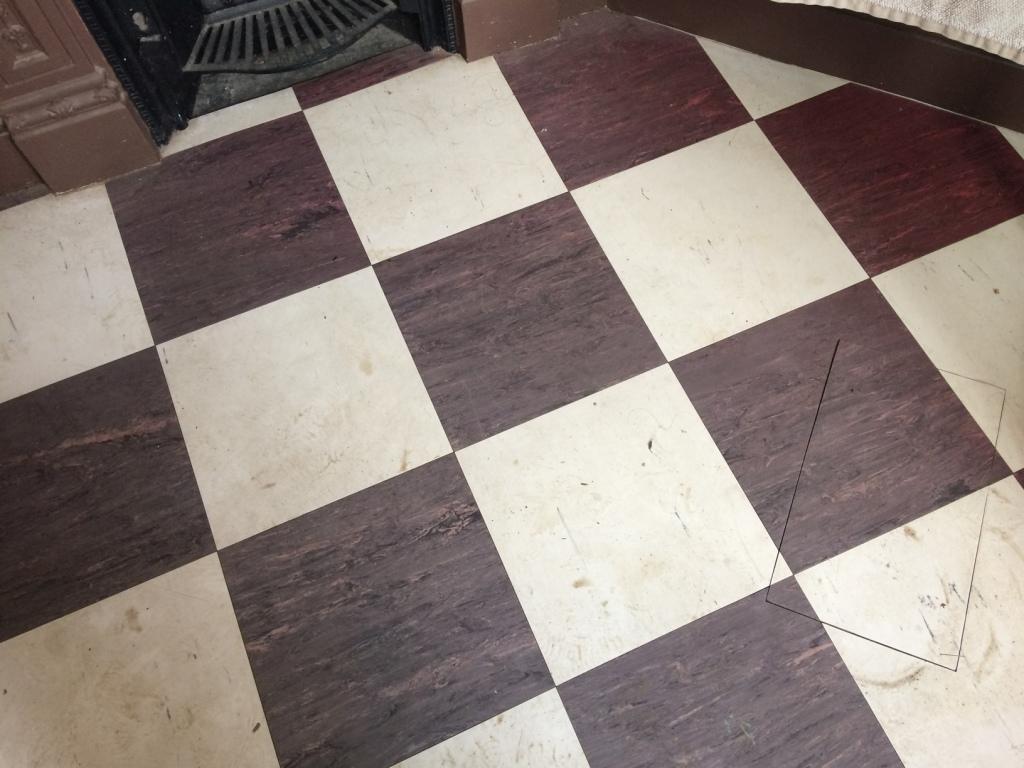
Vinyl Kitchen and Bathroom Floor Before and After Deep Cleaning Worcester Park

Deep Cleaning Kitchen and bathroom Vinyl floors in Worcester Park

When I discuss tile cleaning with customers they normally think of the ceramic or stone tiles you find in Tile shops. Interestingly our equipment, products and techniques also work well on other hard surfaces as well including Vinyl floor tiles.

Things brings me nicely onto this customer in the London suburb of Worcester Park who had chequered Vinyl tiled floors in the bathroom and kitchen that were well overdue a deep clean.

Vinyl Kitchen and Bathroom Floor Before Deep Cleaning Worcester Park

Cleaning Heavily Soiled Vinyl Tiled Floors

I approached cleaning the Vinyl in the same way as tile by applying a strong solution of Tile Doctor Pro-Clean and leaving it soak into the floor for around ten minutes. I then scrubbed the solution into the tiles using a black scrubbing pad fitted to my 45kg buffing machine which had to be lowered down to the basement. Some houses are really difficult to get the equipment into. I like to run marathons when I’m not cleaning tiles so consider myself quite fit but this job was felt across my shoulders for days.

Vinyl Kitchen and Bathroom Floor Before Deep Cleaning Worcester Park Vinyl Kitchen and Bathroom Floor Before Deep Cleaning Worcester Park

The cleaning process released a lot of dirt from the floors which was rinsed away with water and then extracted using a wet vacuum. Once the floor was clean I was able to check the floor and repeat the process for any stubborn areas that needed extra work.

Sealing a Victorian Tiled Floor

The next step was to seal the floor however it had to be dry first so I installed an industrial blower machine to speed up the drying process. Once the floor was dry I applied a coat of Tile Doctor Seal and Go which adds a layer of protection to the Vinyl that will prevent dirt becoming ingrained.

Vinyl Kitchen and Bathroom Floor After Deep Cleaning Worcester Park Vinyl Kitchen and Bathroom Floor After Deep Cleaning Worcester Park

One cleaned and dry the dark squares contrasted well with the white which was appreciated by the customer who left the following feedback.

“Anita and I were both delighted when we got home last night and saw the results of your work – you really have brought the tiles up beautifully and the results are better than I’d hoped or expected. I hope you didn’t hurt your back too badly humping the machine up and down the stairs. We are both most grateful. Thanks again.”

Professional Vinyl Tiled Floor Restoration in South West London

Deep Cleaning Kitchen and bathroom Vinyl floors in Worcester Park Read More »

Quarry Tiles Restored

16th Century Quarry Tile Restoration at the Hogs Back, Farnham

We were contacted by a customer interested in our no obligation home survey who wanted a quotation for restoring their Quarry Tiled floor. It was an interesting property which would probably be best described as a quirky old cottage dating back to the 16th century; it was probably built to house workers from the neighbouring farm and the owner had decided to renovate the original quarry floor tiles which were in a bad way and effected by damp due to a lack of damp proof course and the tiles being laid straight onto a bed of peat. It’s quite amazing when you think that these tiles had been laid over 400 years ago and were still serviceable.

Quarry Tiles Before Cleaning Quarry Tiles Before Cleaning

Cleaning Antique Quarry Tiles

We started by steaming off all the old Sealers, Soil and Waxes that had been applied over the years, we then applied neat Tile Doctor Pro-Clean mixed 50/50 with Nano-Tech Ultra-Clean and left it dwell on the floor for twenty minutes, the two products combined create a powerful cleaning agent which is still safe to use on tile and stone. The tiles were then scrubbed using a rotary machine fitted with a black pad to work the solution into the floor and then it was left to dwell for a further twenty minutes. The dirty solution was then removed using a wet vacuum which I can highly recommend for removing liquids from floors.

The next step was to use our Tile Spinneret tool which is fed from a heavy machine fitted into our Van. Often referred to as a truck mount system the tile spinner power rinses the floor with a high pressure warm water jet wash and at the same time sucks the soiled water back to a recovery tank in our van ready for disposal.

The customer had to make a visit abroad at this point so we left the newly cleaned floor for six weeks to allow it to fully dry out fully before we came back to seal it.

Quarry Tiles After Cleaning Quarry Tiles After Cleaning

Sealing Antique Quarry Tiles

When we returned six weeks later we found a couple of areas were still showing a slight damp problem and so we dried the tiles concerned with heat guns to make sure it was bone dry. Now that the dirt had been removed from the tiles we could also see that they had lost most of their colour and so it was necessary to apply a specially formulated red tile colouring product over the whole floor which we left for an hour to soak in before using a polishing machine to make sure it was well ground in and evenly distributed across the surface of the quarry tiles. The last step was to seal the tiles to and for this we choose a product called Tile Doctor Seal and Go which I can highly recommended for sealing quarry tiles and it gives a nice low sheen effect. Six coats of sealer where needed in total which took some time to apply as you have to let the sealer dry before applying the next coat. Last step was to buff the tiles to a nice shine using our polishing machine fitted with a Buffing Pad.

Quarry Tiles Restored Quarry Tiles Restored

This restoration was a tough assignment and certainly took some time, but I think you will agree our efforts have made a significant improvement to the floor.

Quarry Tile Restoration in Farnham

16th Century Quarry Tile Restoration at the Hogs Back, Farnham Read More »

Indian Sandstone After Cleaning

Beautiful Indian Sandstone floor deep cleaned in Guildford

This beautiful Indian Sandstone tiled floor was laid throughout an open plan Kitchen, Dining and Lounge in a house in Guilford. The floor was in need of a deep clean and seal so we called round initially to survey the tile and grout and provide a quote which was accepted.

Indian Sandstone During CleaningIndian Sandstone Washing

Cleaning Indian Sandstone

To clean the floor we used a solution of Tile Doctor Pro-Clean which is a flexible strong alkaline cleaner specially designed for use on stone floors mixed 50/50 with Tile Doctor Nanotech Ultra-Clean which contains tiny abrasive particles. This solution was left to dwell on the floor for thirty minutes before being worked into the floor with scrubbing brushes. We then used a tile spinner tool and truck mount cleaning system to rinse the floor of all residue soils and chemicals, the floor was covered with dust sheets whilst it dried and also to keep it clean until we came back to seal it.

Indian Sandstone After Cleaning

Sealing Indian Sandstone

On our return we discussed the effects of different sealers, they all offer stain protection to different levels but change the appearance of the tile in different ways. The customer liked the natural look of the stone so we applied Tile Doctor Ultra-Seal using three coats of sealer to fully seal the tiled floor; Ultra-Seal is also a penetrating sealer that gets deep into the pores of the stone. The customer was delighted with the result and we have been asked to return every year to maintain the floor.

Indian Sandstone After Sealing
 

Indian Sandstone Floor Maintained in Guilford

Beautiful Indian Sandstone floor deep cleaned in Guildford Read More »

Satillo Tiled Floor after cleaning

Saltillo Tiles in Shirley

Successful Restoration of Saltillo Tiles

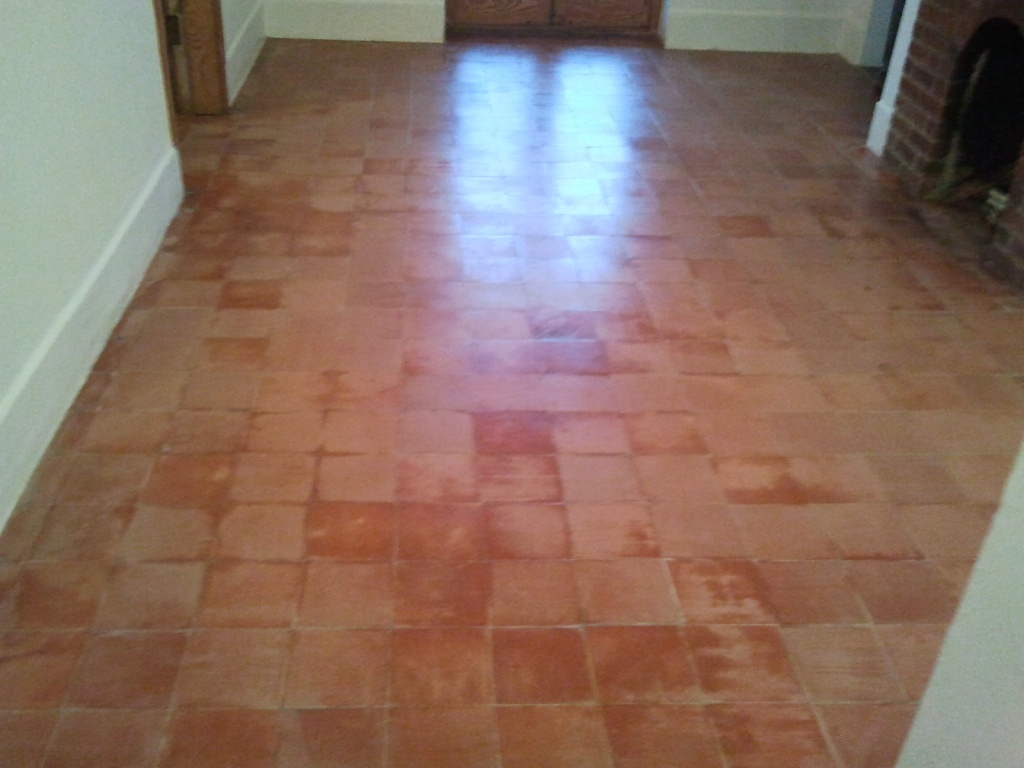
We went and had a look at a floor in a house in Shirley recently to find a dull Saltillo Terracotta tiled floor that was in need of some Tile Doctor TLC. Saltillo tiles are typically made in a region of Mexico; they are very porous and can scuff and stain quite easily if not protected so it’s important to maintain a sealer.

Saltillo Tiles before cleaning Saltillo Tiles before cleaning

Cleaning Saltillo Tiles

We advised the customer that we would probably not be able to get the tile in the traffic lanes back to the same colour due to the excessive wear from foot traffic but we would certainly try our best. We find it best to be honest about what we can achieve and set the customer’s expectations up front. They were happy for us to continue and accepted our very reasonable quote for the amount of work involved so we about cleaning the floor. This we did using a solution of Tile Doctor Pro-Clean tile and grout cleaner. To clean the tougher areas that were heavily stained we mixed the Pro-Clean with a little Tile Doctor NanoTech Ultra-Clean which helps to enhance the cleaning power.

Saltillo Tiled Floor before cleaning

Grout Re-Colouring

We left the floor to dry for 2 days then we went back and re-coloured the customer’s grout which as you can see from the pictures made a huge difference to the look of the floor. Grout Colourant can make a old tired looking floor look totally different and when applied properly forms a barrier that protects the grout from dirt engraining into the grout.

Saltillo Tiled Floor after cleaning Saltillo Tiled Floor after cleaning

Sealing Saltillo Tiles

Terracotta tile are extremely porous and so it came as no surprise that we needed to apply nine coats of Tile Doctor Seal and Go. After the last coat we waited for fourty minutes and then buffed the floor to bring out the shine and harden the sealer, the customer was very pleased with the results and made the following comment:

Thank you very much for doing such a wonderful and professional job my wife and I are very impressed with the results.


Saltillo Tiles Restoration in Shirley

Saltillo Tiles in Shirley Read More »

Indian Orange Slate Floor After Cleaning

Indian Orange Slate Floor in London

Restoration of a client’s slate floor

We were asked to take a look at cleaning and re-sealing an Indian Orange Slate floor at a property in London, the owner had struggled to find someone who would take the job on as they were unsure what they were dealing with and so called in Tile Doctor. This isn’t surprising as we do find that many so called Tile Cleaning companies only take on straight forward cleaning jobs where they can get in and out quickly without fear of complications.

Cleaning an Indian Orange Slate Floor

The floor was in reasonable condition and had simply dulled as the sealer had worn down over time and dirt became trapped in the pores of the tile and grout.

Indian Orange Slate Floor Before Cleaning Indian Orange Slate Floor Before Cleaning

We cleaned the floor using a strong dilution of Tile Doctor Pro-Clean Tile and Grout cleaner in conjunction with a scrubbing machine fitted with a black pad. This removed the old sealers and was followed with a thorough deep clean using our powerful truck mount high pressure cleaning machine to remove any residue soils and sealers etc.

Sealing an Indian Orange Slate

We left the floor for a couple of hours to dry and then we sealed it with six coats of Tile Doctor Seal and Go which is an ideal sealer for slate floors. We left the floor for thirty minutes in-between coats to allow it to dry. Once that was complete we attached a white pad to our buffing machine and polished the floor in order to harden the sealer and bring out the shine.

Indian Orange Slate Floor After Cleaning Indian Orange Slate Floor After Cleaning

The effects was quite dramatic and the customer who was obviously pleased with the results commented “Wow look at my beautiful floor, what a difference thank you very much for such a good professional job”.

Restoration of Orange Slate Floor in London

Indian Orange Slate Floor in London Read More »

Terracotta Floor in the Kitchen

Cleaning Terracotta Floors

Cleaning Terracotta Floors in Surrey

This customer had a terracotta tiled floor in the kitchen, utility room and toilet, which hadn’t been sealed for 8 years and was was in needed of restoration. On full inspection we also found that there was loose and missing grout some of which was in different colours.

Cleaning Terracotta Floors in the Kitchen Terracotta Floor Cleaning in the Kitchen

The tiles were also stained with olive oil from cooking spillages.

Terracotta Floor in the Kitchen Terracotta Floor in the Kitchen

Cleaning Terracotta Floors

We started the cleaning process by giving the terracotta floor a deep clean by using Tile Doctor Pro-clean agitated with scrubbing with deck brushes to remove soil build-up and old sealer residue. We then thoroughly rinsed the floor using our truck mounted machine and spinner tool. Cleaning Terracotta Floors can be difficult and we experienced difficulty removing the oil stains from the tile as terracotta is very porous and had absorbed the oil like a sponge.

We then applied Tile Doctor Remove and Go to the stained areas then sprayed with a light spray of water to help keep it moist and stop it drying out, we left this solution on the tiles for 90 minutes. After the dwelling time we steamed the floor as we rinsed off the Remove and Go. The next step was to rinse the complete floor with our truck mount cleaning system and a tile cleaning spinner tool. This thoroughly rinses and thoroughly cleans the floor with very hot water and high pressure.

Next we had to then tackle the grout problem, so we removed all loose and old grout, where needed and re-grouted the floor. This was left to for 48 hours to completely dry.

Sealing Terracotta Floors

Terracotta is very porous and for this floor we applied 8 coats of Tile Doctor Seal and Go, leaving it to dry for 40 minutes between each coat. We returned the following day and re-coloured the grout with Tile Doctor beige grout re-colourant. This was then left to dry and a further 3 coats of Seal and Go applied.

Once this had dried we buffed the floor to harden the sealer and polish it. We used a white buffing pad fitted to a rotary cleaning and polishing machine to bring out the shine on the floor as shown in the pictures below:

Sealing Terracotta Floor in the Kitchen Terracotta Floor in the Kitchen

The customer was on holiday when we carried out the work, we had been dealing with the manager of the property, who when the customer returned was made to phone me, so the customer could thank me personally.

The customer’s comments were:

“I can’t believe how nice our floor looks and never thought it could look so good! “

They spoke to the manager of their property and have asked him to arrange with me another appointment as they wanted me to clean their courtyard area as well as they were absolutely delighted with their terracotta floors.

Cleaning Terracotta Floors in Surrey

Cleaning Terracotta Floors Read More »

Slate Patio under the process of restoration

Tile Doctor – Showing The Results of Cleaning Slate on a Client’s Patio

Wonders in cleaning slate made by Tile Doctor experts

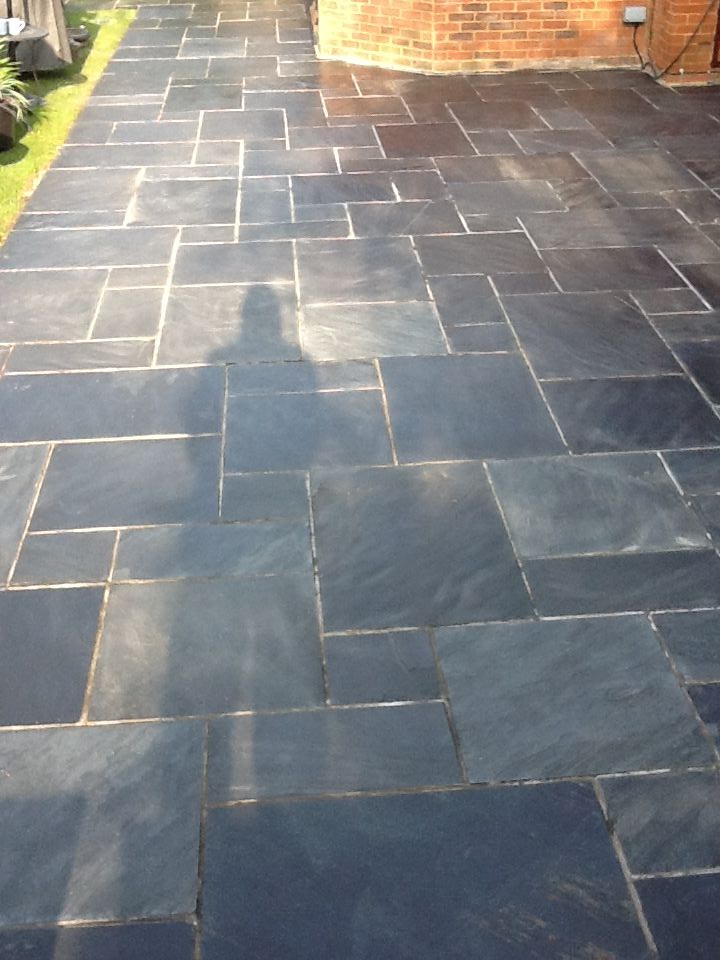
Photographs below of a Slate Patio we recently restored. The customer had another company come in to clean and seal them but they used the wrong product and it turned white and the sealer went patchy.

Process of cleaning slate and its restoration

image of cleaning slate on a patio

e

We stripped of all old sealer using Tile Doctor Remove and Go which is a great multi-purpose product that will remove most sealers and coatings.

cleaning slate

After a thorough rinse and wash down with water the was resealed using Colour Grow which not being water based is ideal for external applications and ideal for bringing out the natural beauty in slate. The customer was so pleased with the work he is inviting back every 6 months to maintain it.

Tile Doctor don’t just specialise in Cleaning Slate we can also restore Ceramic, Granite, Limestone, Marble, Porcelain, Quarry, Sandstone, Terracotta and Victorian Tiles.

Tile Doctor – Showing The Results of Cleaning Slate on a Client’s Patio Read More »

Scroll to Top